
Hide and show the sidebar
Hand Tint Pro - Info Page
Buttons
Top Bar Buttons

- Get Photo - Load a photo or a project from your hard drive
- Save Photo - Save your image or project to your hard drive
- Crop - Cut out an area of your image hiding the rest
- Undo - Undo the last edit
- Zoom In - Zoom in to examine small details
- Move - Move your image within the app (Tip: You can also hold down the spacebar to move your image)
- Zoom Out - Zoom Out to view a larger proportion of your image
- Redo - Redo the last edit that was undone
- Original Button - Hold down to view the original image for a quick comparison.
- Info Button - Opens up the Product Tips dialog
- Website - Takes you to our website
Menu

- Get Photo - Load a photo from your hard drive
- Save Photo - Save the image to your hard drive
- Open Project - Load a project from your hard drive
- Save Project - Save a project to come back to later
- Save Preset - Once you've created an effect you can use this option to save all the attributes and reuse them on another picture
- Preferences - Change where the application will save your image, rebuild presets that came with the product and choose a background color for png files
- Undo - Undo your last edit
- Redo - Redo your last edit that was undone
- Zoom In - Zoom in on areas of the image
- Zoom Out - Zoom out to view a larger portions of the image
- Fit In Window - Fill the window with the image
- Actual Size - Changes the images size to its original size
- Jixipix Info - Brings you to this page
- Product Tips - Opens up the Product Tips dialog
- Jixipix Products - Takes you to our website where you can view all our apps
File
Edit
Window
Help
Keyboard Shortcuts
- [ - Decrease the brush size
- ] - Increase the brush size
- B - Switch to the Brush Tool when using a Paint, Colorize or Auto Paint layer
- E - Switch to the Eraser Tool when using a Paint, Colorize or Auto Paint layer
- I - Switch to the Color Selection masking tool when using a Paint or Colorize layer
- SHIFT - Hold down while using the Color Selection tool
 to add more colors to the selection mask
 - SPACEBAR - Hold down to move the image
- TAB - Hide the sidebar and presets
- ⌘= (Mac) / Ctrl = (Windows) - Zoom in on areas of the image
- ⌘- (Mac)/ Ctrl - (Windows) - Zoom out to view a larger portions of the image
- ⌘0 (Mac)/ Ctrl 0 (Windows) - Fill the window with the image
- ⌘1 (Mac)/ Ctrl 1 (Windows) - Change the image's size to its original size
Layers
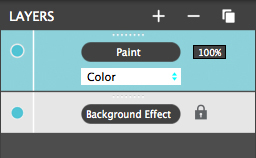


Add a layer using one of the included layer styles
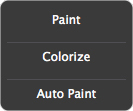
Paint - Brush on color using a custom color
Colorize - Brush on the original colors in the image
Auto Paint - Add all the color back to your image

Delete the selected layer

Duplicate the chosen layer

Click to hide or show the chosen layer

To change the layers opacity click and drag left or right or click and type in a number

Choose paint mode. This changes the look of painted or colorized areas

Click to change the layers name
Adjustments
You can use the Adjust Tab to customize your image. The Adjust Tab changes depending on which layer and brush or background effect is chosen. Use the Randomize dice icon  to randomize the background effect
Background Effect - This tab changes depending on which Background Effect is chosen
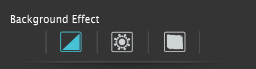
- Background Effect
 - Black & White
 - Luminescent
 - Vintage Scene
Background Effect - Black & White
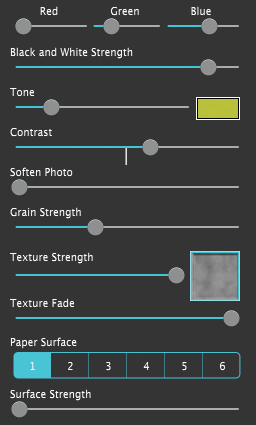
- Red/Green/Blue Sliders - Filters the image with the selected color range.
- B&W Strength - Move slider right to increases the opacity of the Black and White effect or left to blend the original color back in.
- Tone - Create a mood or add depth using the tone slider. Select a color then move slider right to tone the image.
- Contrast - Move the slider right to increase highlights in the image and darken shadows.
- Soften Photo - Move slider right to soften the image for a dreamy look.
- Grain Strength - Move slider right to add interest to the image by adding a darkroom-style grain.
- Texture Strength - Move the slider right to darken the texture. Click the box to choose a texture
- Texture Fade - Blend the texture in a vignette fashion around your photo. Moving the slider right decreases the vignette amount to allow more of the photo to be seen.
- Paper Surface - Change the paper by choosing between six different styles
- Surface Strength - Adjust the strength of the paper
Background Effect - Luminescent
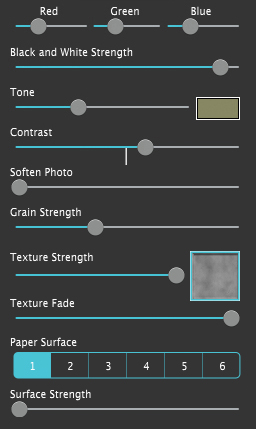
- Red/Green/Blue Sliders - Filters the image with the selected color range.
- B&W Strength - Move slider right to increases the opacity of the Black and White effect or left to blend the original color back in.
- Tone - Create a mood or add depth using the tone slider. Select a color then move slider right to tone the image.
- Contrast - Move the slider right to increase highlights in the image and darken shadows.
- Soften Photo - Move slider right to soften the image for a dreamy look.
- Grain Strength - Move slider right to add interest to the image by adding a darkroom-style grain.
- Texture Strength - Move the slider right to darken the texture. Click the box to choose a texture
- Texture Fade - Blend the texture in a vignette fashion around your photo. Moving the slider right decreases the vignette amount to allow more of the photo to be seen.
- Paper Surface - Change the paper by choosing between six different styles
- Surface Strength - Adjust the strength of the paper
Background Effect - Vintage Scene
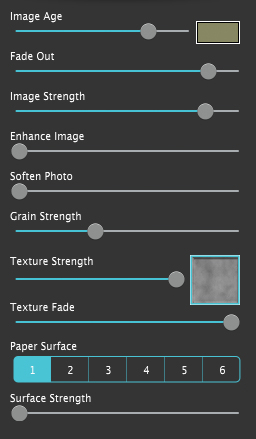
- Image Age - With this slider you can change the aging effect on your photo. Moving the slider right will add more color tone to your photo. Use the color box to choose a color.
- Fade Out - Fade Out blends the texture in a vignette fashion around your photo. Moving the slider right decreases the vignette amount to allow more of the photo to be seen.
- Image Strength - The Image Strength allows you to choose how much of your photo will be seen through your vintage texture. Fade photo by moving the slider left.
- Enhance Image - Enhances the light and dark areas of your image making them stand out more.
- Soften Photo - Move slider right for a dreamy look.
- Grain Strength - Add interest to the image by adding a darkroom-style grain. Move slider right to increase grain opacity.
- Texture Strength - Move the slider right to darken the texture. Click the box to choose a texture
- Texture Fade - Blend the texture in a vignette fashion around your photo. Moving the slider right decreases the vignette amount to allow more of the photo to be seen.
- Paper Surface - Change the paper by choosing between six different styles
- Surface Strength - Adjust the strength of the paper
Paint Layer - This tab will change depending on which Brush tool is selected

- Brushes
 - Paint using a custom color (You can also select this tool by pressing B on your keyboard)
 - Erase the paint (You can also select this tool by pressing E on your keyboard)
- Selection Tool is a quick way to isolate areas for fast and accurate painting. Example: If you choose a green color the mask is created for all the green areas found in the image, to add more colors to this mask hold the SHIFT key. (You can also select this tool by pressing I on your keyboard)
 - Resets all paint strokes
Paint Layer - Paint Color Brush
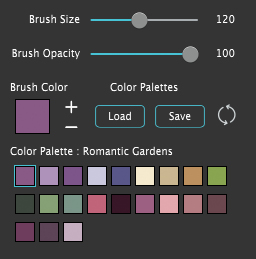
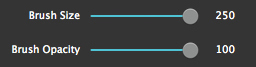
- Brush Size - Increase the size of the brush strokes (You can also press [ and ] on your keyboard) .
- Brush Opacity - Adjust the strength of the brush strokes.
- Brush Color - Click to choose a color to paint on your image
- - Add the chosen color to the color palette
- - Erase the selected color from the palette
 - Load in a color palette
 - Save a color palette to use later
- - Reset the color palette. This removes the palette to allow for a new one to be created.
- Color Palette - Save colors to the color palette to use later
Paint Layer - Erase Brush
- Brush Size - Increase the size of the brush strokes (You can also press [ and ] on your keyboard) .
- Brush Opacity - Adjust the strength of the eraser.
Paint Layer - Color Selection Tool
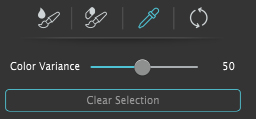
- Color Variance - Move the slider right to add similar colors to the mask or move the slider left to reduce the amount
- Clear Selection - Remove the Color Selection Mask (You can also press X in the top left corner of your image)
Colorize Layer - This tab will change depending on which Brush tool is selected
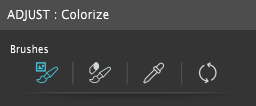
- Brushes
 - Paint using the original color (You can also select this tool by pressing B on your keyboard)
- Erase the paint (You can also select this tool by pressing E on your keyboard)
- Selection Tool is a quick way to isolate areas for fast and accurate painting. Example: If you choose a green color the mask is created for all the green areas found in the image, to add more colors to this mask hold the SHIFT key. (You can also select this tool by pressing I on your keyboard)
- Resets all paint strokes
Colorize Layer - Paint Color Brush
- Brush Size - Increase the size of the brush strokes (You can also press [ and ] on your keyboard) .
- Brush Opacity - Adjust the strength of the brush strokes.
Colorize Layer - Erase Brush
- Brush Size - Increase the size of the brush strokes (You can also press [ and ] on your keyboard) .
- Brush Opacity - Adjust the strength of the eraser.
Colorize Layer - Color Selection Brush Tool
- Color Variance - Move the slider right to add similiar colors to the mask or move the slider left to reduce the amount
- Clear Selection - Remove the Color Selection mask (You can also press X in the top left corner of your image)
Auto Paint Layer
- Brushes
- Paint using the original color (You can also select this tool by pressing B on your keyboard)
- Erase the paint (You can also select this tool by pressing E on your keyboard)
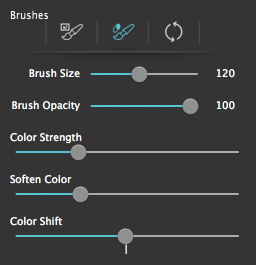
- Resets all paint strokes - Brush Size - Increase the size of the brush strokes (You can also press [ and ] on your keyboard) .
- Brush Opacity - Adjust the strength of the brush strokes.
- Color Strength - Move the slider right to increase the strength of the color
- Soften Color- Tone down the colors in the image
- Color Shift - Change the coloring of the image
Presets
Style Browser

Click t o hide the Style Browser

Create a Preset using your current settings

Delete a Preset
Saving and Deleting Presets
Once you have applied a preset and modified it using the Adjust Tab, you can save your own custom preset by clicking the plus symbol in the bottom right corner. To delete a preset click the minus symbol which is located in the bottom right corner. Then click the X on the preset you wish to delete.
