You can find frequently asked questions about PuzziPix Pro here
Pans around your document. Works especially good when zoomed in. Space Bar on your keyboard gives quick access to this feature.
Watch these short videos to learn the basics.

Every photo placed in the app is automatically turned into a puzzle. Use Auto Generate to change puzzle styles, and the built-in Tools to Move, Size, Rotate and send pieces Front or Back.

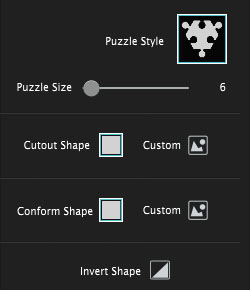
Use Auto Generate to get to the Library of included shapes or import your own using the custom button. Move and Resize Shapes then Apply to cut shapes out of the puzzle. Use the import Photo tool to change the photo on one puzzle piece or groups of them. This technique works great with Text and Logos.


Pans around your document. Works especially good when zoomed in. Space Bar on your keyboard gives quick access to this feature.

Use this tool to move around the pieces. You can select all by pressing Ctrl/Cmd + A on your keyobard or drag over multiple tiles to select them or hold Ctrl/Cmd to select multiple pieces. (T) Selects Tool


Load in a custom image and apply it to the currently selected pieces.

Remove any custom image from the selected item.

Checking this box makes it so whenever you move a piece the image goes with it. Unchecking it does the opposite. Useful if you want to shift the image around and not the piece, or vice versa.

Use this tool to move and resize the image on each piece. This tool depends on what is currently selected on your document. If you have multiple pieces selected then this tool moves the images on those pieces at the same time. (P) Selects Tool

Resets the selected piece's image back to its original size and location

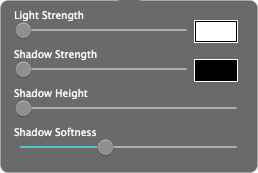
Loads the on-document light source with options to edit lighting and shadows.

Resets the light source to the default settings


Opens the Light Source Settings

Removes duplicated light sources

Adds another light source


Click to hide layers and settings

Add a layer

Delete the selected layer

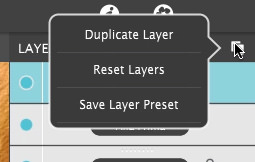
Duplicate Layer - Duplicate the chosen layer
Reset Layers - Removes all added layers and resets the settings
Save Layer Preset - Save the chosen layer or layers as a preset

Click to hide or show the chosen layer

Click to change the layers name
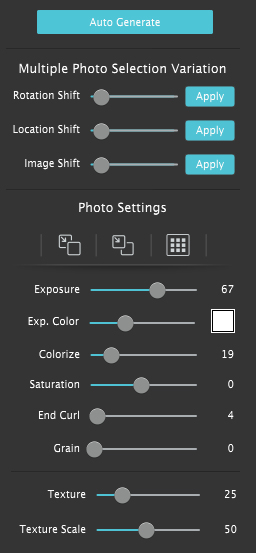
The Adjust Tab changes depending on which layer and how many puzzle pieces are selected. To edit multiple puzzle pieces select the Selection Tool and either click and drag over multiple pieces or hold ⌘ (Mac) / Ctrl (Windows) on your keyboard and click each piece to add it to your selection


Click t o hide the Style Browser

Randomize the effect using the chosen preset style

Create a Preset using your current settings

Delete a Preset
Once you have applied a preset and modified it using the adjust tabs, you can save your own custom preset by clicking the Plus Symbol in the bottom right corner.
To save the settings for a specific layer as a preset select the layer and click the layer button in the top right corner of the app and select Save layer Preset. Once saved the preset will appear with the other presets with a layer icon in the corner of the preset, select the preset to load the Layer Preset

Favorite a preset to move it to the front of the presets list for quick access. To favorite or delete a preset click down on a preset thumbnail and hold until an X and heart appears, click the heart to favorite it or click the X to delete it.

