Pans around your document. Works especially good when zoomed in. Space Bar on your keyboard gives quick access to this feature.
Rip Studio - Info Page Desktop

Getting Started
Rip Studio Basics
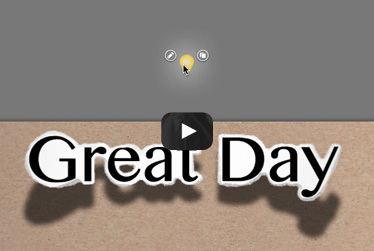
Video Tutorials
Use this series of short video to learn how easy it is to use Rip Studio.
Read the full description and find more videos on Rip Studio's video page -->
Getting Started | Layers and Background Styles |
 |
 |
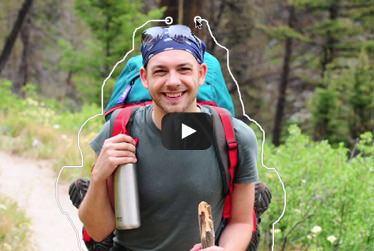
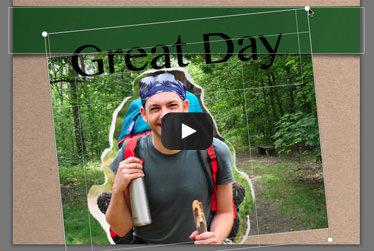
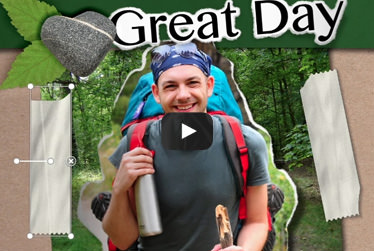
Start a New Project by choosing a Background Style and a Project Size. Drag and drop images on the open application. Use the Lasso tool to create a rip by circling around on the image. |
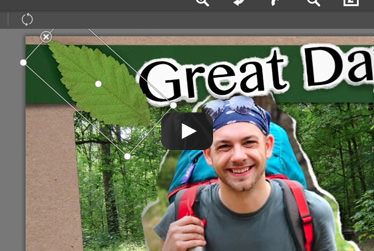
Add a Layer with the + sign on the Layer panel. Paper and Shapes can be used for images, Text brings up the editor, Tape adds a piece of tape, and Object adds staples, pins or other items. |
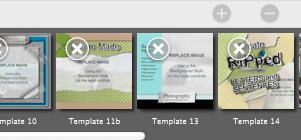
Replace Images | Add Text |
 |
 |
| Replace an image using the Background Style. If you drag and drop a new photo on the open app it creates a new layer. To replace an image, drag the photo into the small thumbnail box left of the Image, Color and Paper icons. |
Add a Text Layer with the + sign on the Layer panel. Scroll through the controls to find the text editor. After typing use the Apply Text button to create the rip around the letters. |
Curl and Light Source | Resize Multiple Elements |
 |
 |
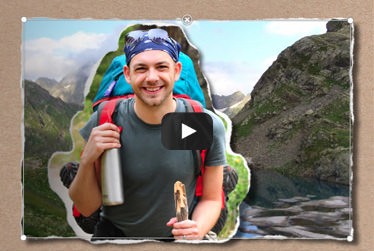
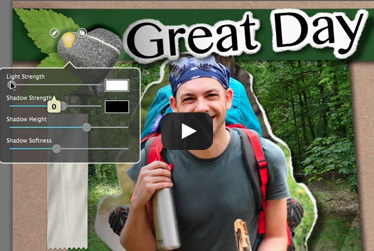
| Use the Edge Curl slider to curl up the edges of text, paper and images. Select the Light icon then move the on-document light source above the curled text to change the shadow. |
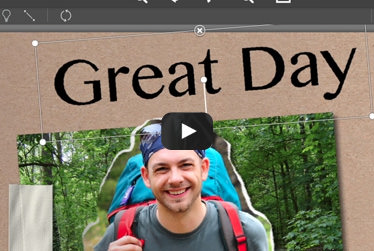
Hold down the ⌘ (Mac) or Ctrl (Windows) key while clicking on each on-document element. As you select them the box grows to include them all. Click on the inside to move, or on the dots to resize and rotate. |
Add Object | Custom Objects |
 |
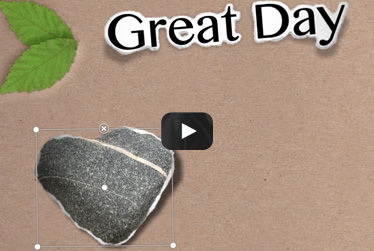 |
| Add an Object Layer with the + sign on the Layer panel. The first object is randomly placed (clicking through the library will change it). Use the Depth and Radius slider to adjust the depth impression. |
To create an object with depth, add an Object Layer using the + sign on the Layer panel. Use the Camera icon on the object library to import it. This works best if file is saved as .png with transparent background. |
Add Tape | Use Crease and Fold |
 |
 |
| Add a Tape Layer with the + sign on the Layer panel. A piece of tape is placed on-document. Resize, rotate and use the Lasso rip tool to modify the ends for added variation. |
Select the text or image you want to crease. Use the Crease tool to draw a line across the area. An Edit icon on the line allows you to change the crease to a fold and adjust the fold direction up or down. |
Create Plain Text | Remove Surface Shadows on Text |
 |
 |
| To remove paper from around the text, select the text layer then go to the control panel and choose None as the Edge Style. To remove drop shadows use the Light Tool and check off Render Shadows. |
To remove surface shadows from text using the Light tool. Inside edit on the on-document Light Source adjust the Light Strength slider to 5. Don’t move it too low or it will affect creases and folds. |
Find these videos and more on Rip Studio's Video Page -->
New Project
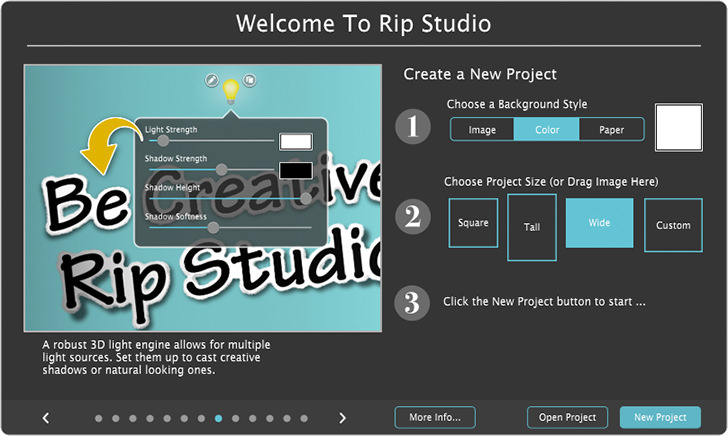
- Step 1: Choose a background style
Image - Choose an image on your computer to use as the background
Color - Use a solid color as the background, click the color box to choose a color
Texture - Use a built in texture as the background, click the texture box to choose a texture - Step 2: Choose the Project Size
Choose the size of the project, use custom to choose a custom resolution - Step 3: Choose New Project to begin
Buttons
Top Bar Buttons

- Get Photo - Load a photo or a project from your hard drive or start a new project
- Save - Save your image to your hard drive or save your project to use later
- Zoom In - Zoom in to examine small details
- Undo - Undo the last edit
- Redo - Redo the last edit that was undone
- Zoom Out - Zoom Out to view a larger proportion of your image
- Original Button - Hold down to view the original image for a quick comparison.
- Info Button - Explains how-to-use the product
- Website - Takes you to Jixi’s website
Menu

- Get Photo - Load a photo from your hard drive
- Save Photo - Save the image to your hard drive
- Open Project - Load a project from your hard drive
- Save Project - Save a project to come back to later
- Save Preset - Once you've created an effect you can use this option to save all the attributes and reuse them on another picture
- New Project - Opens then new project window to start a new project
- Preferences - Change where the application will save your image, rebuild presets that came with the product, turn off tooltips and choose a background color for png files
- Undo - Undo your last edit
- Redo - Redo your last edit that was undone
- Zoom In - Zoom in on areas of the image
- Zoom Out - Zoom out to view a larger portions of the image
- Fit In Window - Fill the window with the image
- Actual Size - Changes the images size to its original size
- Jixipix Info - Brings you to this page
- Jixipix Products - Takes you to our website where you can view all our apps
File
Edit
Window
Help
Keyboard Shortcuts
- SPACEBAR - Hold down to move the canvas
- T - Resize and move an image
- L - Select the Rip Lasso
- P - Resize and move an image
- S - Select the Light Tool
- \ - Select the Crease and Fold Tool
- SHIFT - Hold down while moving an object to constrains movements to strictly vertically or horizontally
- ARROW UP / ARROW DOWN - nudge object, text or image
- ⌘+A (Mac) / Ctrl+A (Windows) - Select All
- ⌘+N (Mac) / Ctrl+N (Windows) - New Project
- ⌘+O (Mac) / Ctrl+O (Windows) - Open
- ⌘ (Mac) / Ctrl (Windows) - Select multiple items
- DELETE - deletes selected layers
- TAB - Hide the sidebar and presets
- ⌘= (Mac) / Ctrl = (Windows) - Zoom in on areas of the image
- ⌘- (Mac)/ Ctrl - (Windows) - Zoom out to view a larger portions of the image
- ⌘0 (Mac)/ Ctrl 0 (Windows) - Fill the window with the image
- ⌘1 (Mac)/ Ctrl 1 (Windows) - Change the image's size to its original size
Tools
Tool Bar Buttons

Pan Tool

Selection Tool

Moves and transforms the selected object.

Reset Selection resets the selected object back to its original size and location
Rip Tool

Creates a ripped shaped by circling around on the background.

Clears the selected Rip

Adds an Edge area to the ripped shape

Removes Edge from the ripped shape
Move Image Tool

Moves and transforms the image within a rip or shape.
Light Source Tool

Loads the on-document light source with options to edit lighting and shadows.
Source Resets the light source to the default settings
Light Source


Opens the Light Source Settings

Removes duplicated light sources

Adds another light source
Light Source Settings

- Light Strength - Adjusts the strength of the surface lighting (Color Box) Changes light temperature and colorcast
- Shadow Strength - Adjusts the shadow darkness (Color Box) Changes the shadow color
- Shadow Height - Increases the distance of the shadow off the paper
- Shadow Softness - Softens the edge of the shadow making it translucent
Crease Tool
Adds a crease or fold by drawing a line across the area.
Crease Buttons

Opens the crease settings
Removes the chosen crease
Creates an identical crease or fold
Crease Settings
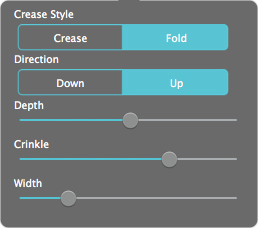
- Crease Style - Changes a crease to a fold
- Direction - Changes the direction of a crease or fold
- Depth - Adjust how deep the crease appears
- Crinkle - Adjust how crinkly the crease appears
- Width - Increase how far the fold spreads out from the crease's center
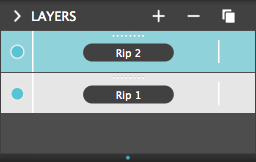
Layers

Click to hide layers and settings

Add a layer using one of the included layer styles
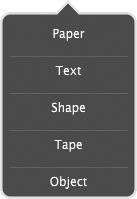
Paper - Add an image, color or paper with a rip, border or cut edge
Text - Add text with paper around it
Shape - Add color, paper or an image in a chosen shape
Tape -Add tape to your project
Object - Add an object or image to your project

Delete the selected layer

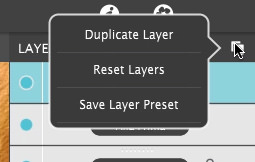
Duplicate Layer - Duplicate the chosen layer
Reset Layers - Removes all added layers and resets the settings
Save Layer Preset - Save the chosen layer or layers as a preset

Click to hide or show the chosen layer

Click to change the layers name
Adjustments
You can use the Adjust Tab to customize your image. The Adjust Tab changes depending on which layer is chosen. Use the Randomize dice icon  to randomize the background effect
Adjust Tab - Background, Paper, Text and Shape Layers
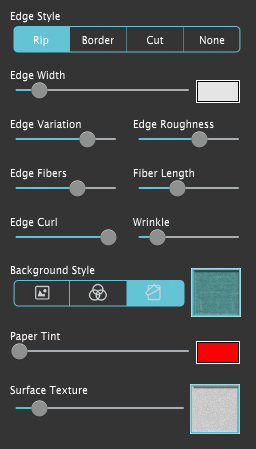
- Edge Style - Choose an Edge style: Rip creates a ripped edge, Border creates a solid border, Cut creates a rough scissor cut edge and None removes the edge
- Edge Width (Available when using Rip, Border or Cut Edge Style) - Increase the width of the edge
- Edge Variation (Available when using Rip Edge Style) - Changes the look of the edge
- Edge Roughness (Available when using Rip Edge Style) - Move right to smooth out the edges
- Edge Fibers (Available when using Rip Edge Style) - Add Fiber filament to the layers edge
- Fiber Length (Available when using Rip Edge Style) - Increase the length of the fibers
- Edge Curl - Adds a horizontal curl to the layer
- Wrinkle - Add wrinkles to the layer
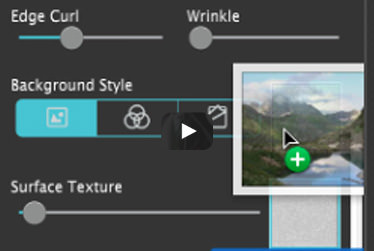
- Background Style - Choose a background style:
Image - Imports an image. Select the icon then use the open window to retrieve the image; or replace an image by dragging the new one into the box on the right.
Color - Changes the background to a solid color. Select the box to bring up the color picker.
Paper - Changes the background to paper. Select the box to bring up a library of papers to choose from.
Embed Photo - Flags the image to play back when using an action, preset or template. A flagged image will not save in a preset, but will instead replace it with the one used to create a new project the next time you use the preset.
- Paper Tint (Only available when using paper as the background style) - Replaces the paper color with a new one
- Surface Texture - Applies texture and changes the strength. Select the box to bring a library of textures.
Available when using a Text Layer
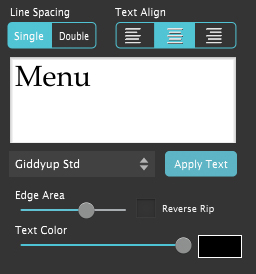
- Line Spacing - Switch between single and doubled spacing between lines of text
- Text Align - Aligns the on-document text to the left, center or right (does not show change in the text editor).
- Text Box - Type text here. Highlight the sample text and type over it.
- Font Style - Browse through the font styles installed on your computer
- Apply Text - Updates the text on-document
- Edge Area - Increases the amount of paper around the text
- Reverse Rip - Reverses the direction of the rip so it looks cut out
- Text Color - Changes text color. Select the box to bring up the color picker. Use the slider to change the opacity.
Available when using a Shape Layer
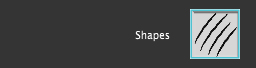
- Shapes Changes the shape. Select the box to bring up a library of shapes to choose from. Use the Background Style to load an image inside the shape.
Adjust Tab - Tape Layer
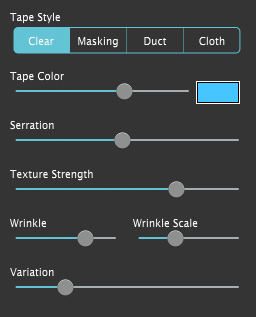
- Tape Style - Choose the type of tape
- Tape Color - Changes the tape color. Select the box to bring up the color picker. Use the slider to adjust the opacityy
- Serration - Adjusts the size of the teeth on the ends of the tape
- Texture Strength - Adjusts the opacity of the surface texturee
- Wrinkle - Adds wrinkle to the tape’s surface
- Wrinkle Scale - Adjusts the size of the surface wrinkle
- Variation - Changes the look of the wrinkle
Adjust Tab - Object Layer
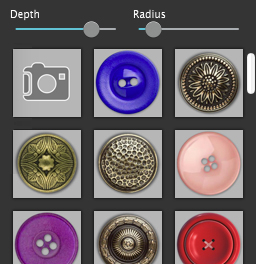
- Depth - Changes how deep the impression appears
- Radius - Softens the ridge around the impression
- Objects - Choose an object to add to the layer, use the first box to choose a custom object
Presets
Preset Browser

Click t o hide the Preset Browser

Create a Preset using your current settings

Delete a Preset
Saving and Loading Layer Presets
To save the settings for a specific layer as a preset select the layer and click the layer button in the top right corner of the app and select Save layer Preset. Once saved the preset will appear with the other presets with a layer icon in the corner of the preset, select the preset to load the Layer Preset
Saving and Deleting Presets
Once you have applied a preset and modified it using the Adjust Tab, you can save your own custom preset by clicking the plus symbol in the bottom right corner. To delete a preset click the minus symbol which is located in the bottom right corner. Then click the X on the preset you wish to delete.