Pans around your document. Works especially good when zoomed in. Space Bar on your keyboard gives quick access to this feature.
RipPix - Info Page Desktop
Buttons
Top Bar Buttons

- Get Photo - Load a photo or a project from your hard drive or start a new project
- Save - Save your image to your hard drive or save your project to use later
- Crop - Cut out an area of your image hiding the rest
- Zoom In - Zoom in to examine small details
- Undo - Undo the last edit
- Redo - Redo the last edit that was undone
- Zoom Out - Zoom Out to view a larger proportion of your image
- Original Button - Hold down to view the original image for a quick comparison.
- Info Button - Explains how-to-use the product
- Website - Takes you to Jixi’s website
Menu

- Get Photo - Load a photo from your hard drive
- Save Photo - Save the image to your hard drive
- Save Preset - Once you've created an effect you can use this option to save all the attributes and reuse them on another picture
- Preferences - Change where the application will save your image, rebuild presets that came with the product, turn off tooltips and choose a background color for png files
- Undo - Undo your last edit
- Redo - Redo your last edit that was undone
- Zoom In - Zoom in on areas of the image
- Zoom Out - Zoom out to view a larger portions of the image
- Fit In Window - Fill the window with the image
- Actual Size - Changes the images size to its original size
- Jixipix Info - Brings you to this page
- Jixipix Products - Takes you to our website where you can view all our apps
File
Edit
Window
Help
Keyboard Shortcuts
- SPACEBAR - Hold down to move the canvas
- T - Resize and move an image
- L - Select the Rip Lasso
- ⌘+O (Mac) / Ctrl+O (Windows) - Open
- TAB - Hide the sidebar and presets
- ⌘= (Mac) / Ctrl = (Windows) - Zoom in on areas of the image
- ⌘- (Mac)/ Ctrl - (Windows) - Zoom out to view a larger portions of the image
- ⌘0 (Mac)/ Ctrl 0 (Windows) - Fill the window with the image
- ⌘1 (Mac)/ Ctrl 1 (Windows) - Change the image's size to its original size
Tools
Tool Bar Buttons

Pan Tool

Rip Tool

Creates a ripped shaped by circling around on the background : keyboard (L)


Clears the selected Rip

Adds Edge area to the ripped shape

Removes the selection from the ripped shape
Move Image Tool

Transforms the foreground image. Use the dots on the selection box to move, resize and rotate it: keyboard (T)
Resets the foreground image back to its original size and location
Adjustments
You can use the Adjust Tab to customize your image.
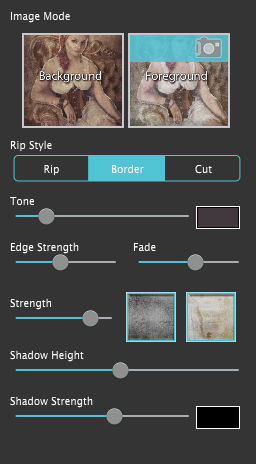
- Background - Select this to change the settings on the background image. Note, the background image is static and cannot be removed.
- Foreground - Select this to change the settings on the foreground image. Replace the image using the camera icon
 on the blue bar, or drag and drop a new photo onto this box.
 - Rip Style - Choose an Edge style: Rip creates a ripped edge, Border creates a solid border and Cut creates a rough scissor cut edge
- Tone - Use the color box to choose a color to tone the image. Move slider right to increase tone strength.
- Edge Strength - Creates a textured vignette around both the foreground and background image. Use the slider to adjust the opacity.
- Fade - Increases the width of the vignette
- Strength - Adjusts the worn texture strength, or completely removes the photo effect when set to ‘0’
- Texture Box - Select the box to bring up a library of textures. Mix this with papers for different looks.
- Paper Box - Select the box to bring up a library of papers. Mix this with textures for different looks.
- Shadow Height - Changes the height of the shadow giving the appearance of being higher off the other image or lower.
- Shadow Strength - Changes the opacity of the shadow and use the color picker to change the shadow’s color
Presets
Preset Browser

Click t o hide the Preset Browser

Create a Preset using your current settings

Delete a Preset
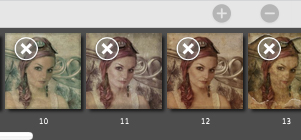
Saving and Deleting Presets
Once you have applied a preset and modified it using the Adjust Tab, you can save your own custom preset by clicking the plus symbol in the bottom right corner. To delete a preset click the minus symbol which is located in the bottom right corner. Then click the X on the preset you wish to delete.