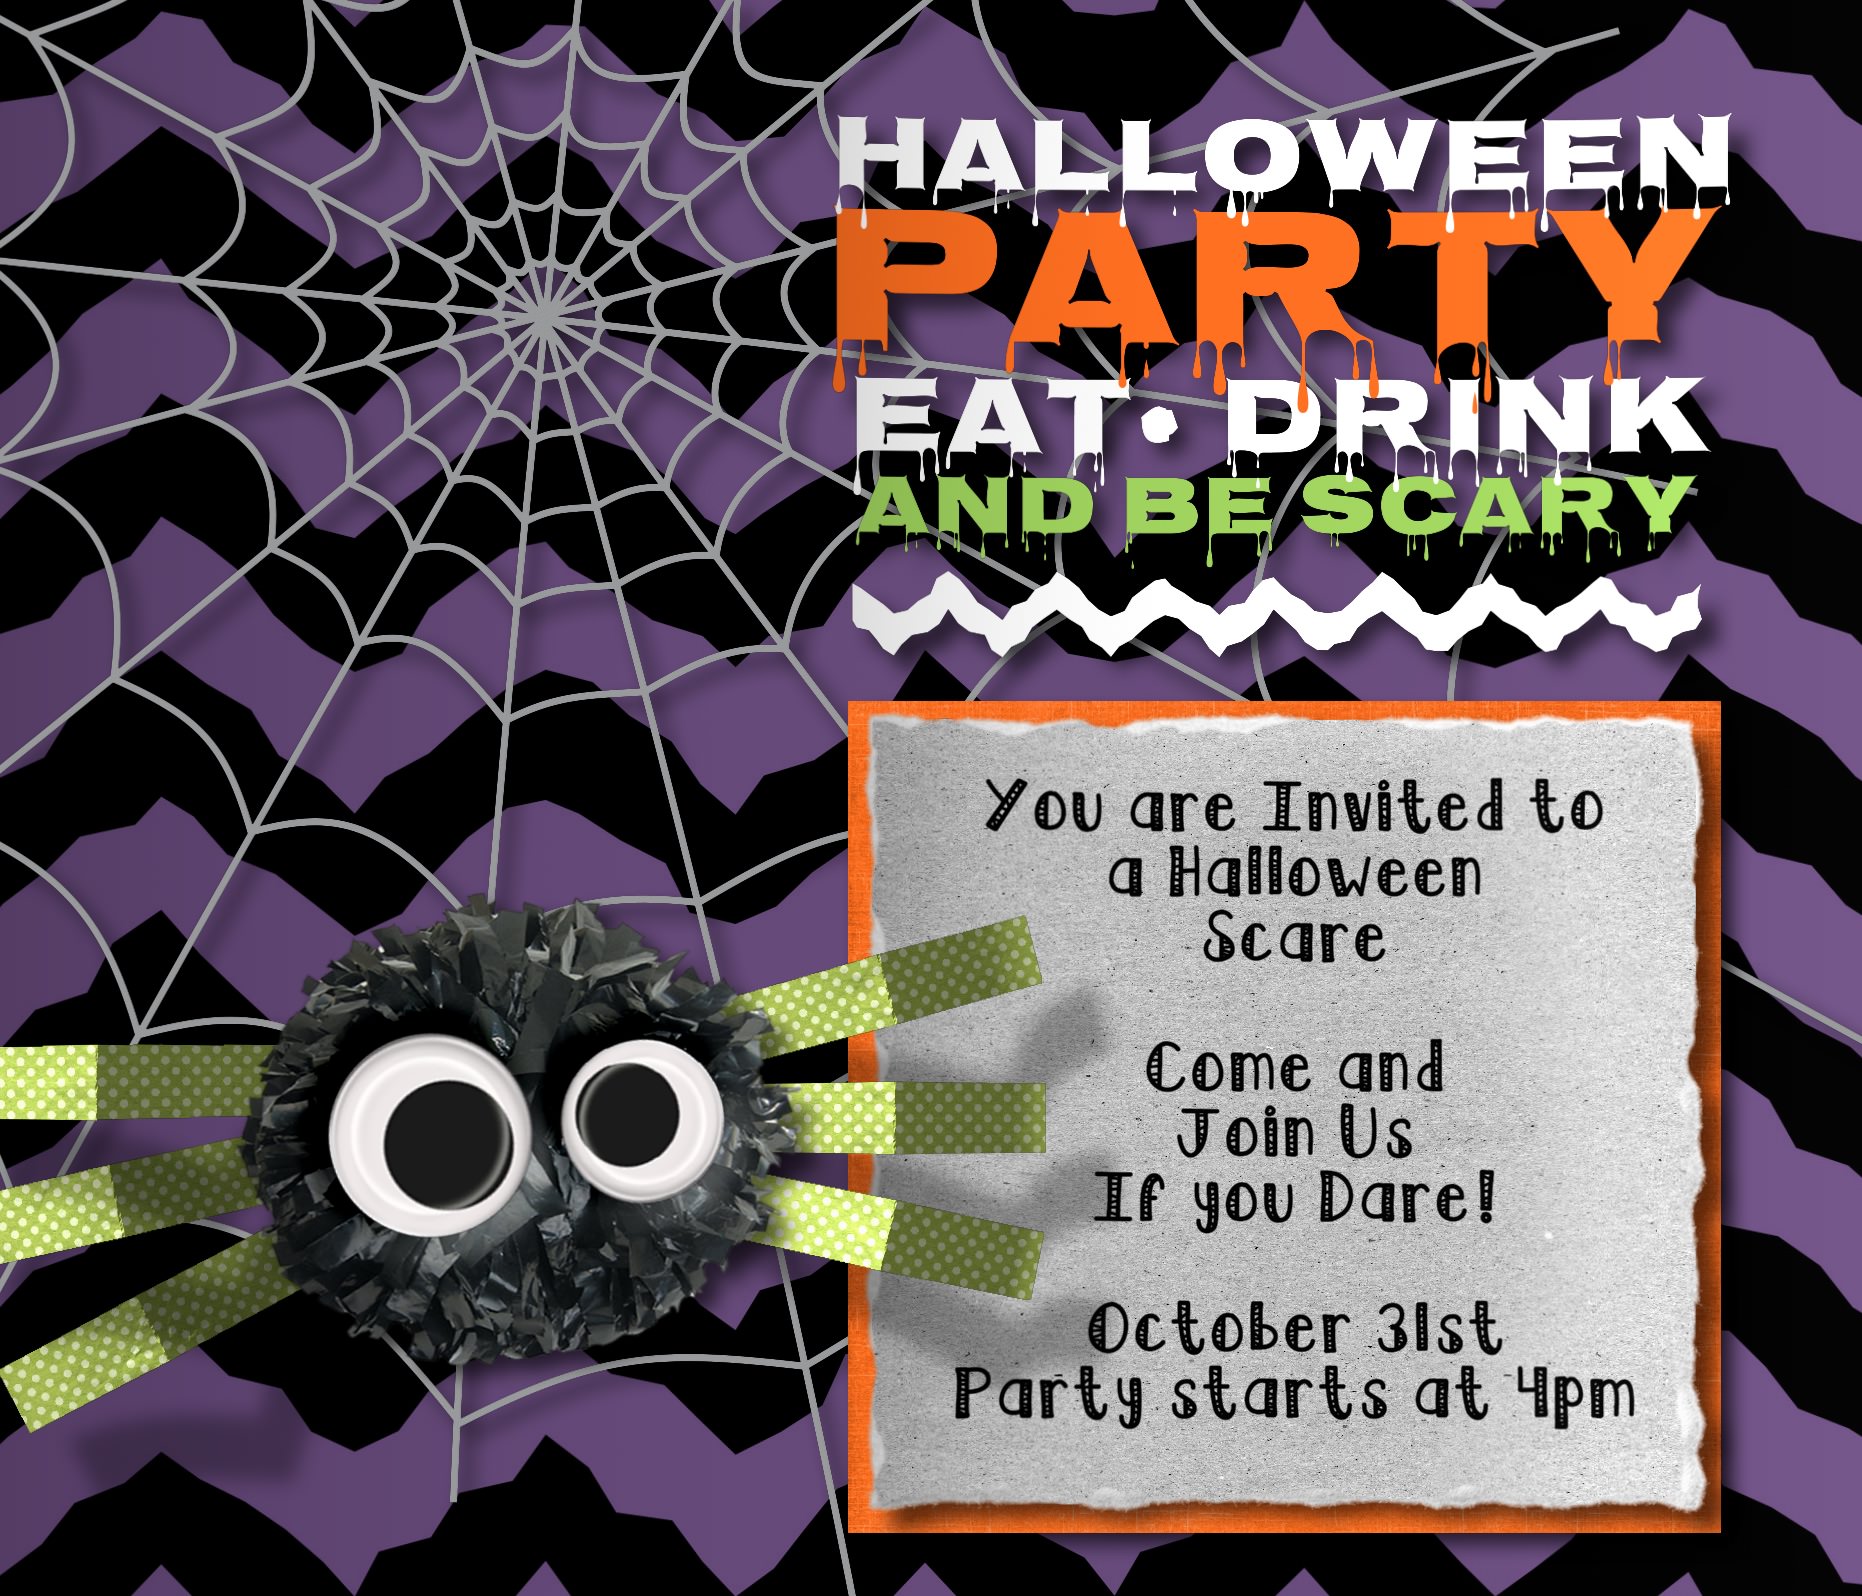
This creative tutorial shows you how to create a handcrafted Halloween Invitation with layered graphics, a pom pom spider with google eyes and folded legs. At the end of the tutorial you will have an invitation to email your friends, or to create an event on your favorite social media site.
If a printed invitation is desired, Rip Studio generates realistic High Resolution Rips, Curls, Texture and Shadows in full print resolution—all with control over every element create inside the app. We guarantee every creation you make will be unique and one of-a-kind!
First download the Demo of Rip Studio (choose platform): Mac | Win
Then download the Project Halloween Invitation 2 (click link): Start Download
The folder contains: Purple RickRack, Web, Spider Body and Googly Eyes. It also has an image of the finished example of the invitation and a Project. This project will help you understand how the invitation was set up inside Rip Studio that you can refer to it at the end of the tutorial and compare.
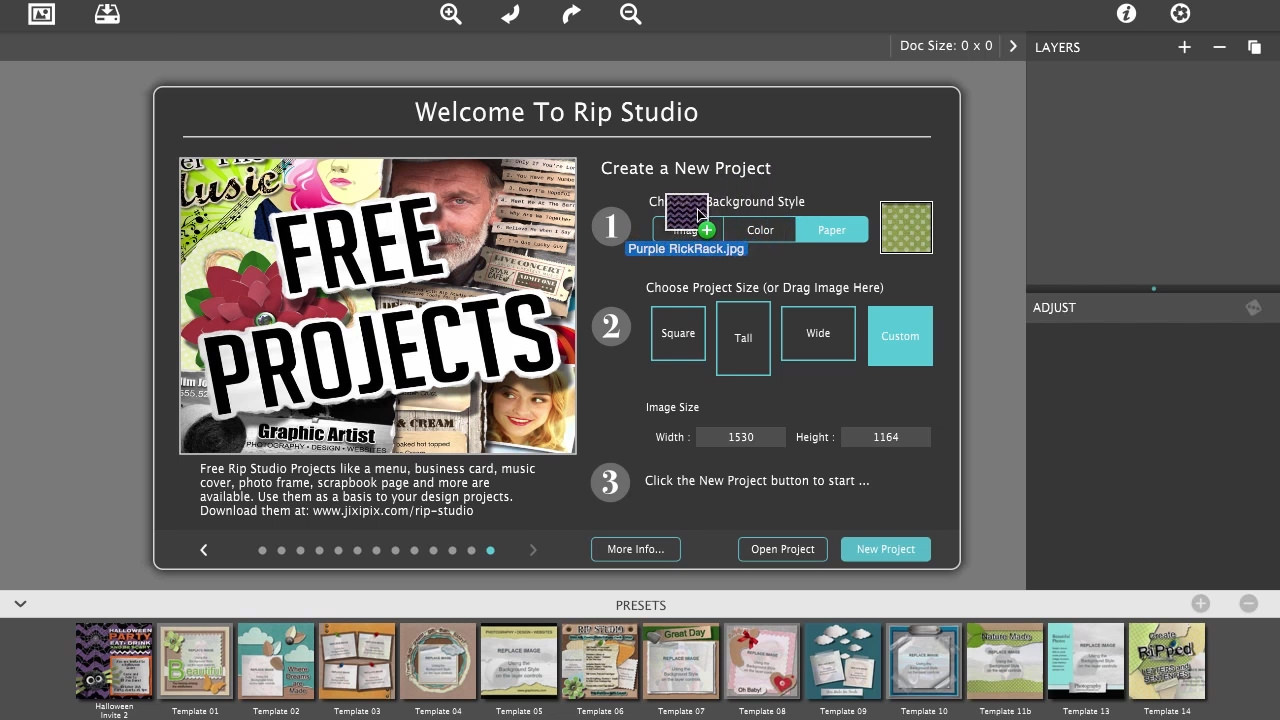
The easiest way to add images is to drag and drop them on the open application. In this tutorial images will be placed one at time in the order you would normally create a handmade invitation, however Rip Studio allows you to add multiple images, meaning you could grab all the ones in the folder and just drop them in. If you decide to do this arrange them in the Layers palettes in this order going from bottom to top: Purple Rick Rack.jpg (bottom), Web.png, Spider Body.png, and Party Text.png. If you added Googly Eyes.png delete it, you will import this later as an Object for depth. Once they are organized use the Reset Tool on the bar above to set the images to their original size. Also, notice the files some have .png extensions to support transparency. Some files come this way, or remove your own backgrounds using an editing app. NOTE: If you experimented with multiple images and want to start fresh. Go to the top, select the image icon, and choose New Project off the menu and Save Image: No. You will now see the Welcome—New Project wizard.
Start the invitation by adding the invitation background. Go to the open folder, grab the Purple Rick Rack and drop it on the Welcome—New Project wizard.
Add the spider web to the invitation.
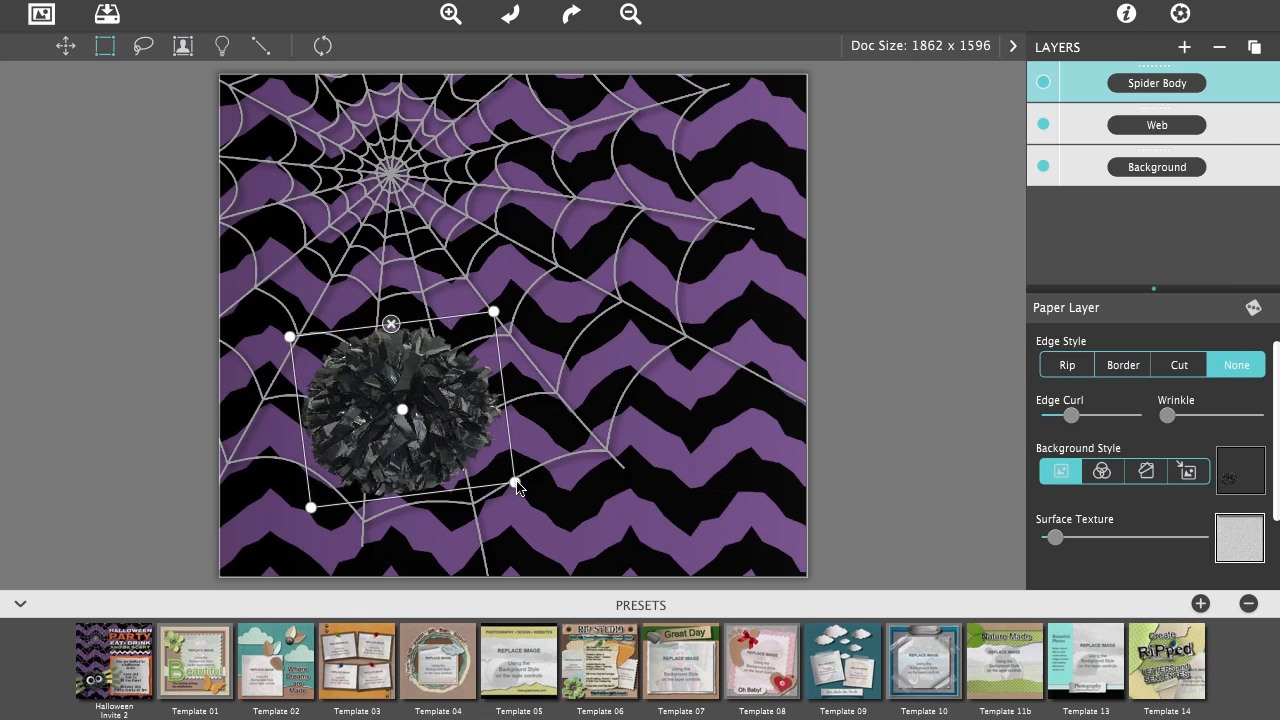
Drop in the Web.png, go to the Reset Tool above to reset the image to its original size.
Go to the Paper Layer panel on the right and set Edge Style to None.
NOTE: Shadows are automatically applied to everything dropped in Rip Studio. As we progress I’ll show you how to remove them.
Create the Spider Body. A pom pom image is a fun way give dimension to the body.
Rip Studio has many uses, in this tutorial we use the app as a digital Arts & Crafts tool. So be crafty with your creation and use all sorts of creative images in your composition like cotton balls, ribbons, rope and buttons just to name a few.
Drop in the Spider Body.png. Again, use the Reset Tool to restore it to its original size and set the Edge Style to None.
Rotate and enlarge the body using the selection handles (corner circles).
Step 3 - Crease and Fold Tool
To create Spider Legs with folded strips of narrow paper that pop off the page. Follow these steps:
Go to the top of the Layers pallet and use the plus sign ( + ) to add a Paper Layer.
Label this layer: Spider Legs and change the Edge Style to None
Change paper to green dots by going to Background Style, click the Paper icon , click the box at the end to bring up the library of papers and choose #41
Resize the paper to a narrow strip and move it to the center of the spider body.
Select the Crease Tool in the bar above and draw a vertical line across the paper.
Use the Edit button (pencil icon) on the line to adjust the settings. Change Crease Style to Fold, Direction: Down, move the Depth slider and the Width slider to 100.
Click off to the side to close the edit box
Copy the Crease line using the Duplicate icon and move it directly to the right.
Go to Edit and change the Direction to Up.
Adjust the leg shadow by clicking on the Light icon , move the on-document Light bulb to the upper left corner, click on the edit box (pencil) to change the settings to: Shadows Strength to 30 and Shadow Height to 0. This will make the legs look very dimensional.
Step 4 - Save Layer Presets
To create multiple Spider Legs and avoid drawing all the creases and keep the shadows the same.
Duplicate the leg by first selecting the layer named Spider Leg, go to the top of the Layers palette to click the the Duplicate Layer icon and choose Save Layer Preset off the menu. Name the preset Spider Leg.
NOTE: If the leg preset didn’t work it may be because the layer wasn’t selected when it was saved. Try selecting it and re-saving.
To find the saved Layer Preset go to the Preset browser on the bottom of the app. You know it’s a Layer Preset if there is two blue boxes on it. Click it to add a leg.
Move Leg up and rotate
Repeat to add another leg Note: If the shadow from the leg is casting one on the other legs, reorder the layers until it looks right.
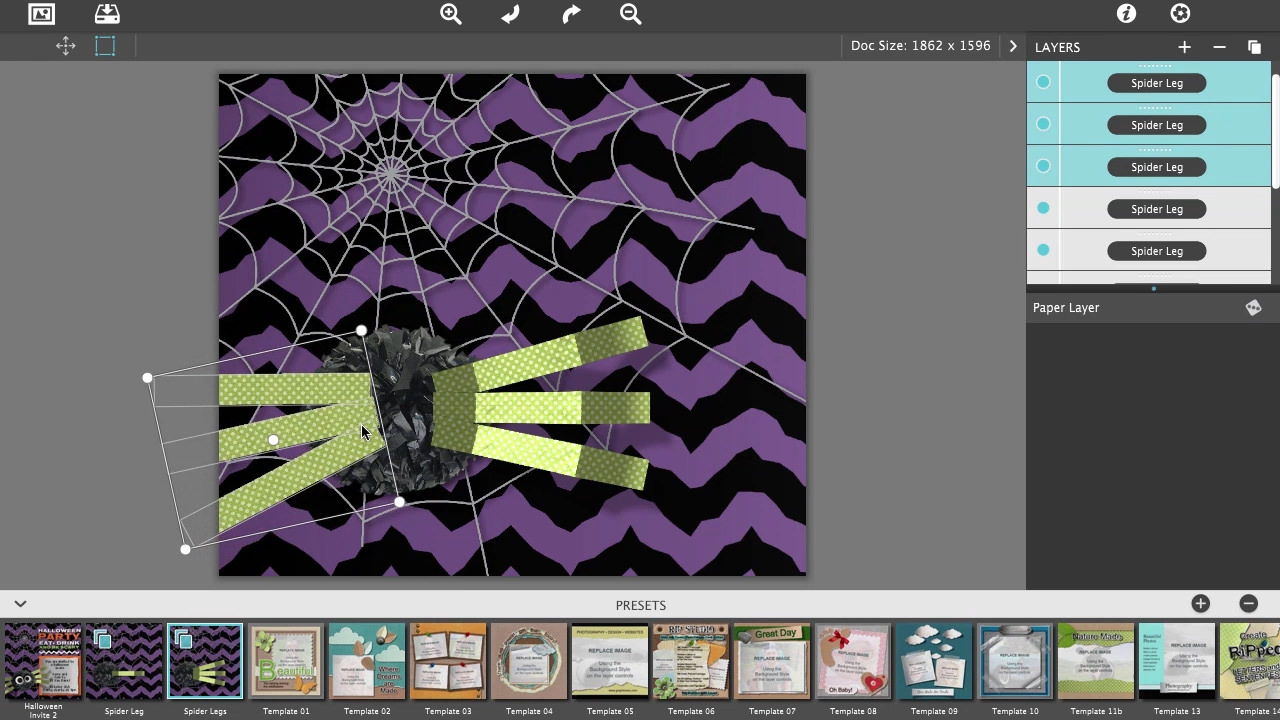
Now select all three legs and select Save Layer Preset. Use this trick to select multiple layers: Hold the cmd or ctrl key while selecting layers. Name the preset Spider Legs
Click on the preset at the bottom to add the legs to the project.
They will be placed on top of the other legs, so just select them holding the cmd or ctrl key and clicking on each one. Move and rotate them to the left side of the spider body.
Move the Spider Body above the legs by reordering the layer and resize the body so it’s in proportion to the legs.
Step 5 - Objects and Depth
Now it’s time to add the spider’s Googly Eyes. To do this:
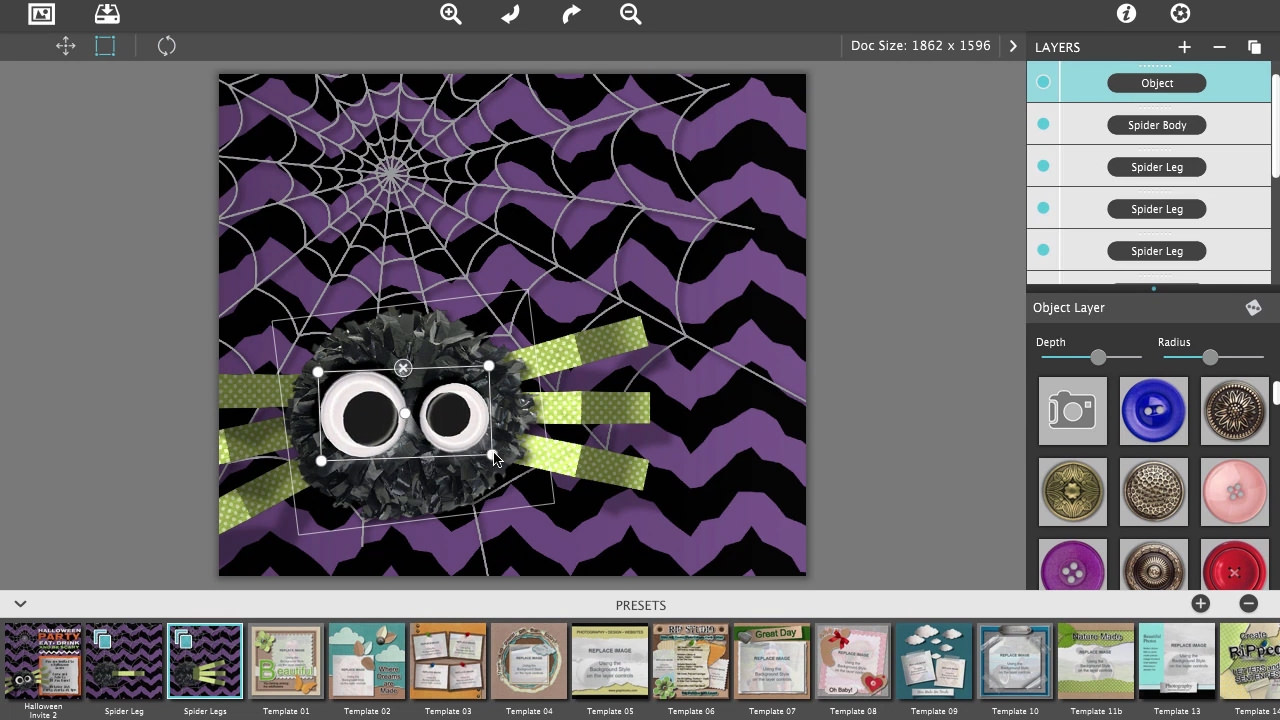
Go to the top of the Layers palette, use the plus sign ( + ) to add an Object layer. Note: Every time an object layer is added an object is automatically placed on-document.
Change the Object to the Googly Eyes by clicking on the camera (first item in the object library). Use the standard Open dialog to navigate to the Halloween Invitation 2 folder to get the file, or an easier way to do this is once the dialog opens drag the file from the folder and drop it on to the Open dialog.
Adjust the Radius slider to 50 and the Depth slider to 60. This is a cool little trick to make the eyes sink into the Spider’s body.
Move, resize and rotate the eyes and place them on the spider body.
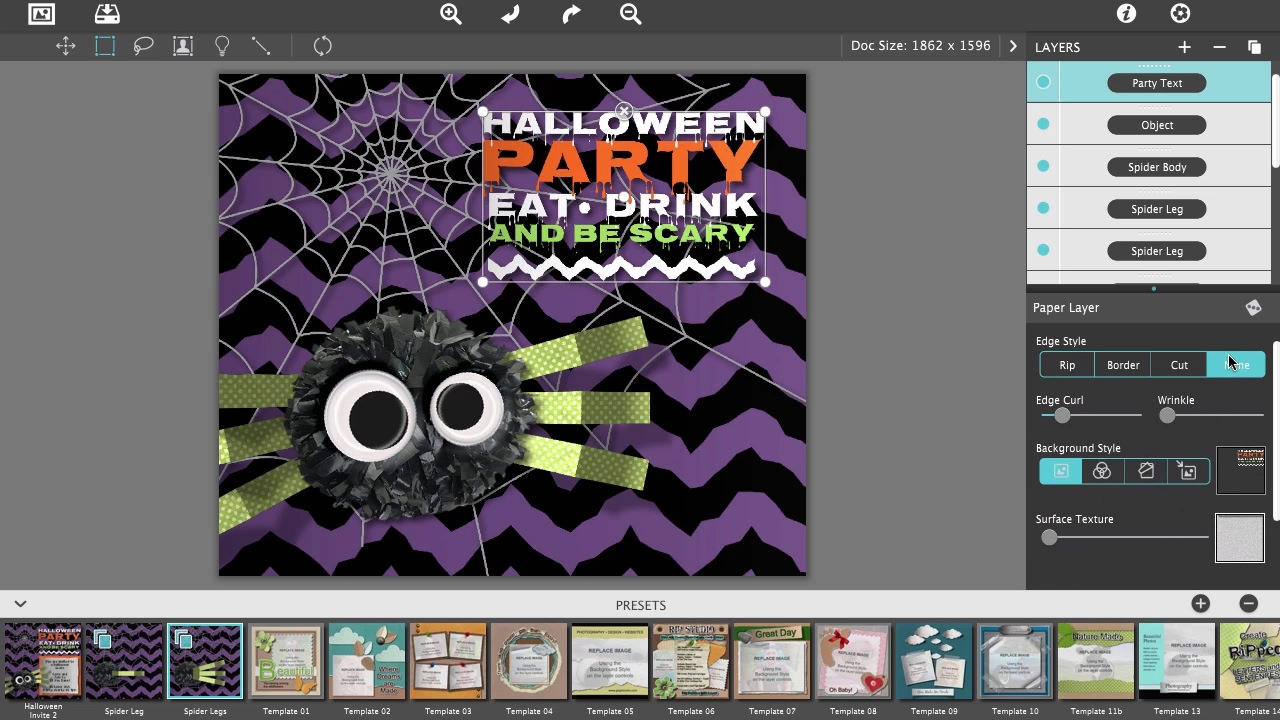
Step 6 - Adding Graphical Text
Add the Party Text.jpg, drag and drop it, Reset the size , and change Edge Style to None.
Step 7 - Paper Layers
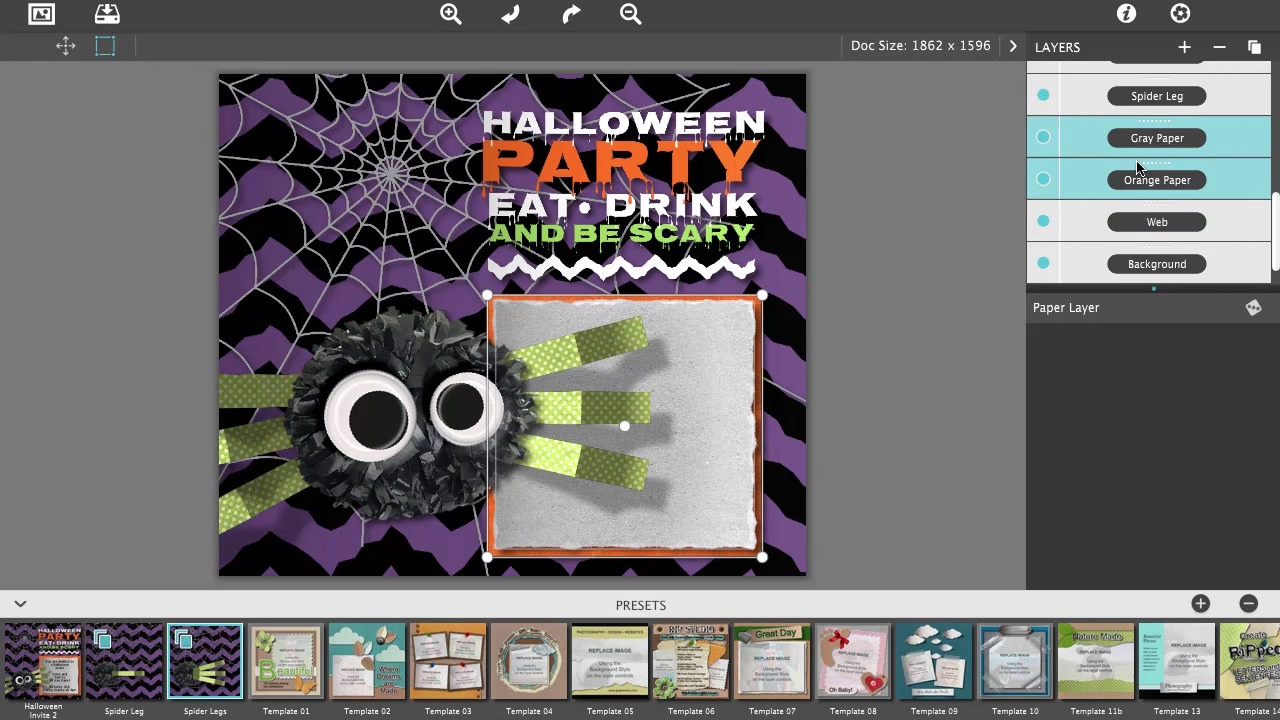
To create a background for the invitation text make an orange paper with a grey one on top. To do this:
Go to the top of the Layers pallet and use the plus sign ( + ) to add a Paper Layer
Label this layer Orange Paper and change Edge Style to None.
Set Edge Curl to 0.
Change Background Style to Paper (3rd icon), open paper library (click box) and choose #37.
Change color by moving the Paper Tint slider to 100, change red color to orange by clicking on the box to bring up the color picker. Change the color to orange using the RGB fields type R: 255, G: 111, B: 32. This will match the orange color exactly to the one used in the party text graphic.
Resize the paper into square shape below the party text graphic.
Place the grey paper by adding another Paper Layer. Name it Gray Paper.
Leave the ripped edge and increase the Edge Curl slider to 25.
Change the Background Style to #75
Move and resize the gray paper over the top of the orange one.
Now select the two paper layers and move them below the Spider layers
Step 8 - Text Layers
Add the invitation text. To do this:
Add a Text Layer using plus sign ( + ) on the Layer Palette.
NOTE: Random text is automatically placed when a Text Layer is added.
Scroll down to the text editor. Highlight the text and type: You are Invited to (return) a Halloween (return) Scare! (return)(return) Come and (return) Join Us (return) If You Dare!
You are Invited to a Halloween Scare! Come and Join Us If You Dare!
Use the APPLY button to update it on-document.
Move and resize the text over the orange and grey paper
Change font to: KBLimeLight (get the font at http://www.dafont.com/kb-lime.font)
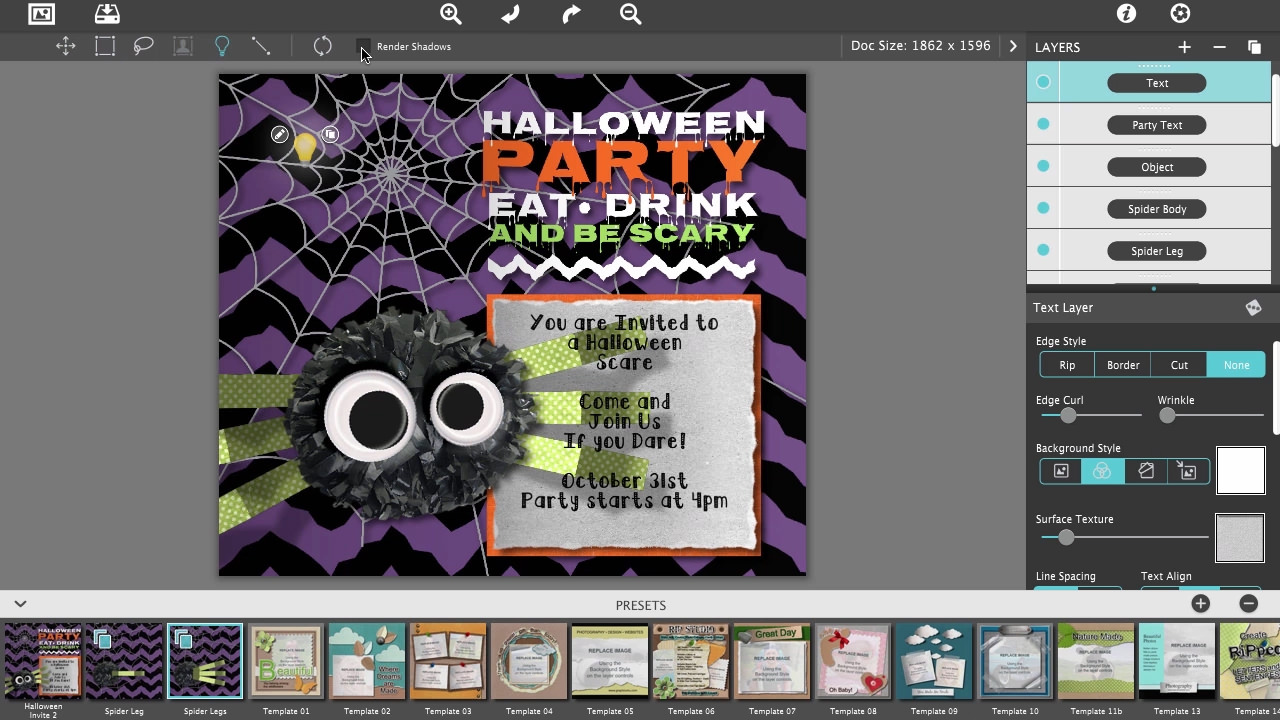
Scroll up and change the Edge Style to None
Remove the shadow by selecting the Light Tool, find the check box to the right and check off Render Shadows
Make any final adjustments to the on-document text then move the Text layer to below the Spider ones.
Step 9 - Selecting Multiple Layers
The spider is a little large so follow these steps to resize it:
Select all the Spider layers used to create it. Remember to hold down the cmd or ctrl key to Select Multiple Layers.
Use the selection box handles (corner circles) to resize it smaller, and click in the center of the selection box to move into place.
Step 10 - Save Preset, Image and Project
There are three ways to save the invitation:
Save Preset (File Menu or quick keys: Shift/Ctrl + S or Shift/Cmd + S): This saves all the images, layers and settings inside the app. This is great for saving the project and go off to create a variation of it. You can find the preset in the browser at the bottom of the app.
Save Project: Saves all the images, layers and settings externally to your hard drive. This is a great for storing the project for future use and allows you to share this project with co-workers, family or friends. You know it’s a project file if the file extension is .jrp. Just be aware that projects saved with .jrp extension can only be opened with the Rip Studio App.
Save Image: This saves an image externally. Use it to print, email or post to your favorite social sites.
You have made a digital handmade invitation with all the qualities of a traditional one. Email it to your friends, or create an event and post it.
If you desire a printed version go ahead and do it! The file is a full 266 resolution image.
KB LimeLight Font Courtesy of DaFont.com: http://www.dafont.com/kb-lime.font
Special Thanks to Artist Olga Milagros for creating Halloween Background and Party Text at Freepik.com
Tutorial Music Doll Dancing Artist: Puddle of Infinity


 and move it directly to the right.
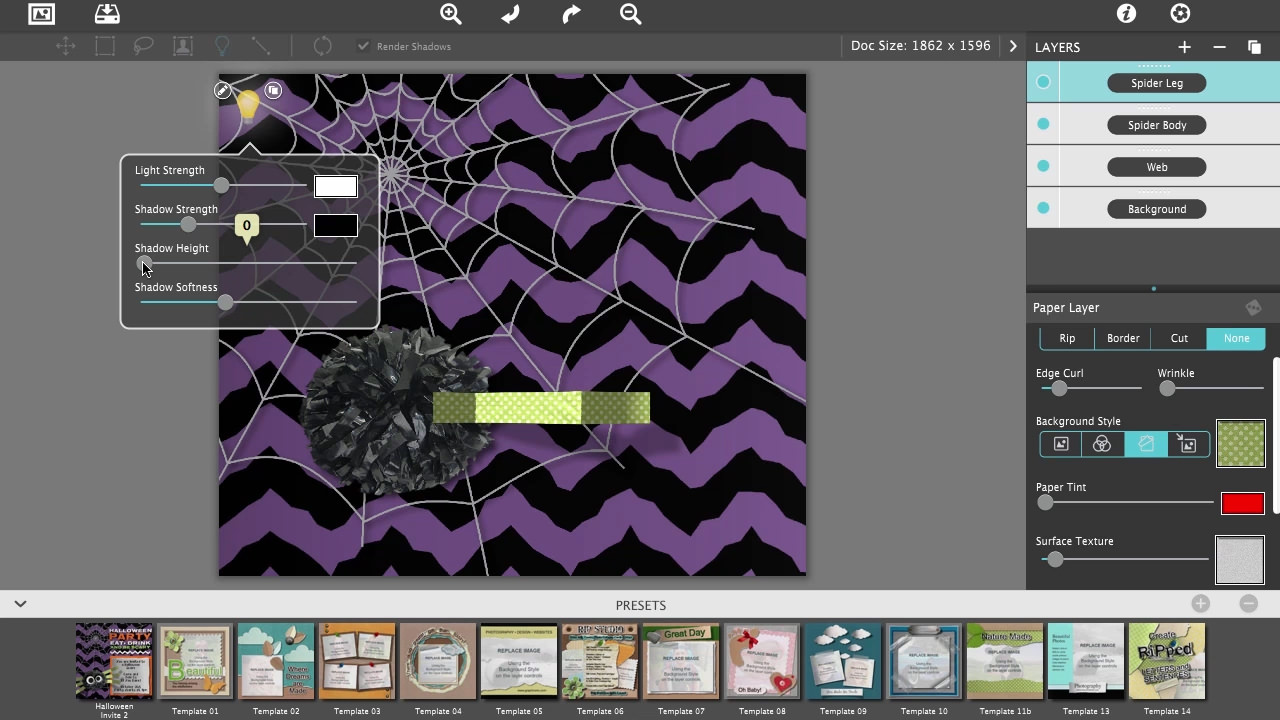

 : Saves all the images, layers and settings externally to your hard drive. This is a great for storing the project for future use and allows you to share this project with co-workers, family or friends. You know it’s a project file if the file extension is .jrp. Just be aware that projects saved with .jrp extension can only be opened with the Rip Studio App.