Sign up to receive promotional offers and new product announcements.
Premium Pack - Info Page Desktop
Buttons
Top Bar Buttons

- Get Photo - Load a photo from your hard drive
- Save Photo - Save your image to your hard drive
- Crop - Cut out an area of your image hiding the rest
- Undo - Undo the last edit
- Zoom In - Zoom in to examine small details
- Move: Move your image within the app and pan through the presets, grains and tints
- Zoom Out - Zoom Out to view a larger proportion of your image
- Redo - Redo the last edit that was undone
- Original Button - Hold down to view the original image for a quick comparison.
- Info Button - Opens up this page
- Website - Takes you to our website
- Randomize - Randomizes the effect on the image.
Menu

File
- Get Photo - Load a photo from your or hard drive
- Save Photo - Save the image to your or hard drive
- Save Preset - Once you've created an effect you can use this option to save all the attributes and reuse them on another picture
- Preferences - Change where the application will save your image and rebuild presets that came with the product
Edit
- Undo - Undo your last edit
- Redo - Redo your last edit that was undone
Window
- Zoom In - Zoom in on areas of the image
- Zoom Out - Zoom Out to view a larger proportion of the image
- Fit In Window - Fill the window with the image
- Actual Size - Changes the images size to its original size
Help
- Jixipix Info - Brings you to this page
- Jixipix Products - Takes you to our website where you can view all our apps
Adjustments
You can use the Adjustment Tab to customize your picture. The Adjustment Tab changes depending on which App and Preset Style is chosen.
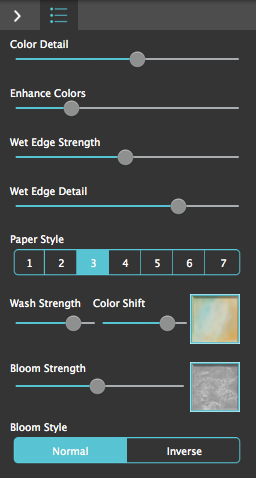
- Color Detail - Move the slider to the left to add more colors, that will increase detail in your image.
- Enhance Colors - Increase the Saturation of the image making the image more bright and colorful.
- Wet Edge Strength - Change the visibility of the Wet Edges around areas of color.
- Wet Edge Detail - Adds more Wet Edges around smaller areas of color in your image to give it more detail.
- Paper Style - Choose between 6 different paper styles to overlay your image.
- Wash Strength - Increase the visibility of the colors in the Wash chosen below.
- Color Shift - Move the slider to change the colors of the Wash chosen below.
- Wash Thumbnail - Choose a wash that will overlay your image.
- Bloom Strength - Change the visibility of the chosen Bloom.
- Bloom Thumbnail - Choose a Bloom style to go with your image.
- Normal/ Inverse - Choose wether to use the normal version of the chosen Bloom or the inverse version which is an inverted version of the bloom.
Available when using Two Tone
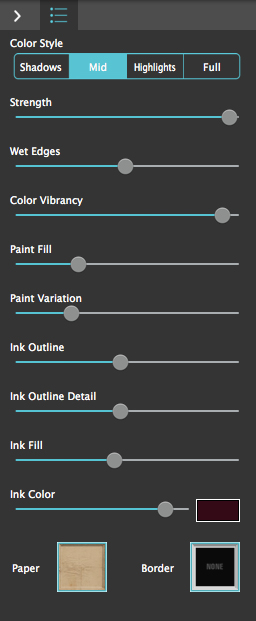
- Shadows/ Mid-Tones/ Highlights/ Full Tabs - Choose where the watercolor appears on the image. If Full is selected Wet Edges and Paint Area Sliders will turn grey and not work.
- Strength - Change the opacity of the watercolor effect.
- Wet Edges - Change the size of the outline around the watercolor effect creating a 'wet' look. (Not available when Full is selected.)
- Color Vibrancy - Enrich Watercolor pigment making it more vibrant. (Only available when Abstract is chosen)
- Paint Fill - Change how much of the image is covered in watercolor. (Not available when Full is selected.)
- Paint Variation - Change how the paint looks in the selected area.
- Ink Outline - Use this to increase detail in the outlined areas.
- Ink Outline Detail - Moving the slider left renders a loose outline and moving it right renders a sharper one.
- Ink Fill - Increases ink amount in darker areas of the image.
- Ink Color - Change the ink color for Ink Outline, Ink Outline Detail and Ink Fill. Move the slider right to increase ink strength.
- Paper Thumbnails - Select a paper.
- Border Thumbnails - Choose a border. Borders blend with ink outlines and changes when adjustments are made to ink sliders.
Available when using Stylized ( Abstract uses the actual colors of the image.)
- Paint Color Shift - Change the color of the watercolor.
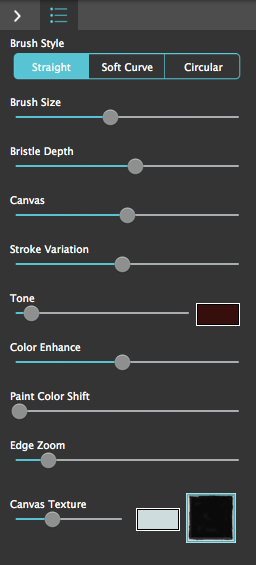
- Brush Style - These are bristle patterns seen in the painting. Control the amount seen using the bristle depth slider. (Not available when using Impressionism.)
- Brush Size - Move slider left for small brush details or right for larger thicker strokes.
- Bristle Depth - Controls the amount of bristle pattern seen in the painting.
- Canvas -Move slider right to control how much canvas is seen through the paint. (Not available when using Impressionism.)
- Stroke Variation - Change where the brush strokes are applied to your painting.
- Tone - Create mood or add depth with tone. Select a tone color with the colorbox.
- Color Enhance - Enriches color in the image making them more vibrant.
- Paint Color Shift - Change the color of the oil painting.
- Edge Zoom - Change the size of the edge making it bigger
- Canvas Texture - Add or decrease the texture around the outsied of the edge. Use the color box to change the canvas color.
- Edge Thumbnail - Add a painted edge.
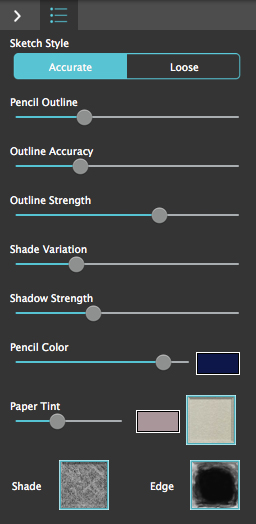
- Sketch Style - Style 1 has more accurate pencil detail. Style 2 has looser outlines with more shaded areas.
- Pencil Outline - Use this to outline more edges in the photo.
- Outline Accuracy - Move right to pencil in detail in the image.
- Outline Strength - Move right to darken outline. Move left for a light and delicate one.
- Shade Variation - Move slider to shift shading to other show areas.
- Shadow Strength - Move slider to lighten or darken shadow areas.
- Pencil Color - Change the color of the pencil outline and shadow strength. Move right to increase shadow strength color.
- Paper Tint - Change the paper color by tinting it. Use the slider to adjust its opacity.
- Paper Thumbnails - Select a sketch paper
- Shade Thumbnails - Change the shade pattern.
- Edge Thumbnails - Add an edge.
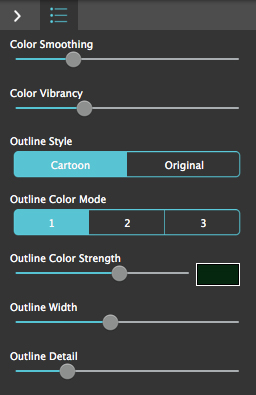
- Color Smoothing - Smooths out the colors in your image blending them together.
- Color Vibrancy - Move the slider right to enrich the colors in your image making them bright and vibrant or move the slider left to cut back the saturation in the image. (Not available when using Monotoon.)
- Outline Style - Style 1 uses the cartooned image to make the outline while Style 2 uses the original image and adds some extra detail.
- Outline Color Mode - 1 uses the color chosen below as the Outline Color. 2 uses a transparent version of the chosen color as the Outline Color. 3 uses the original colors in the image as the Outline Color.
- Outline Color Strength - Move right for a dark Outline or left for a light delicate Outline. Use the color box to choose the color of the Outline.
- Outline Width - Change the thickness of the Outline.
- Outline Detail - Add Outlines to smaller areas of color in your image giving it more detail.
Available when using Poptoon
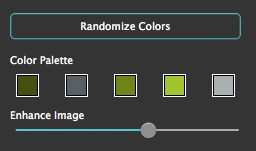
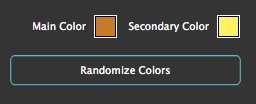
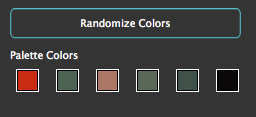
- Randomize Colors - Randomizes the five Color Palette colors.
- Color Palette Boxes - Change the colors in your image. Color Palette works best when the colors go from dark to light.
- Enhance Image - Adjust the vibrancy of the image in darker areas.
Available when using Monotoon
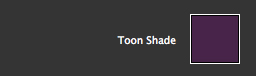
- Tone Shade - Change the mood or add depth to your image by adding a color tone.
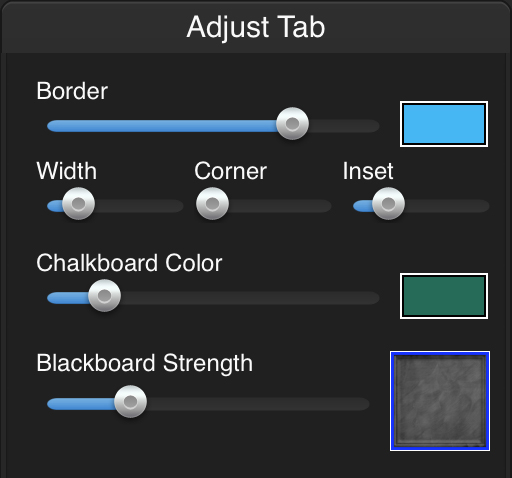
- Border - Change the opacity of the border. Use the color box to choose a color for the border.
- Width - Choose the thickness of the border.
- Corner - Use the slider to make the corners of your border rounded.
- Inset - Adjust the distance the border is from the edge of your photo.
- Chalkboard Color - Use the colorbox to choose a color for your chalkboard and the slider to adjust its opacity
- Blackboard - Choose a texture for your Blackboard and use the slider to adjust its opacity.
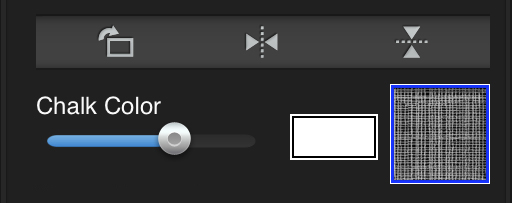
Available when an image is selected

- Rotate/ Flip Horizontally/ Flip Vertically - Use these buttons to rotate your image or to flip it horizontally or vertically.
- Chalk Color - Use the colorbox to choose the color of your chalk, use the slider to adjust the colors opacity and the thumbnail to choose the texture of the chalk.
- Shade Strength - Adjust the opacity of the shaded areas.
- Shade Style - Choose which parts of your image are shaded in.
- Outline Detail - Move right to make your outline more accurate.
- More Detail - Add more detail to the oultine.
- Edge Style - Choose Round or Square to add a faded edge around your image blending it into the background.
Available when an accent is selected
- Rotate/ Flip Horizontally/ Flip Vertically - Use these buttons to rotate your image or to flip it horizontally or vertically.
- Chalk Color - Use the colorbox to choose the color of your chalk, use the slider to adjust the colors opacity and the thumbnail to choose the texture of the chalk.
Available when text is selected
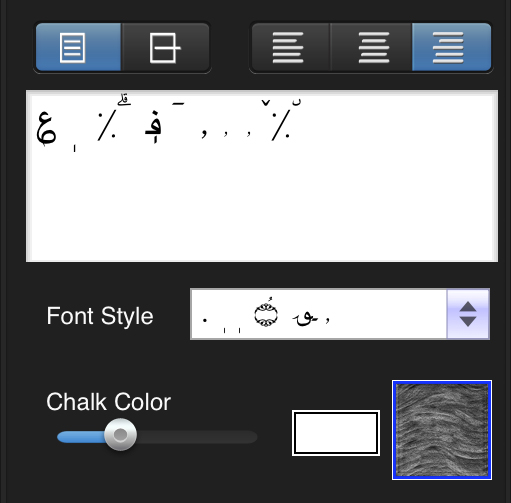
- Multi-line/ One-line Buttons - Choose between using multiple lines or to have everything on 1 line
- Text Alignment Buttons - Pick a left, center or right orientation for your text.
- Font Style - Choose a font style to use.
- Chalk Color - Use the colorbox to choose the color of your chalk, use the slider to adjust the colors opacity and the thumbnail to choose the texture of the chalk.
Available when using Black and White style
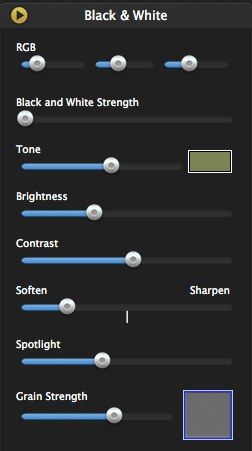
- Red/Green/Blue Sliders - Filters the image with the selected color range.
- B&W Strength - Move slider right to increases the opacity of the Black and White effect or left to blend the original color back in.
- Tone Slider - Create a mood or add depth using the tone slider. Select a color then move slider right to tone the image.
- Brightness Slider - Enhances the lighter tones in the image.
- Contrast Slider - Increase highlights in the image and darken shadows. Move slider right to increase contrast strength..
- Soften/ Sharpen Slider - Move slider left for a dreamy feel or right to bring out details in the image.
- Spotlight Slider - Fade black in and around the placed spotlight. Move slider right to increase spotlight opacity.
- Grain Strength - Add interest to the image by choosing a darkroom-style grain. Move slider right to increase grain opacity.
Available when using Infrared or Dramatic B&W style
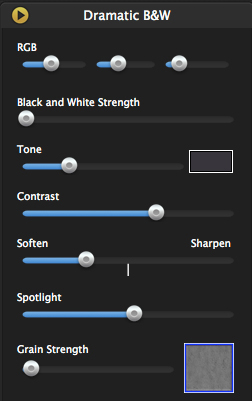
- Red/Green/Blue Sliders - Filters the image with the selected color range.
- B&W Strength - Move slider right to increases the opacity of the Black and White effec or left to blend the original color back in.
- Tone Slider - Create a mood or add depth using the tone slider. Select a color then move slider right to tone the image.
- Contrast Slider - Increase highlights in the image and darken shadows. Move slider right to increase contrast strength.
- Soften/ Sharpen Slider - Move slider left for a dreamy feel or right to bring out details in the image.
- Spotlight Slider - Fade black in and around the placed spotlight. Move slider right to increase spotlight opacity.
- Grain Strength - Add interest to the image by choosing a darkroom-style grain. Move slider right to increase grain opacity.
Available when using Pop Grunge Style
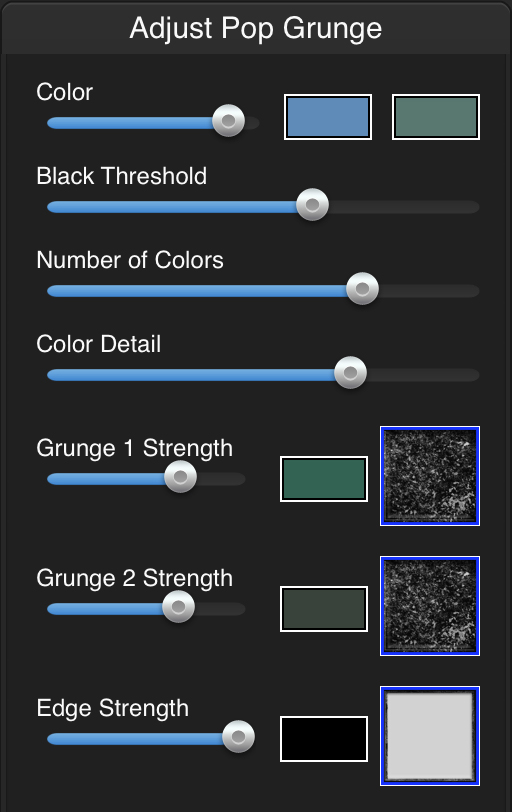
- Color - Choose two colors to create a pop color scheme. Use slider to adjust color strength.
- Black Threshold - Darken the shadows in the image.
- Number of Colors - Controls how many colors are in the image.
- Color Detail - Move the slider right to add detail to your image.
- Grunge Strength 1 - Choose a color and texture for Grunge 1. Use slider to adjust color strength.
- Grunge Strength 2 - Choose a color and texture for Grunge 2. Use slider to adjust color strength.
- Edge Strength - Choose a color and edge. Use slider to adjust edge strength.
Available when using Bleached Style
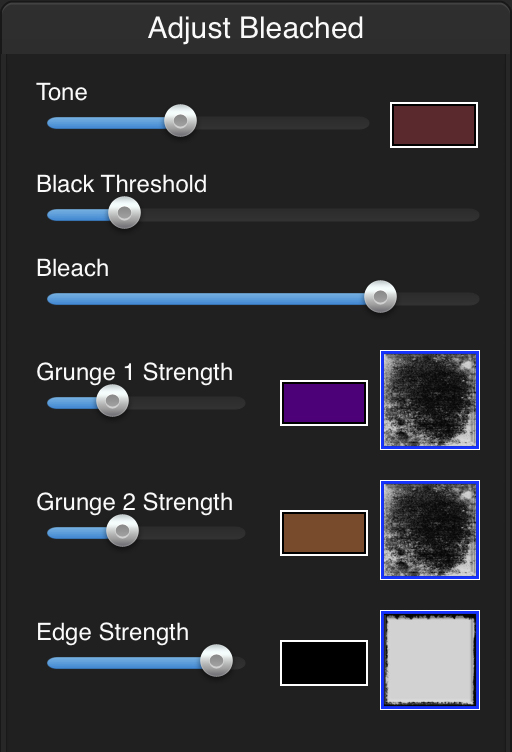
- Tone - Choose a color to tone the image. Move slider right to increase tone strength.
- Black Threshold - Darken the shadows in the image.
- Bleach - Wash the color out of the image.
- Grunge Strength 1 - Choose a color and texture for Grunge 1. Use slider to adjust color strength.
- Grunge Strength 2 - Choose a color and texture for Grunge 2. Use slider to adjust color strength.
- Edge Strength - Choose a color and edge. Use slider to adjust edge strength.
Available when using Grunge Style
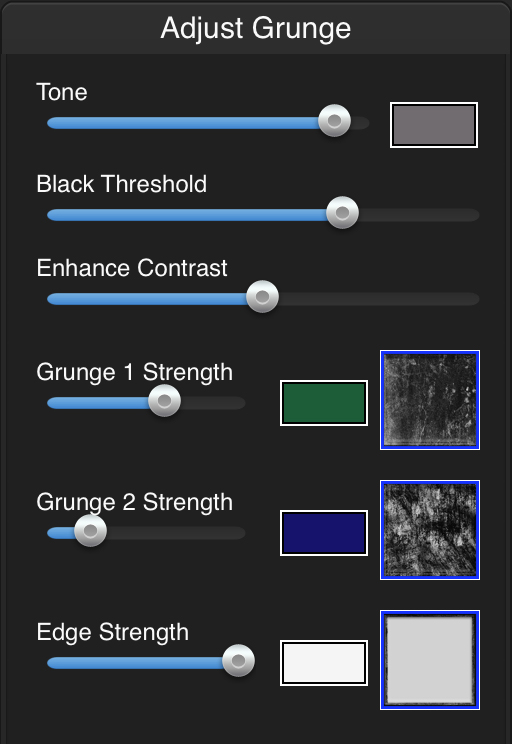
- Tone - Choose a color to tone the image. Move slider right to increase tone strength.
- Black Threshold - This slider darkens the shadows in the image.
- Enhance Contrast - Increase the ambiant light and brightness in the image. Move slider right to increase strength.
- Grunge Strength 1 - Choose a color and texture for Grunge 1. Use slider to adjust color strength.
- Grunge Strength 2 - Choose a color and texture for Grunge 2. Use slider to adjust color strength.
- Edge Strength - Choose a color and edge. Use slider to adjust edge strength.
Available when using Distressed Style
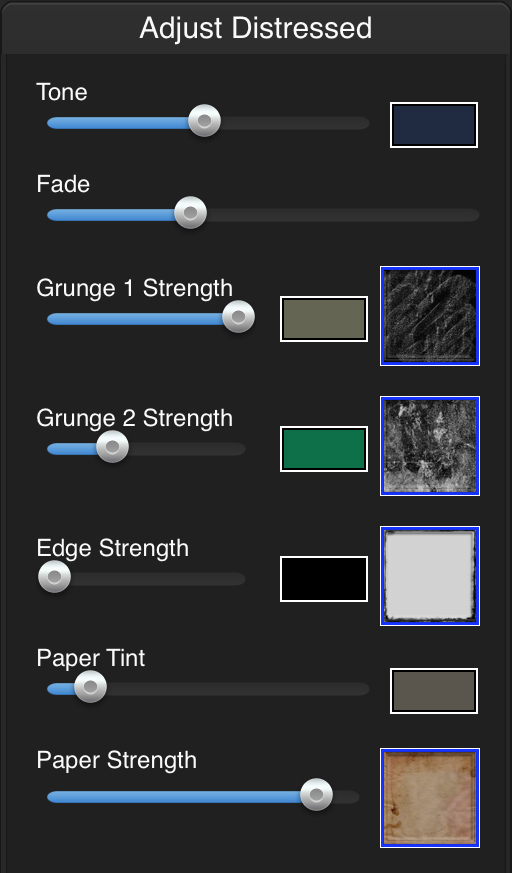
- Tone - Choose a color to tone the image. Move slider right to increase tone strength.
- Fade - Move slider right to fade color from the image.
- Grunge Strength 1 - Choose a color and texture for Grunge 1. Use slider to adjust color strength.
- Grunge Strength 2 - Choose a color and texture for Grunge 2. Use slider to adjust color strength.
- Edge Strength - Choose a color and edge. Use slider to adjust edge strength.
- Paper Tint - Tint paper by choosing a color. Use slider to increase tint strength.
- Paper Strength - Increase the amount of paper seen through the grunge texture and edge.
Available when using Gritty Style
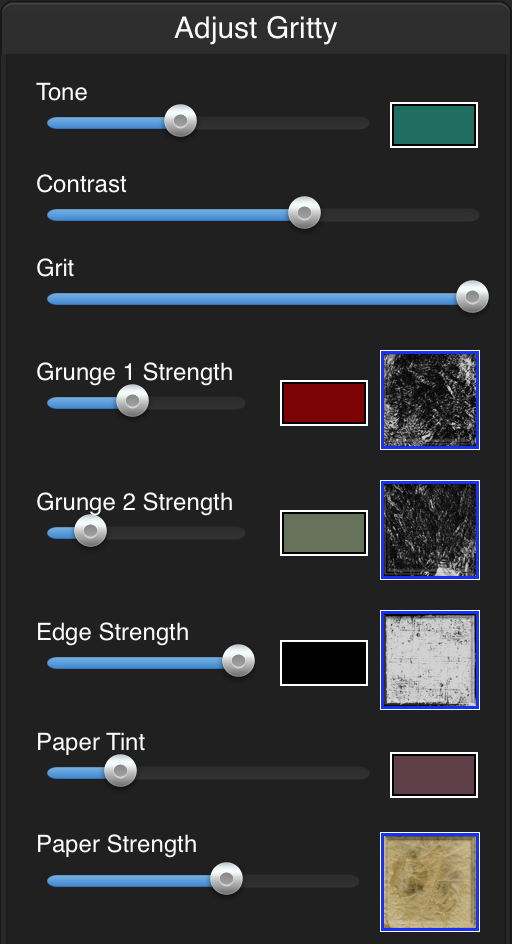
- Tone - Choose a color to tone the image. Move slider right to increase tone strength.
- Contrast - Increase the ambient light and brightness in the image. Move the slider right to increase contrast strength.
- Grit - Move the slider right to add grit to the image.
- Grunge Strength 1 - Choose a color and texture for Grunge 1. Use slider to adjust color strength.
- Grunge Strength 2 - Choose a color and texture for Grunge 2. Use slider to adjust color strength.
- Edge Strength - Choose a color and edge. Use slider to adjust edge strength.
- Paper Tint - Tint paper by choosing a color. Use slider to increase tint strength.
- Paper Strength - Increase the amount of paper seen through the grunge texture and edge.
Available when using Worn Style
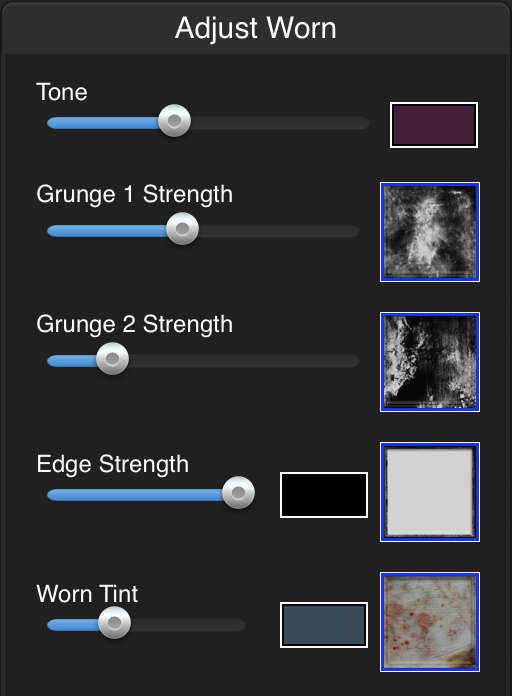
- Tone - Choose a color to tone the image. Move slider right to increase tone strength.
- Grunge Strength 1 - Choose a color and texture for Grunge 1. Use slider to adjust color strength.
- Grunge Strength 2 - Choose a color and texture for Grunge 2. Use slider to adjust color strength.
- Edge Strength - Choose a color and edge. Use slider to adjust edge strength.
- Worn Tint - Increase the amount of tint seen through the grunge texture and edge and use the color box to choose a color.
Available when using Worn Pop Style
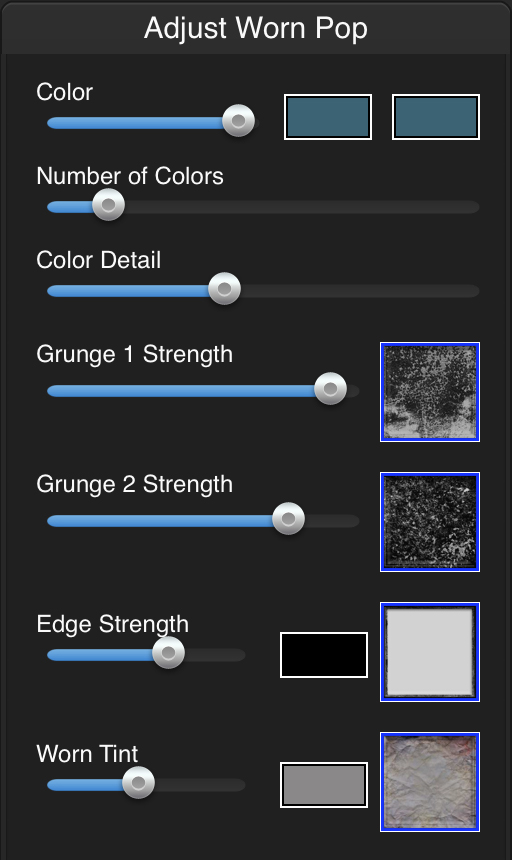
- Color - Choose two colors to tone the image. Move slider right to increase tone strength.
- Number of Colors - Controls how many colors are in the image.
- Color Detail - Move the slider right to add detail to your image.
- Grunge Strength 1 - Choose a color and texture for Grunge 1. Use slider to adjust color strength.
- Grunge Strength 2 - Choose a color and texture for Grunge 2. Use slider to adjust color strength.
- Edge Strength - Choose a color and edge. Use slider to adjust edge strength.
- Worn Tint - Increase the amount of tint seen through the grunge texture and edge and use the color box to choose a color.
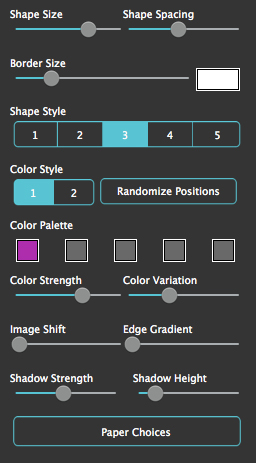
- Shape Size - Change the size of the shapes.
- Shape Spacing - Change the spacing between the shapes revealing the background paper. ( Not available when an Ooberlapping style is selected.)
- Border Size - Change the size of the border surrounding each shape. Use the color box to change the border color. ( Only Available when a Kyoobik Photo style is selected.)
- Shape Style - Select between the different shapes. There are different shapes available per style.
- Color Style: 1.Tint or 2.Kaleidoscope - Switch between using one or five tones to overlay your shapes. Use the color boxes to change the colors.
- Randomize Positions - Randomizes the position of the different sized shapes and also how many shapes are affected by the Tint Strength chosen below.
- Color Strength - Change the opacity of the colors overlaying your shapes.
- Color Variation - Change how different the color is in each shape.
- Image Shift - Change how much the image is rotated in each shape.
- Edge Gradient - Adds a gradient around the edge of the shapes to give them a more 3-dimensional look. ( Not available when an Oobik Shapes style is selected.)
- Shadow Strength - Change the opacity of the shadows of the individual shapes.
- Shadow Height - Choose far away the shapes appear from the background paper.
- Paper Choices - Opens the paper tab where you can choose which kind of paper to use.
Available when using Ooberlapping Style
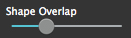
- Shape Overlap - Change how far the shapes overlap each other.
Paper Styles
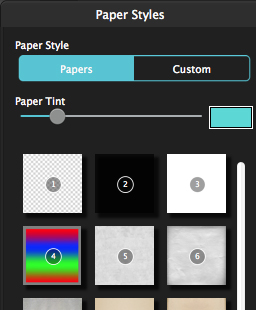
- Paper Style - Choose either to use one of the built in papers or a Custom paper (custom paper on Mac and Windows only)
- Paper Tint - Changes the opacity of the chosen color. Choose the paper tint color with the color box.
- Paper Thumbnails - Choose a paper to use as the background for the image.
Open the Paper Styles tab by clicking on Paper Choices
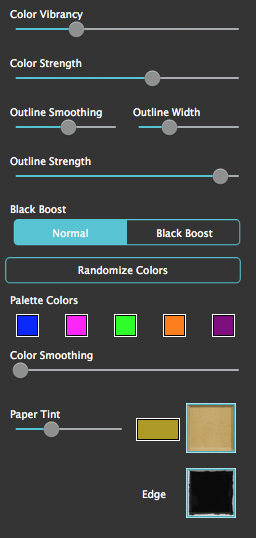
- Color Vibrancy - Enriches color in the image making them more vibrant.
- Color Strength - Change the opacity of the color.
- Color Area - Blends colors by increasing the colored areas ( Only available when using Multi-Color. )
- Outline Smoothing - Makes the outline more fluid and loose. Move the slider left to make the outline more ragged and rough.
- Outline Width - Change the thickness of the outline.
- Outline Strength - Change the opacity of the outline.
- Normal/ Black Boost - Switching this to Black Boost will add black to the darker parts of the image.
- Randomize Colors - Randomly picks five colors from the original image and uses them in the palette below. ( Only available when using Multi-Block. )
- Color Boxes - Change this color. ( Only available when using Multi-Block. )
- Color Smoothing - Blends the five palette colors by increasing colored areas for each one. ( Only available when using Multi-Block. )
- Paper Tint - Tint paper by choosing a color. Use the slider to increase tint strength. Use the color box to choose a color.
- Paper Thumbnails - Select a paper for the background.
- Edge Thumbnails - Change the edge around the image.
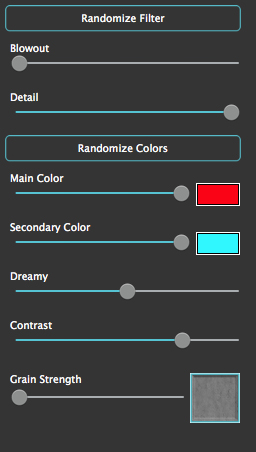
- Randomize Filter - Randomizes the custome color filter drastically changing your image.
- Blowout Slider - Blows out the highlights to make them brighter and more apparent.
- Detail Slider - Move left to add sharpness to your image.
- Randomize Colors - Randomizes the two colors listed below
- Color 1 and Color 2 - Choose the two colors to overlay your image, use the sliders to change the opacity of the colors.
- Contrast Slider - Deepens the dark areas in the image.
- Dreamy Slider - Gives the image a soft dreamy effect.
- Grain Strength Slider - Changes the opacity of the selected grain effect.
- Grain Thumbnails - Choose the grain effect used to overlay the image.
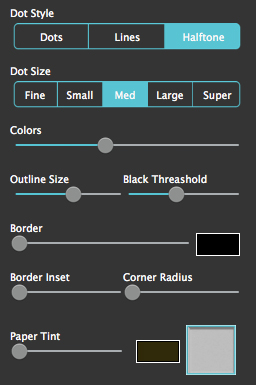
- Dots / Lines / Halftone - Choose which halftone style to use.
- Fine / Small / Med / Large / Super - Change the size of the Dots, Lines or Halftone effect on your image.
- Colors - Adjust the amount of colors in your image. ( Not available when Noir Comics or Halftone is chosen.)
- Outline Size - Control the width of the outline throughout your image.
- Black Threshold - Adjust the amount of black in your image.
- Border Width - Change the thickness of the Border around your image.
- Border Inset - Adjust the size of the paper on the outside of the Border.
- Corner Radius - Use this slider to make the corners of your border rounded.
- Border Color - Choose the color of your border.
Available when using Pop Comics and Pulp Comics
- Six Color Boxes - Choose the colors to use on your image. The image will change depending on the order of the colors chosen.
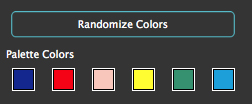
- Randomize Colors - Randomly chooses colors depending on which style is chosen. Pop Comics uses random Pop colors while Pulp Comic uses colors in the image.
Available when using Noir Comics
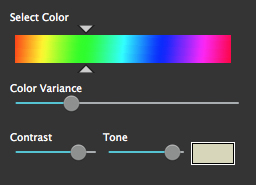
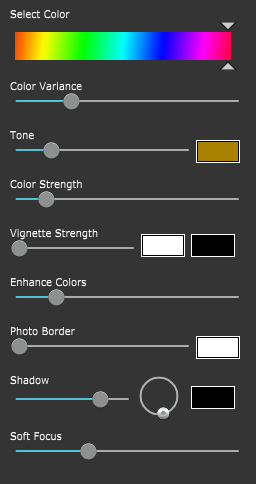
- Select Color - Choose a color to stand out in your image. The rest of the image will become black and white.
- Color Variance - Moving the slider right brings out more colors close to the selected color in your photo. If you notice areas of color you do not want move the slider left to reduce these areas.
- Contrast - Adjust the difference between the lightest and darkest tones in the image.
- Tone - Change the opacity of the color that will overlay your image. Use the Color Box to choose which color to use.
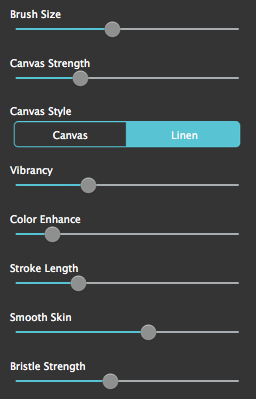
- Brush Size - Changes the thickness of the brush strokes.
- Canvas Strength - Change the opacity of the canvas texture.
- Canvas/ Linen - Choose between Canvas or Linen for the Canvas Texture.
- Vibrancy - Increases the blacks and whites in your image to create shadows and highlights.
- Color Enhance - Increase the Saturation of the image making the image more bright and colorful.
- Stroke Length - Change the length of the paint strokes. Move left to smooth some areas of color together or move right to increase some of the small details.
- Smooth Skin - Used to get rid of color banding and other unwanted noise.
- Bristle Strength - Change the opacity of the bristle texture on your image.
Available when using Bright and Colorful style
- Randomize Colors - Randomizes the six color boxes by choosing colors found in your image.
- Color Boxes - Choose the colors to use on your image. The image will change depending on the order of the colors chosen.
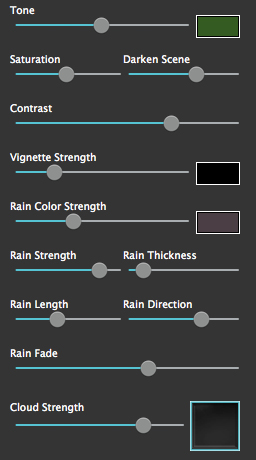
- Tone - Add a color tone to your image by moving the slider right. Use the color box to choose a custom color.
- Saturation - Move this slider right to add more of the original color back into the image.
- Darken Scene - Adds a dark rainy day feel to your picture.
- Contrast - Deepens the dark areas in the image.
- Vignette Strength - Shades off the edges of your image with the chosen color. Use the color box to choose a custom color. (Not available when using a Vintage Rain Style Preset.)
- Rain Color Strength - Move right to increase the rains color. Click on the color box to choose the color of the rain. (Not available when a Vintage Rain Style Preset is selected.)
- Rain Strength - Increase the rains opacity by moving the slider right. Move the slider left to create a light drizzle.
- Rain Thickness - Move this slider right to add more rain drops to the image.
- Rain Length - Move the slider right to make the drops long and streaky.
- Rain Direction - Use this slider to rotate the rain drops right, left or straight down with several variations in between.
- Rain Fade - Choose how much of your image is covered by rain. Move the slider right to bring the rain closer to the ground.
- Cloud Strength - Adjusts the opacity of the clouds.
- Cloud Thumbnails - Choose a cloud style to use on your image.
Available when using Romantic Rain style
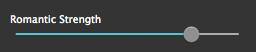
- Romantic Strength - Adds a soft romantic feel to your picture
Available when using Vintage Rain style
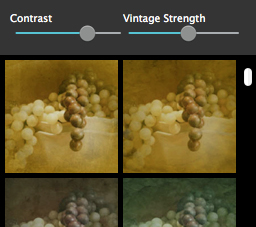
- Vintage Strength - Change the strength of the Vintage syle chosen below.
- Vintage Templates - Choose from our vintage effect presets which adds an old-fashioned look to the picture.
Heavenly Photo
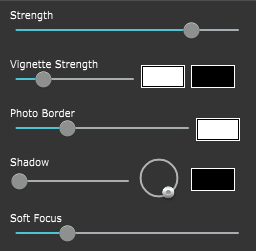
- Strength - Renders a dark dreamy black and white effect to the image. Move right to increase effect strength and left to blend original color with the effect.
- Vignette Strength - Frame the image with a white or black vignette. Move right to increase the opacity or left to remove it.
- Photo Border - Add a border around the image. Move right to increase the border width. Use the Color Box to choose a color for the border around your image.
- Shadow - Add a shadow to the image or photo border. Move right to increase shadow opacity. Note: A white background accommodates the shadow and will be seen on the saved output. For a transparent background ‘save’ as .png. Use the circle to change shadow direction and the color box to choose the shadow color.
- Soft Focus - Move right to increase how defocused your image is outside of the ellipse tool.To view the ellipse, select the ‘Soft Focus’ icon found on the grey bar above the image.
Heavenly Detail
- Strength - Renders a soft black and white effect to the image. Move right to increase effect strength and left to blend original color with the effect.
- Vignette Strength - Frame the image with a white or black vignette. Move right to increase the opacity or left to remove it.
- Photo Border - Add a border around the image. Move right to increase the border width. Use the Color Box to choose a color for the border around your image.
- Shadow - Add a shadow to the image or photo border. Move right to increase shadow opacity. Note: A white background accommodates the shadow and will be seen on the saved output. For a transparent background ‘save’ as .png. Use the circle to change shadow direction and the color box to choose the shadow color.
- Soft Focus - Move right to increase how defocused your image is outside of the ellipse tool.To view the ellipse, select the ‘Soft Focus’ icon found on the grey bar above the image.
Romantic Colors
- Select Color - Use this for selective colorization in the image. To select a color move the slider along the color picker and release. If you stopped under red then only the red areas in the image will be seen.
- Color Variance - Move the slider right to bring out more of the selected color. If you notice too much color, move the slider left to reduce the amount.
- Tone - Create a mood or add depth using the tone slider. Select a color then move slider right to tone the image. Use the Color Box to select a custom color.
- Color Strength - Blend the original color with the selective one. Move slider right to increase the original color or left to remove it.
- Vignette Strength - Frame the image with a white or black vignette. Move right to increase the opacity or left to remove it.
- Enhance Colors - Increase the Saturation of the image making the image more bright and colorful.
- Photo Border - Add a border around the image. Move right to increase the border width. Use the Color Box to choose a color for the border around your image.
- Shadow - Add a shadow to the image or photo border. Move right to increase shadow opacity. Note: A white background accommodates the shadow and will be seen on the saved output. For a transparent background ‘save’ as .png. Use the circle to change shadow direction and the color box to choose the shadow color.
- Soft Focus - Move right to increase how defocused your image is outside of the ellipse tool.To view the ellipse, select the ‘Soft Focus’ icon found on the grey bar above the image.
Dreamy Photo
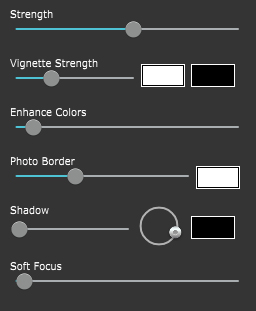
- Strength - Renders a dreamy-like quality to the image. Move slider right to increase effect strength.
- Vignette Strength - Frame the image with a white or black vignette. Move right to increase the opacity or left to remove it.
- Enhance Colors - Increase the Saturation of the image making the image more bright and colorful.
- Photo Border - Add a border around the image. Move right to increase the border width. Use the Color Box to choose a color for the border around your image.
- Shadow - Add a shadow to the image or photo border. Move right to increase shadow opacity. Note: A white background accommodates the shadow and will be seen on the saved output. For a transparent background ‘save’ as .png. Use the circle to change shadow direction and the color box to choose the shadow color.
- Soft Focus - Move right to increase how defocused your image is outside of the ellipse tool.To view the ellipse, select the ‘Soft Focus’ icon found on the grey bar above the image.
Romantic Scene
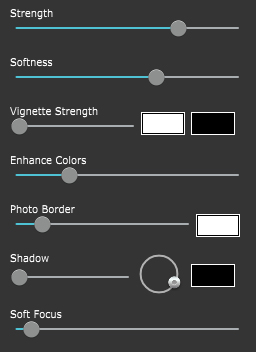
- Strength - Renders a dark romantic feel to the image. Move slider right to increase effect strength.
- Softness - Adds a dreamy softness to the image.
- Vignette Strength - Frame the image with a white or black vignette. Move right to increase the opacity or left to remove it.
- Enhance Colors - Increase the Saturation of the image making the image more bright and colorful.
- Photo Border - Add a border around the image. Move right to increase the border width. Use the Color Box to choose a color for the border around your image.
- Shadow - Add a shadow to the image or photo border. Move right to increase shadow opacity. Note: A white background accommodates the shadow and will be seen on the saved output. For a transparent background ‘save’ as .png. Use the circle to change shadow direction and the color box to choose the shadow color.
- Soft Focus - Move right to increase how defocused your image is outside of the ellipse tool.To view the ellipse, select the ‘Soft Focus’ icon found on the grey bar above the image.
Morning Light
- Strength - Renders a sunlit effect to your image. Move slider right to increase effect strength.
- Vignette Strength - Frame the image with a white or black vignette. Move right to increase the opacity or left to remove it.
- Photo Border - Add a border around the image. Move right to increase the border width. Use the Color Box to choose a color for the border around your image.
- Shadow - Add a shadow to the image or photo border. Move right to increase shadow opacity. Note: A white background accommodates the shadow and will be seen on the saved output. For a transparent background ‘save’ as .png. Use the circle to change shadow direction and the color box to choose the shadow color.
- Soft Focus - Move right to increase how defocused your image is outside of the ellipse tool.To view the ellipse, select the ‘Soft Focus’ icon found on the grey bar above the image.
Captured Moments
- Strength - Levels out shadows and light then creates mood with tone. Move slider right to increase tone strength.
Use the Color Box to select a custom color. - Vignette Strength - Frame the image with a white or black vignette. Move right to increase the opacity or left to remove it.
- Enhance Colors - Increase the Saturation of the image making the image more bright and colorful.
- Photo Border - Add a border around the image. Move right to increase the border width. Use the Color Box to choose a color for the border around your image.
- Shadow - Add a shadow to the image or photo border. Move right to increase shadow opacity. Note: A white background accommodates the shadow and will be seen on the saved output. For a transparent background ‘save’ as .png. Use the circle to change shadow direction and the color box to choose the shadow color.
- Soft Focus - Move right to increase how defocused your image is outside of the ellipse tool.To view the ellipse, select the ‘Soft Focus’ icon found on the grey bar above the image.
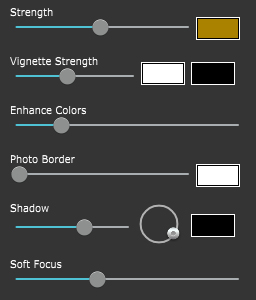
Golden Memories
- Strength - Combines softness with dreamy tone for a timeless quality. Move slider right to increase tone strength. Use the Color Box to select a custom color.
- Vignette Strength - Frame the image with a white or black vignette. Move right to increase the opacity or left to remove it.
- Enhance Colors - Increase the Saturation of the image making the image more bright and colorful.
- Photo Border - Add a border around the image. Move right to increase the border width. Use the Color Box to choose a color for the border around your image.
- Shadow - Add a shadow to the image or photo border. Move right to increase shadow opacity. Note: A white background accommodates the shadow and will be seen on the saved output. For a transparent background ‘save’ as .png. Use the circle to change shadow direction and the color box to choose the shadow color.
- Soft Focus - Move right to increase how defocused your image is outside of the ellipse tool.To view the ellipse, select the ‘Soft Focus’ icon found on the grey bar above the image.
Warm Glow
- Strength - Adds a light glow to the image then combines it with warm tones for atmosphere. Move slider right to increase tone strength. Use the color box to choose a custom color
- Vignette Strength - Frame the image with a white or black vignette. Move right to increase the opacity or left to remove it.
- Enhance Colors - Increase the Saturation of the image making the image more bright and colorful.
- Photo Border - Add a border around the image. Move right to increase the border width. Use the Color Box to choose a color for the border around your image.
- Shadow - Add a shadow to the image or photo border. Move right to increase shadow opacity. Note: A white background accommodates the shadow and will be seen on the saved output. For a transparent background ‘save’ as .png. Use the circle to change shadow direction and the color box to choose the shadow color.
- Soft Focus - Move right to increase how defocused your image is outside of the ellipse tool.To view the ellipse, select the ‘Soft Focus’ icon found on the grey bar above the image.
Day Dream
- Strength - Enhances softness in light areas and deepens shadows in dark ones for a day lit and dreamy feel.
- Vignette Strength - Frame the image with a white or black vignette. Move right to increase the opacity or left to remove it.
- Photo Border - Add a border around the image. Move right to increase the border width. Use the Color Box to choose a color for the border around your image.
- Shadow - Add a shadow to the image or photo border. Move right to increase shadow opacity. Note: A white background accommodates the shadow and will be seen on the saved output. For a transparent background ‘save’ as .png. Use the circle to change shadow direction and the color box to choose the shadow color.
- Soft Focus - Move right to increase how defocused your image is outside of the ellipse tool.To view the ellipse, select the ‘Soft Focus’ icon found on the grey bar above the image.
Soft Touch
- Strength - Combines softness and a touch of light for a soft feel.
- Vignette Strength - Frame the image with a white or black vignette. Move right to increase the opacity or left to remove it.
- Enhance Colors - Increase the Saturation of the image making the image more bright and colorful.
- Photo Border - Add a border around the image. Move right to increase the border width. Use the Color Box to choose a color for the border around your image.
- Shadow - Add a shadow to the image or photo border. Move right to increase shadow opacity. Note: A white background accommodates the shadow and will be seen on the saved output. For a transparent background ‘save’ as .png. Use the circle to change shadow direction and the color box to choose the shadow color.
- Soft Focus - Move right to increase how defocused your image is outside of the ellipse tool.To view the ellipse, select the ‘Soft Focus’ icon found on the grey bar above the image.
HDR, HDArt and Contrasted HDR
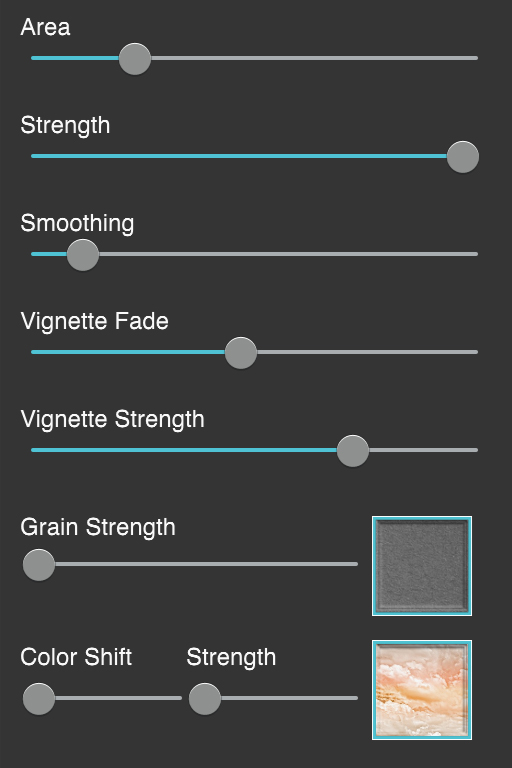
- Area Slider - Changes HDR between the light and dark area.
- Strength Slider - Adjust the opacity of the HDR effect. If you are using Contrasted HDR it also Deepens the dark areas in the image.
- Smoothing Slider - Used to remove unwanted noise from the image
- Vignette Fade Slider - Adds a darkened edge around the image move the slider right to increase the distance it covers
- Vignette Strength Slider - Changes the opacity of the Vignette
- Grain Strength Slider - Changes the opacity of the chosen grain effect
- Grain Thumbnails - Opens up a tab where you can choose a grain effect to overlay the image
- Color Shift Slider - Move the slider to change the tint of the chosen color.
- Color Strength Slider - Move the slider right to increase the amount of color tone added to the image or move it left to add the original color back into the image
- Color Thumbnails - Opens up a tab where you can choose a color tint to overlay the image
Contrasted Light
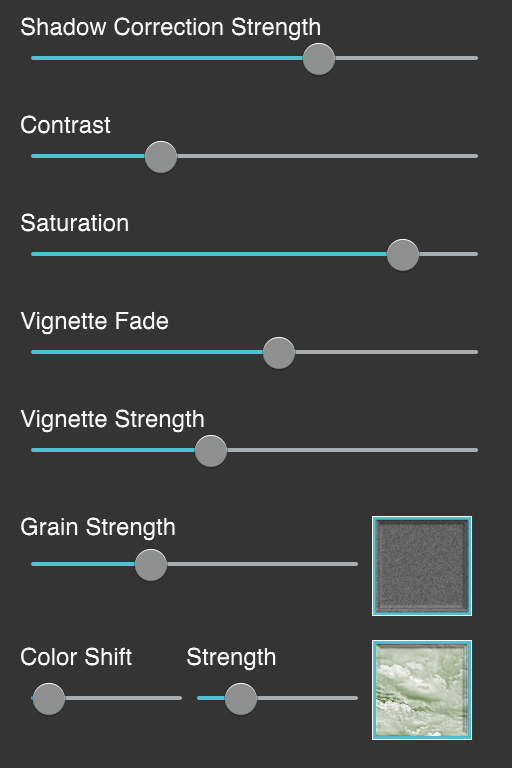
- Shadow Correction Slider - Remove unwanted shadows from the image
- Contrast Slider - Deepens the dark areas in the image.
- Saturation Slider - Move this slider right to add more of the original color back into the scene.
- Vignette Fade Slider - Adds a darkened edge around the image move the slider right to increase the distance it covers
- Vignette Strength Slider - Changes the opacity of the Vignette
- Grain Strength Slider - Changes the opacity of the chosen grain effect.
- Grain Thumbnails - Opens up a tab where you can choose a grain effect to overlay the image
- Color Shift Slider - Move the slider to change the tint of the chosen color.
- Color Strength Slider - Move the slider right to increase the amount of color tone added to the image or move it left to add the original color back into the image
- Color Thumbnails - Opens up a tab where you can choose a color to overlay over the image
Black and White
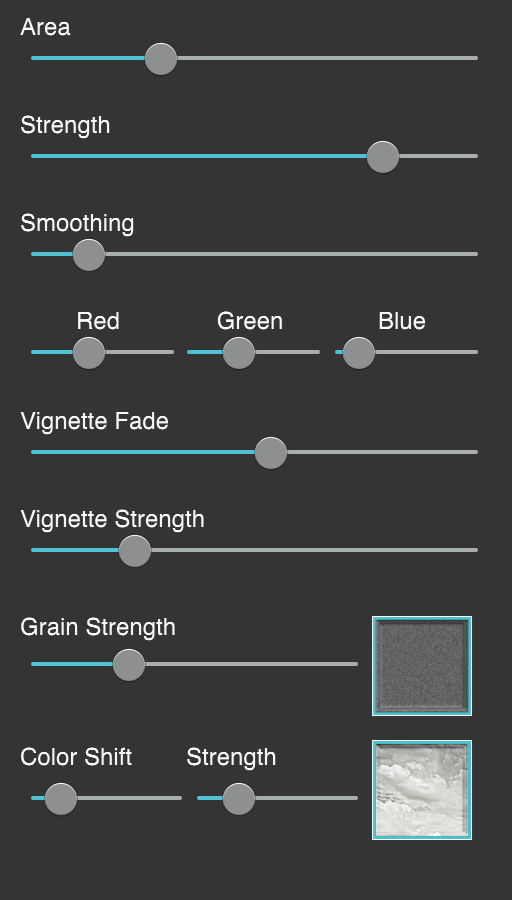
- Area Slider - Change HDR between the light and dark area.
- Strength Slider - Adjust the opacity of the HDR effect.
- Smoothing Slider - Used to remove unwanted noise from the image
- Red - Red Filter strength
- Blue - Blue Filter Strength
- Green - Green Filter strength
- Vignette Fade Slider - Adds a darkened edge around the image move the slider right to increase the distance it covers
- Vignette Strength Slider - Changes the opacity of the Vignette
- Grain Strength Slider - Changes the opacity of the chosen grain effect
- Grain Thumbnails - Opens up a tab where you can choose a grain effect to overlay the image
- Color Shift Slider - Move the slider to change the tint of the chosen color.
- Color Strength Slider - Move the slider right to increase the amount of color tone added to the image or move it left to add the original color back into the image
- Color Thumbnails - Opens up a tab where you can choose a color to overlay the image
Shadows and Lights
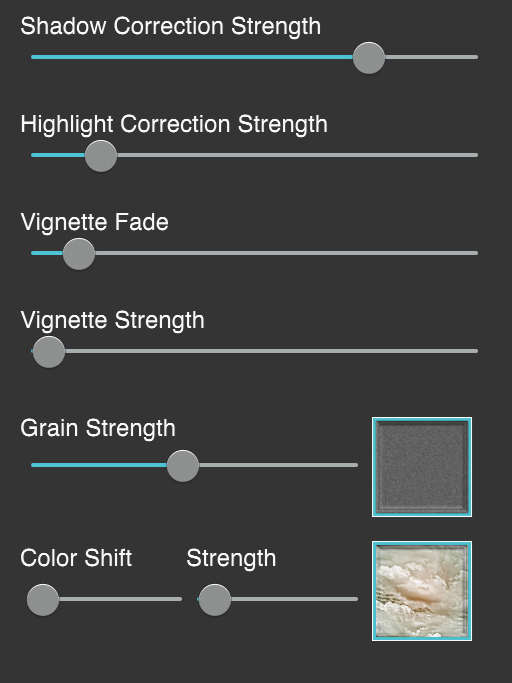
- Shadow Correction Slider - Remove unwanted shadows from the image
- Highlight Correction Slider - Remove unwanted highlights from the image
- Vignette Fade Slider - Adds a darkened edge around the image move the slider right to increase the distance it covers
- Vignette Strength Slider - Changes the opacity of the Vignette
- Grain Strength Slider - Changes the opacity of the chosen grain effect.
- Grain Thumbnails - Opens up a tab where you can choose a grain effect to overlay the image
- Color Shift Slider - Move the slider to change the tint of the chosen color.
- Color Strength Slider - Move the slider right to increase the amount of color tone added to the image or move it left to add the original color back into the image
- Color Thumbnails - Opens up a tab where you can choose a color to overlay over the image
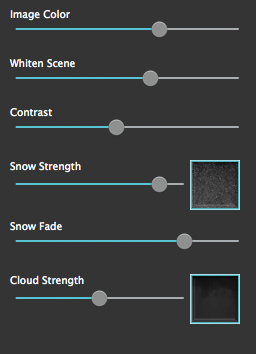
- Image Color - Move this slider right to add more of the original color back into the image.
- White Scene - Adjust how frosty the picture appears by moving this slider right.
- Contrast - Deepens the dark areas in the image.
- Snow Strength - Adjusts the opacity of the snow.
- Snow Thumbnails - Choose a snow style varying from light to heavy snow fall.
- Snow Fade - Choose how much of your image is covered by snow. Move the slider right to bring falling snow closer to the ground.
- Cloud Strength - Adjusts the opacity of the clouds.
- Cloud Thumbnails - Choose a cloud style to use on your image.
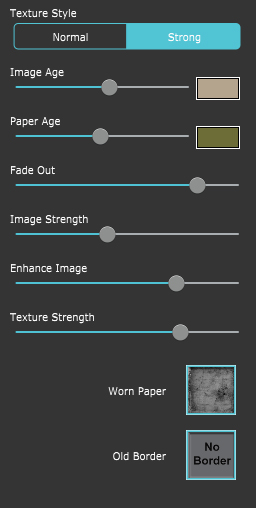
- Texture Style - Choosing Strong allows more texture to be seen through the image. (Only available when an Antique Photo Preset is selected. )
- Image Age - With this slider you can change the aging effect on your photo. Moving the slider right will add more color tone to your photo. Use the color box to choose a color.
- Paper Age - Moving this slider right changes the aging effect on the overlay and border. Use the color box to pick a custom age color. (Only available when using Antique Photo or Faded Time. )
- Fade Out - Fade Out blends the texture in a vignette fashion around your photo. Moving the slider right decreases the vignette amount to allow more of the photo to be seen.
- Image Strength - The Image Strength allows you the choose how much of your photo will be seen through your vintage texture. Fade photo by moving the slider left.
- Enhance Image - Enhances the light and dark areas of your image making them stand out more.
- Texture Strength - Use the slider to adjust the opacity of the texture. Moving the slider right will darken the texture.
- Texture Thumbnails - Choose a grungey texture to overlay your image.
- Old Border Thumbnails - Choose a border style to be placed around your image. Use the Texture Strength slider to change how much of the paper border is shown.
Tools
Use the Tools to further edit your image
Brush Tools

- Erase - Remove the outline on specific parts of the image.
- Add - Add back the effect that was removed by the Erase Tool.
- Reset - Resets the image to before The Brush Tool was used.
- Brush Size - Change the diameter of The Brush Tools.
- Opacity - Change the opacity of the Brush Tools.

- Object Editor - Displays the Transform Tool and the Object Editor Tools that allow you to edit, add and remove objects
- Brush Tool - Displays the Color Brush Tools allowing you to brush on color and remove color
- Eraser Tool - Displays the Eraser Tools allowing you to remove chalk in unwanted areas.
Object Editor Tools

- Add Image - Add another image to your chalkboard
- Add Accents - Add some accents to add character to your chalk art
- Add Text - Add text to your chalkboard with a variety of different fonts
- Reset Objects - Removes all objects that have been added and resets the image back to the original size
Color Brush Tools

- Colorbox - Choose a color to brush onto your chalk art
- Eraser - Use this to erase brushed on color. Use the brush size and slider to change the size of eraser.
- Reset - This will removes the brushed on color to the oject that is selected
- Brush Size - Change the diameter of the Color Brush tool
- Strength - Change the opacity of the Color Brush tool
Eraser Tools

- Reset Eraser - This will bring back all the erased chalk to the oject that is selected
- Brush Size - Change the diameter of the Eraser tool
- Strength - Change the opacity of the Eraser tool
Transform Tool Buttons
- Delete Deletes the chosen object
- Copy - Creates a copy of the selected object

- Spotlight - Show or hide the spotlight(s) placed on the image.
- Add Spotlight - Add a spotlight to the image - use multiple spotlights for a creative look. Resize the spotlight using anchor points on ellipses placed on top of the image.
- Delete Spotlight - Delete spotlight(s) placed on the image.

- Erase - Remove the tiles from specific parts of the image. You can drag through multiple tiles to delete them.
- Add - Add back the tiles that were removed by the Erase Tool.
Fun Stuff Tools

- Transform Tool - Show or hide the transform tool around the Fun Stuff and Chat Bubbles which can be used to change the size and rotate.
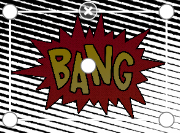
- Fun Stuff - Choose a clipart from our Fun Stuff collection to add to your image.
- Chat Bubble - Choose a chat bubble which you can then add text to.
How to Use - Fun Stuff and Speech Bubbles
- Delete - To delete Fun Stuff or Chat Bubbles you need to click on the Transform Tool located above the image next to where it says "Fun Tool". After you do that click on a fun object and an X will appear, click it to delete.
- Edit Type - Click on the inside of the speech bubble to bring up the text editor. Here you can type a message or change the text color, alignment and font style.
- Resize - To resize or rotate the Chat Bubbles and Funstuff - click on the Transform Tool then use the circles in the corners of the transform tool to stretch or rotate the Fun Stuff/ Chat Bubble.
- Move - To move the speech bubble and fun stuff - click on the Tranform Tool then click and hold anywhere in the box of the Chat Bubbles/ Fun Stuff to move it.
Editing Text
To edit the text in a bubble simply click the text in a bubble.
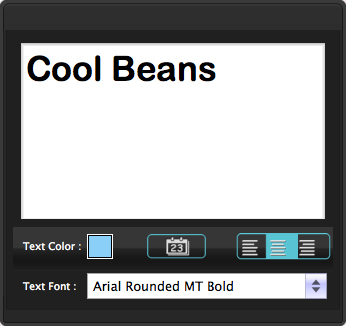
- Text Color - Choose the color of the text in the bubble.
- Date - Add the current date to the text field.
- Text Alignment - Pick the orientation of the text in the selected bubble.
- Text Style - Select the font type for the bubble. Tons of fonts are included
Detail Spotlight Tool

- Detail Tool - Hide/Show the detail spotlights
- Add Detail - Add a detail spotlight
- Delete Detail - Removes the selected detail spotlight
- Detail Strength - Increase the detail in the spotlight
- Apply - Click this button after moving the detail spotlight to apply the adjustments
Brush Tools
- Erase - Remove the outline on specific parts of the image.
- Add - Add back the effect that was removed by the Erase Tool.
- Reset - Resets the image to before The Brush Tool was used.
- Brush Size - Change the diameter of The Brush Tools.
- Opacity - Change the opacity of the Brush Tools.
Brush Tools

- Erase - Remove the effect on specific parts of the image.
- Add - Add back the effect that was removed by the Erase Tool.
- Reset - Resets the image to before The Brush Tools was used.
- Brush Size - Change the diameter of The Brush Tools.
- Opacity - Change the opacity of the Brush Tools.
- Soft Focus - Show or hide the ellipse tool placed on the image. Adjust where on the image you want the soft focus applied by moving, rotating and sizing the tool.
Brush Tools

- Erase - Remove the effect on specific parts of the image.
- Add - Add back the effect that was removed by the Erase Tool.
- Reset - Resets the image to before The Brush Tool was used.
- Brush Size - Change the diameter of The Brush Tools.
- Opacity - Change the opacity of the Brush Tools.
Brush Tools

- Erase - Remove the effect on specific parts of the image.
- Add - Add back the effect that was removed by the Erase Tool.
- Reset - Resets the image to before The Brush Tools was used.
- Brush Size - Change the diameter of The Brush Tools.
- Opacity - Change the opacity of the Brush Tools.
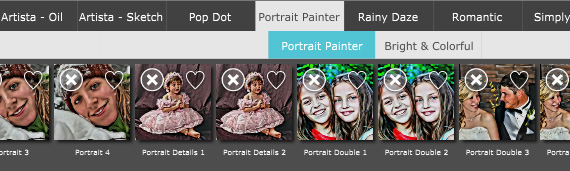
Presets
Style Browser

Click to hide the Style Browser

Randomize the effect using the chosen preset style

Create a Preset using your current settings

Permanetly delete a Preset
Change App
Click an apps name to switch to it
Saving Presets
Once you have applied a preset and modified it using the adjust tabs, you can save your own custom preset by clicking the Plus Symbol in the bottom right corner.
Favoriting and Deleting Presets
Favorite a preset to move it to the front of the presets list for quick access. To favorite or delete a preset click down on a preset thumbnail and hold until an X and heart appears, click the heart to favorite it or click the X to delete it.