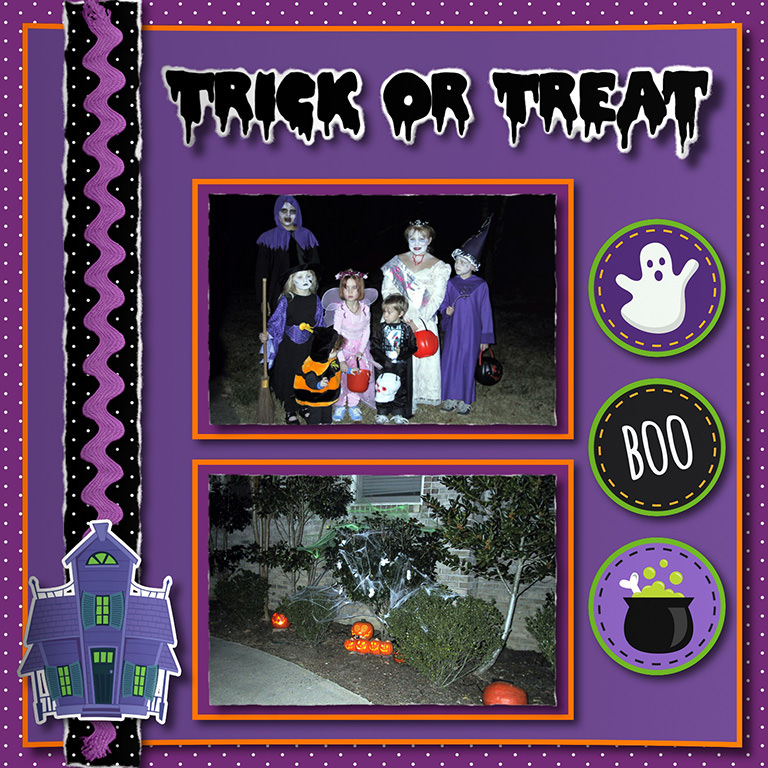
This creative tutorial shows you how to create a handcrafted Halloween Scrapbook page with all the traditional elements like: Layered Photo Frames, Ripped Images, Fabric Embellishment, Halloween Stickers and Ripped Spooky Lettering.
If a printed invitation is desired, Rip Studio generates realistic High Resolution Rips, Curls, Texture and Shadows in full print resolution—all with control over every element create inside the app. We guarantee every creation you make will be unique and one of-a-kind!
Scrapbook Page Size: 6 x 6 in. (1596 x 1596 px.), or easily enlarge it to a 12 x 12 using the resolution box found inside the app on the top right corner of the document. Click on value and change the height to 3192 and width 3192 px.
First download the Demo of Rip Studio (choose platform): Mac | Win (This tutorial requires the latest version of Rip Studio)
Then download the Project Halloween Scrapbook Page (click link): Start Download
The folder contains: Black Polka Dot Ribbon, Halloween Stickers, Haunted House, Photo-1_FPO, Photo-2_FPO, Purple Photo Frame, Purple Polka Dots and Purple Ric Rac Ribbon. It also has an image of the finished example of the invitation and a Project. This project will help you understand how the invitation was set up inside Rip Studio that you can refer to it at the end of the tutorial and compare.
Create Purple Background Paper with Edge Curl, Border and Texture
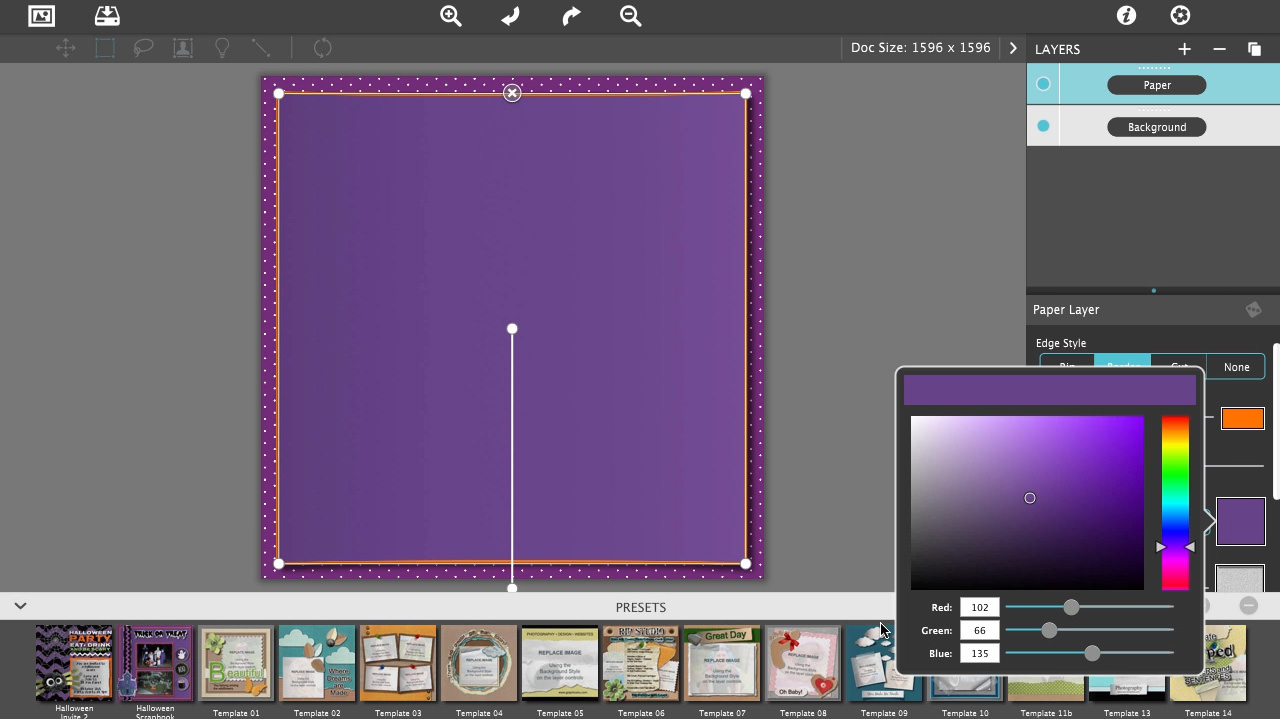
Add a Paper Layer by clicking the + symbol next to LAYERS and select Paper
Resize the Paper Layer using the selection handles in the corners of the layer
Change the Edge Style to Border and click the Color Box next to Edge Width and change it to Orange (R:255 G:114 B:0)
Set the Edge Width to 15 and make sure the Edge Curl is around 20
Check that Background Style is set to the second option which is Solid then click the Color Box next to it and change the color to Purple (R:102 G:66 B:135)
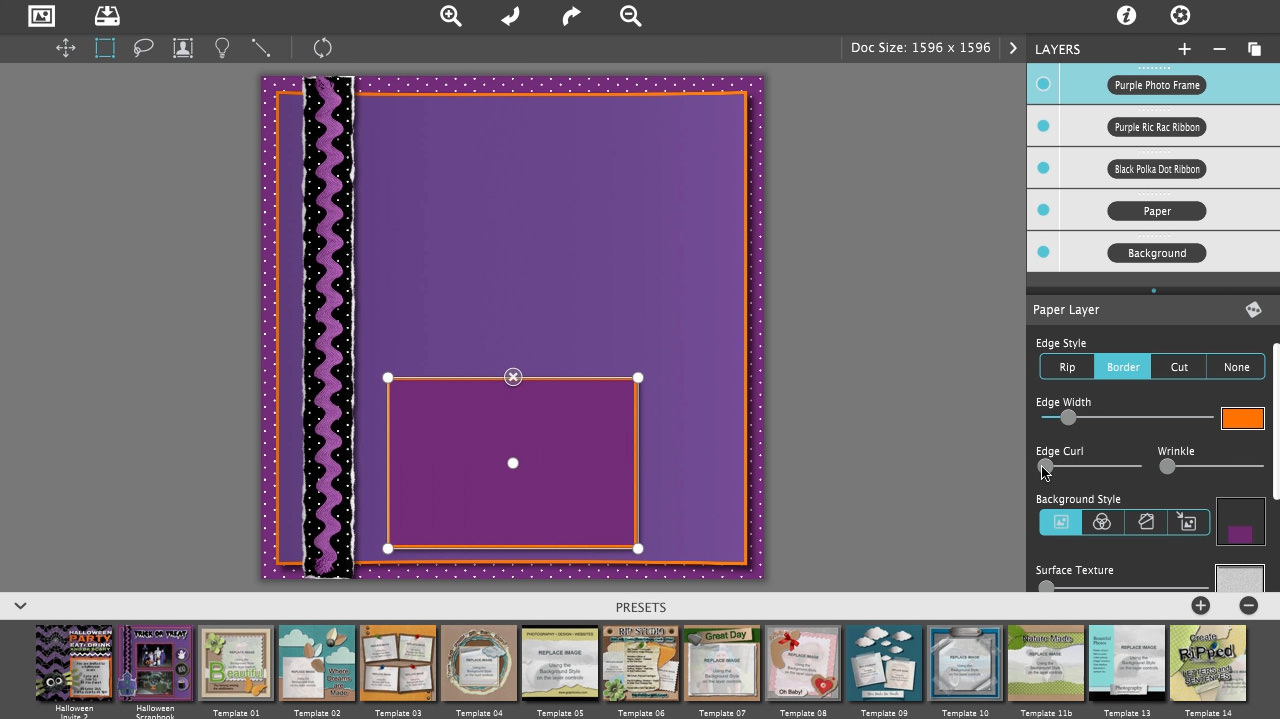
In the Halloween Scrapbook Page folder locate Black Polka Dot Ribbon and drag and drop it into Rip Studio and click the Reset Button (reset button) to reset its position
Set the Edge Style to Rip and the Edge Width to 25 then set Edge Curl to 20
Add Ribbon Embellishement
In the Halloween Scrapbook Page folder locate Purple Ric Rac Ribbon and drag and drop it into Rip Studio and click the Reset Button (reset button) to reset its position
Set Edge Style to None
Step 3 - Create Photo Frame
You can create a photo frame using a Paper Layer the same way you made the purple paper background, or you can drag and drop in a pre-made photo frame. This example is to show you another way to create one.
In the Halloween Scrapbook Page folder locate Purple Photo Frame and drag and drop it into Rip Studio and click the Reset Button (reset button) to reset its position
Change the Edge Style to Border and click the Color Box next to Edge Width and change it to Orange (R:255 G:114 B:0)
Set Edge Width to 15 and Edge Curl to 0
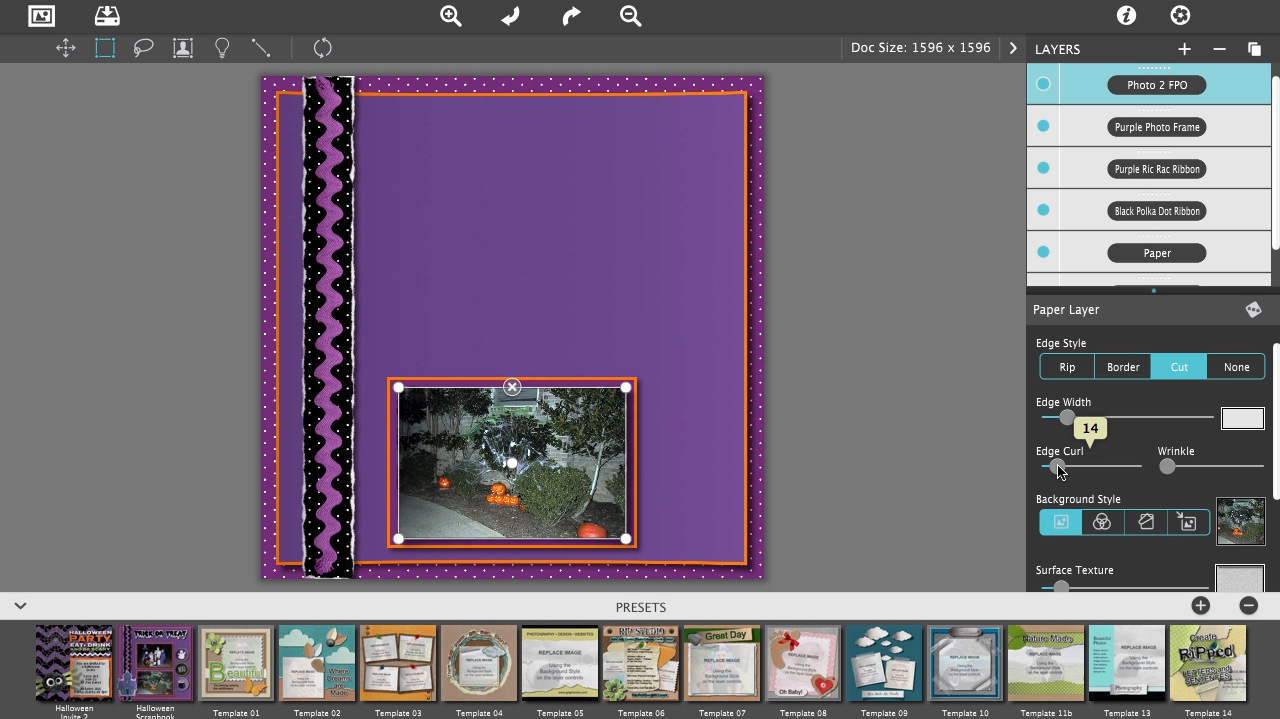
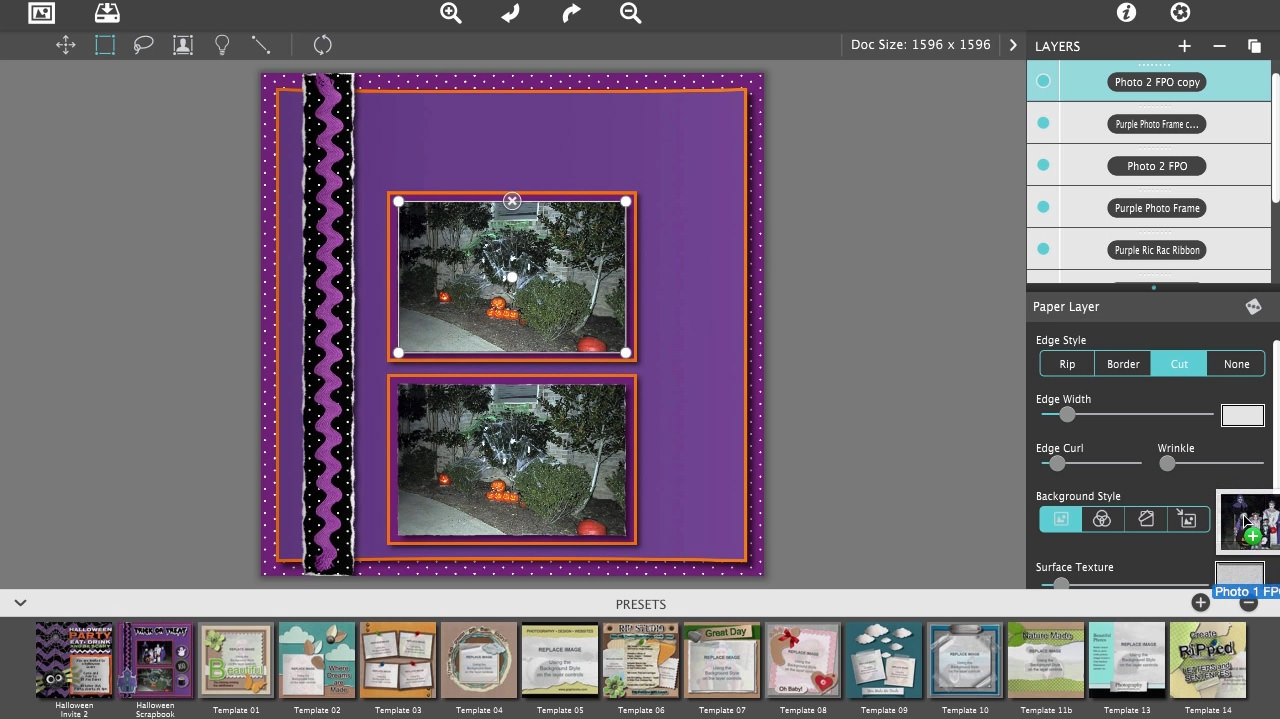
Step 5 - Add a Photo
In the Halloween Scrapbook Page folder locate Photo-2_FPO and drag and drop it into Rip Studio (In Step 7 we will show you how to update the layer with a different photo.)
Reset the images position by clicking the Reset Button (reset button) located above the image
Resize anad move the image to fit inside the photo frame using the selection handles in the corners of the layer (Use the arrows on your keyboard to nudge the layer for finite positioning)
Set the Edge Style to Cut, the Edge Width to 15 and the Edge Curl to 14
Step 6 - Duplicate Photo Layers
To duplicate the layers first select both the Purple Photo Frame layer and the Photo 2 FPO layer by holding down cmd or ctrl on your keyboard and click each layer
Once both layers are selected click the Duplicate Button (duplicate button) in the top right corner of the app and select Duplicate Layer.
After the layers have been copied position them above the original layers. (Use the Shift Key while moving to keep the layers lined up.)
Step 7 - Replace the Photo
To Replace the photo in a layer select the layer labeled Photo 2 FPO copy then drag in Photo 1 FPO (from the Halloween Scrapbook Page folder) and drop it on the thumbnail on the end of the Background Style. NOTE: There are two ways to add your photo the the scrapbook. First is to drag and drop the photo on the open application. If you add them this way the settings will go back to the default ones and will require you to set them again. If you add the photo using the Background Style it will retain the settings, however you may need to resize the picture if it is a different size.
Step 8 - Transparent Graphics
Add Haunted House
In the Halloween Scrapbook Page folder locate Haunted House and drag and drop it into Rip Studio and click the Reset Button (reset button) to reset its position
Set the Edge Style to None and Edge Curl to 50
If needed resize and center the house on the ribbon using the selection handles
Add Halloween Stickers
In the Halloween Scrapbook Page folder locate Halloween Stickers and drag and drop it into Rip Studio and click the Reset Button (reset button) to reset its position
Set the Edge Style to None and Edge Curl to 50
NOTE: These files have transparent backgrounds and were designed this way. If you want to make your own, use an editing app to remove background then save the file as a .png or .tif
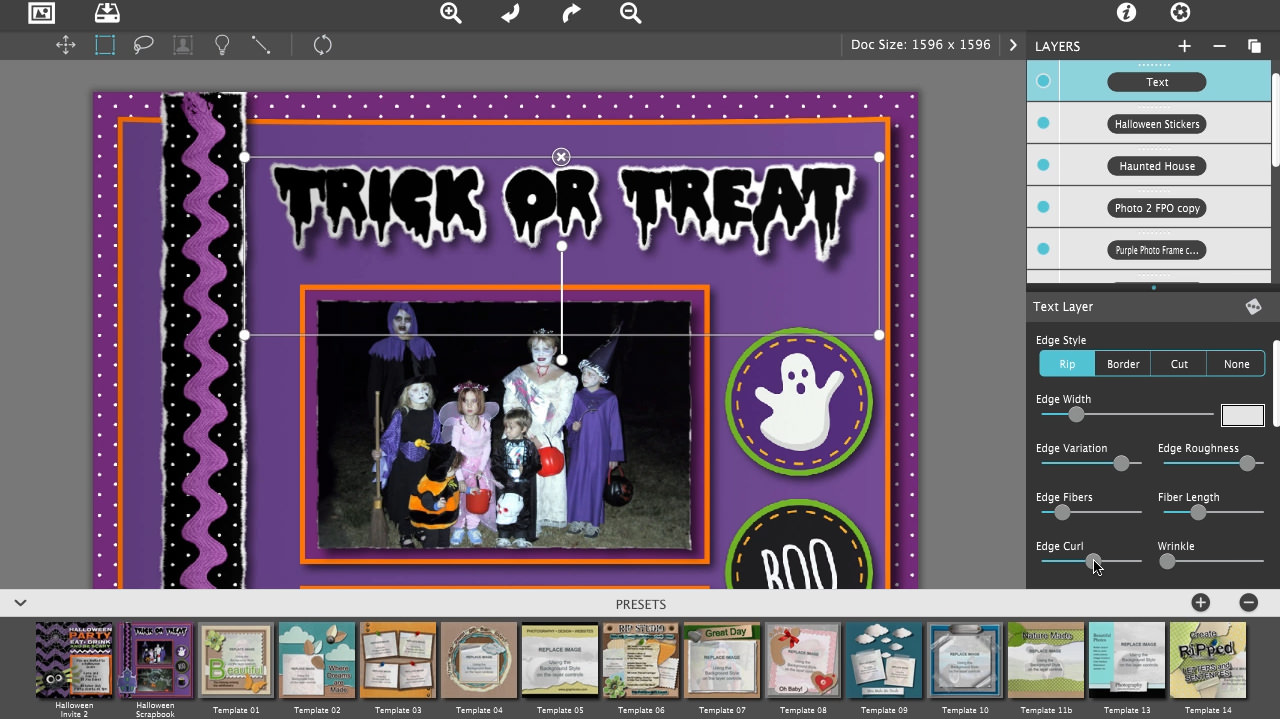
Step 9 - Text Layer
Finish up the composition by adding text.
Add a Text Layer by clicking the + symbol next to LAYERS and select Text.
On the panel below scroll down to the text editor. Highlight the text in the box and type: Trick or Treat
Use the Apply button to update the text on-document
Change the font to: Double Feature (You can download the font here: http://www.dafont.com/doublefeature.font)
Resize and position the text
Set Edge Style to Rip, Edge Width to 20, Edge Fibers to 20 and Edge Curl to 54
You have made a digital handmade scrapbook page with all the qualities of a traditional one.
Email it to your friends, or create an event and post it.
If you desire a printed version go ahead and do it! The file is a full 266 resolution image.