
Detailed instructions below explains everything happening in this video. Download a demo version of Pastello: ![]() Mac |
Mac | ![]() Windows
Windows
Intro | Step 1 | Step 2 | Step 3 | Step 4 | Step 5 | Step 6 | Keyboard Shortcuts
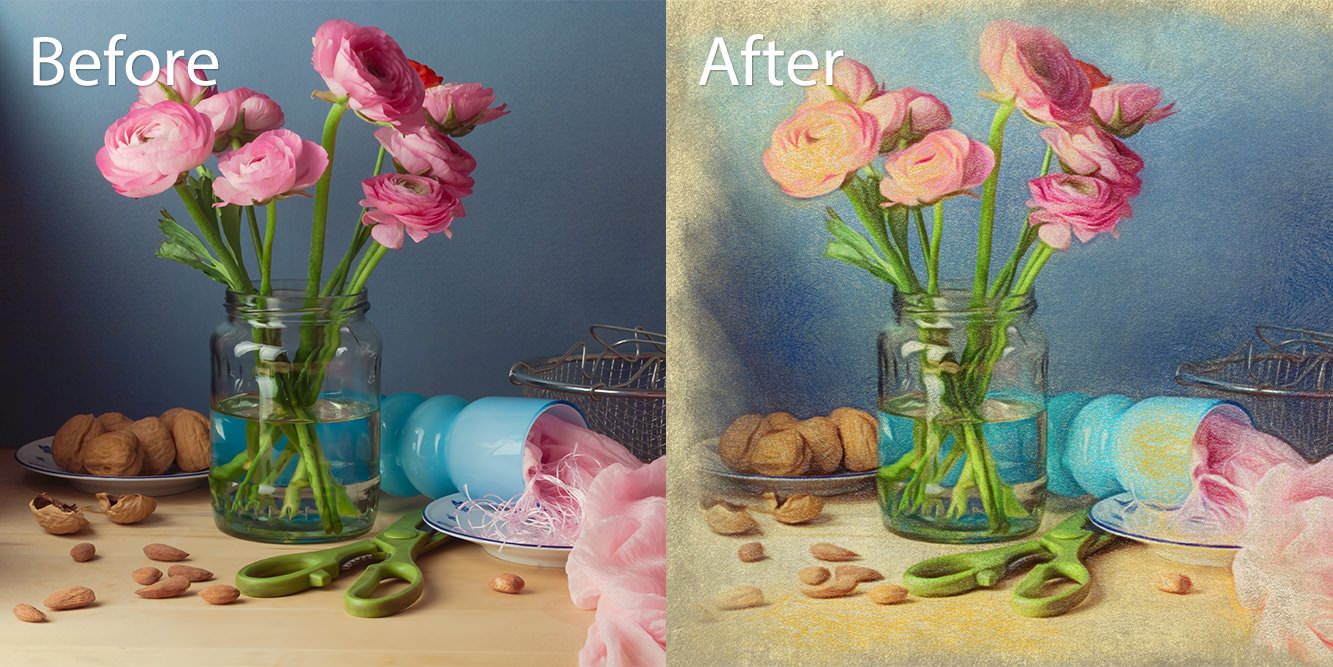
This Tutorial will teach you how to create a Soft Pastel Drawing with Pastello using the Paper, Chalk, Conte and Colored Pencil Layers and the Smudge Tool
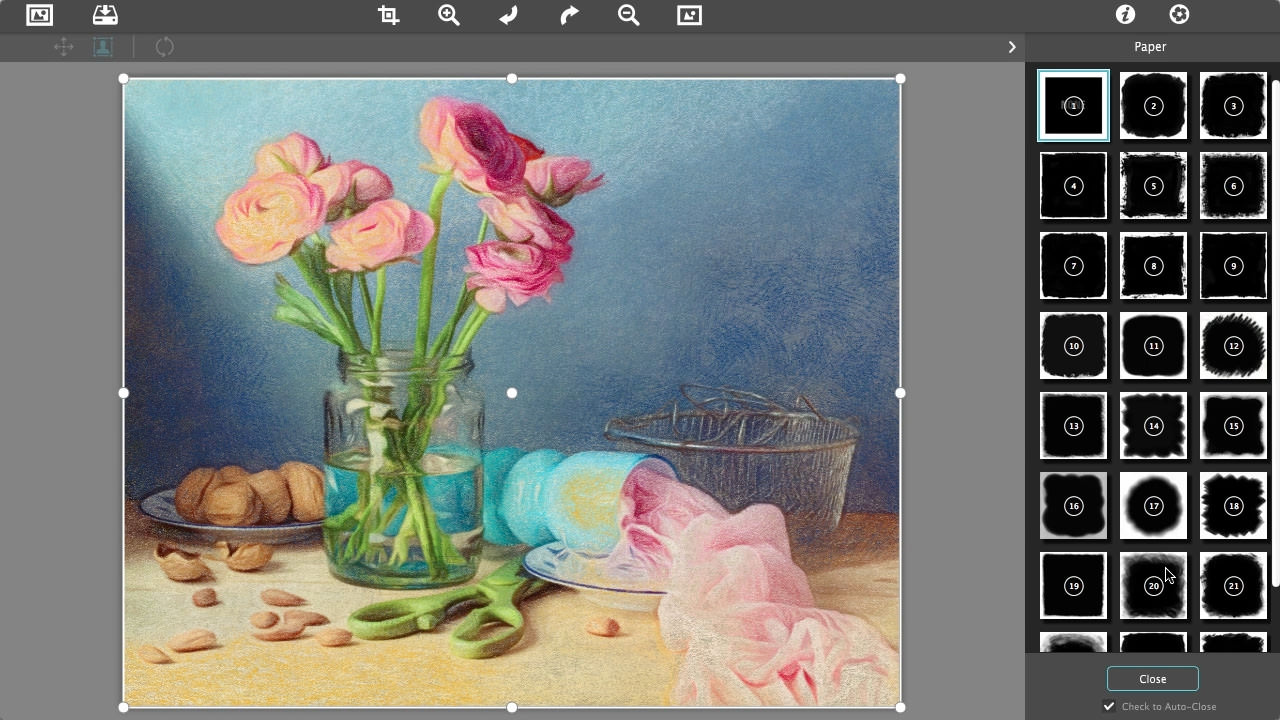
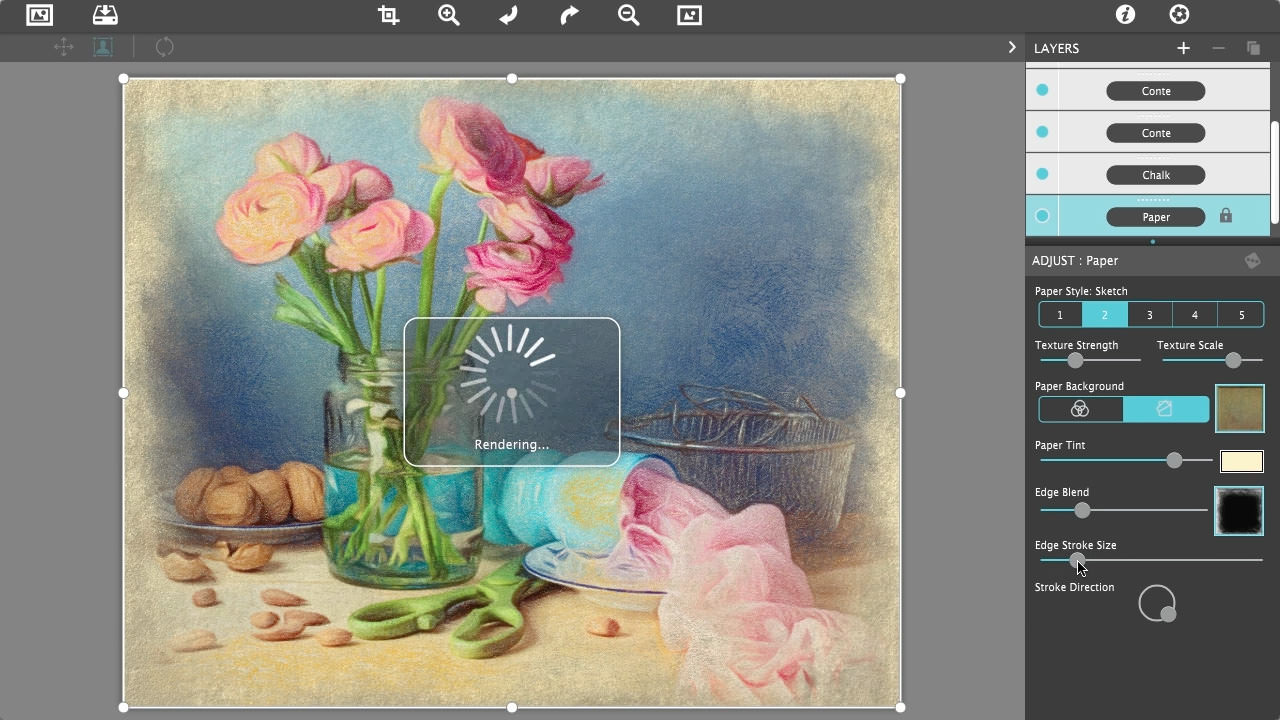
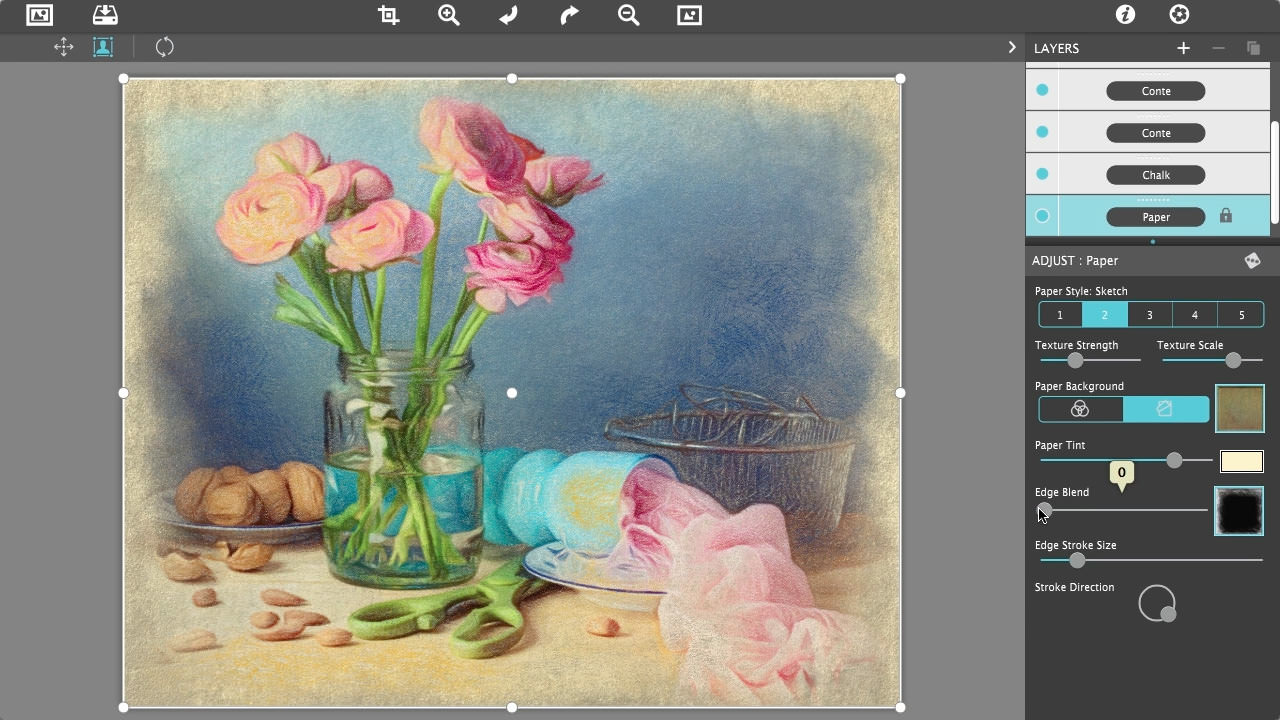
To get started load in an image and hide the Pastel Layer to have a better view of the paper layer
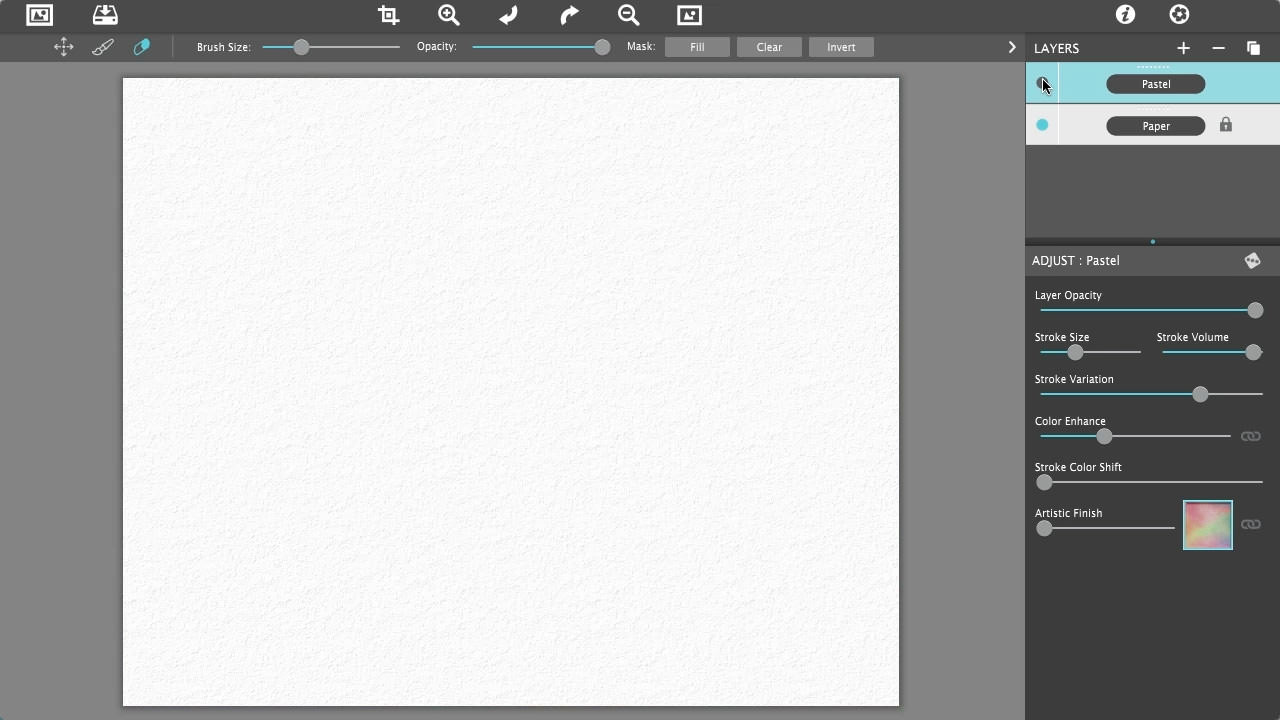
The Paper Layer reacts to dry media like real paper would. The more you layer the media the more it fills into the paper’s texture.

First we will choose a Paper Background which can be a solid color or one of the built in artistic and aged papers. Select the first option to use a color or the second option to use a paper, for this image we will choose Paper and use paper 10.
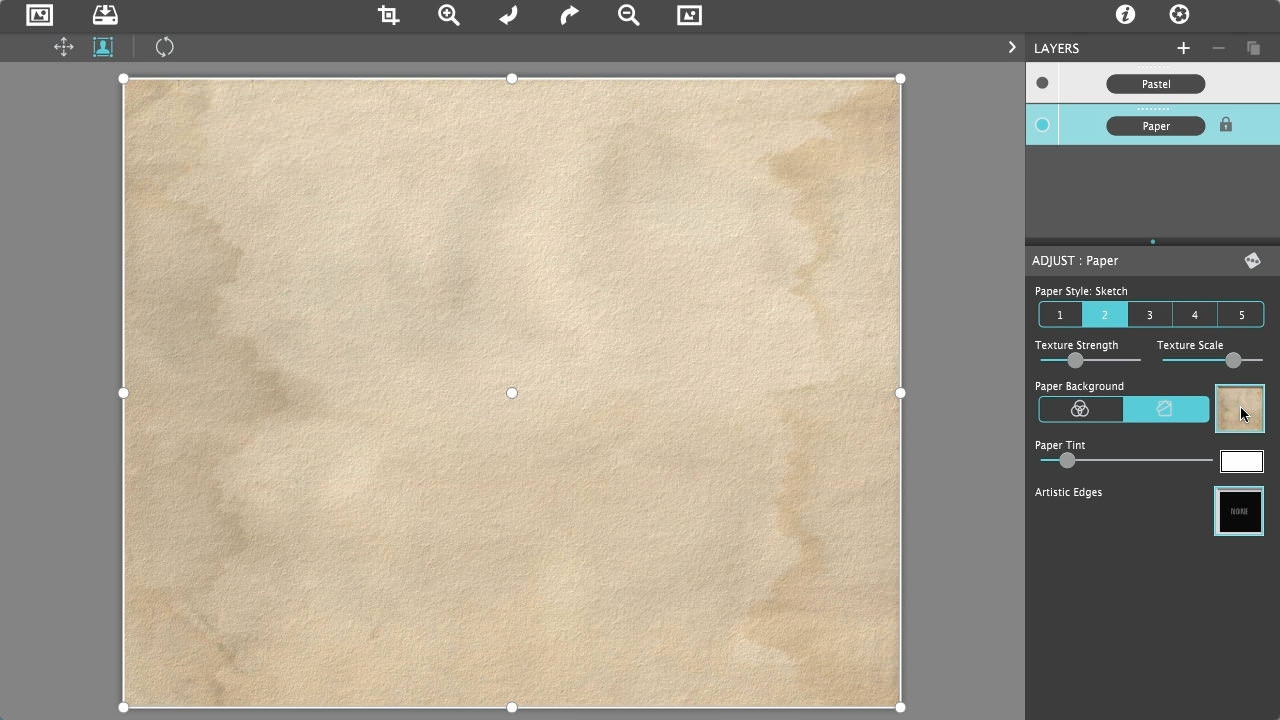
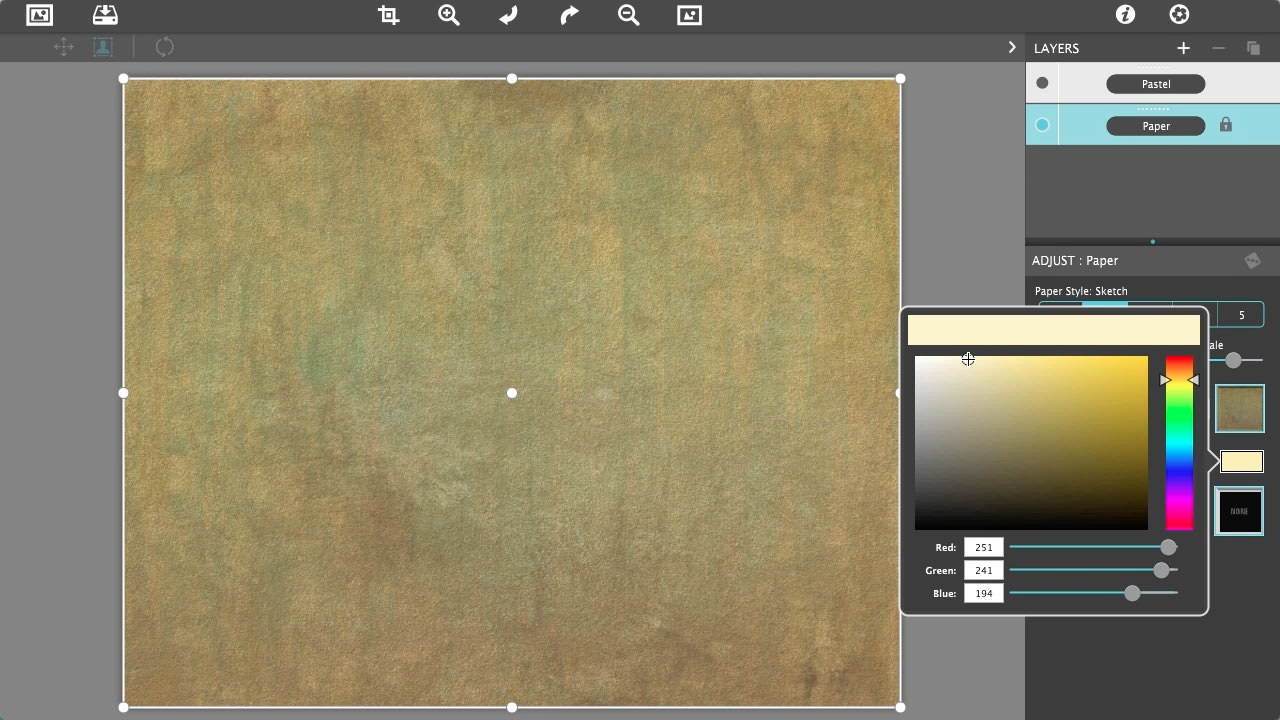
Use Paper Tint to add or change the color of the paper, use the slider to choose the color's strength. We chose a soft yellow color and turned the opacity up to 81
Paper Style - Choose to use the Canvas, Sketch, Charcoal, Chalk or Smooth Canvas texture for the background
Texture Strength - Change the opacity of the paper texture
Texture Scale - Change the scale of the paper texture
Artistic Edges - Add an Artistc Edge
Edge Stroke Size - Move left for small detailed strokes in the edge or right for large thick strokes.
Stroke Direction - Control the overall direction of the strokes in the edge
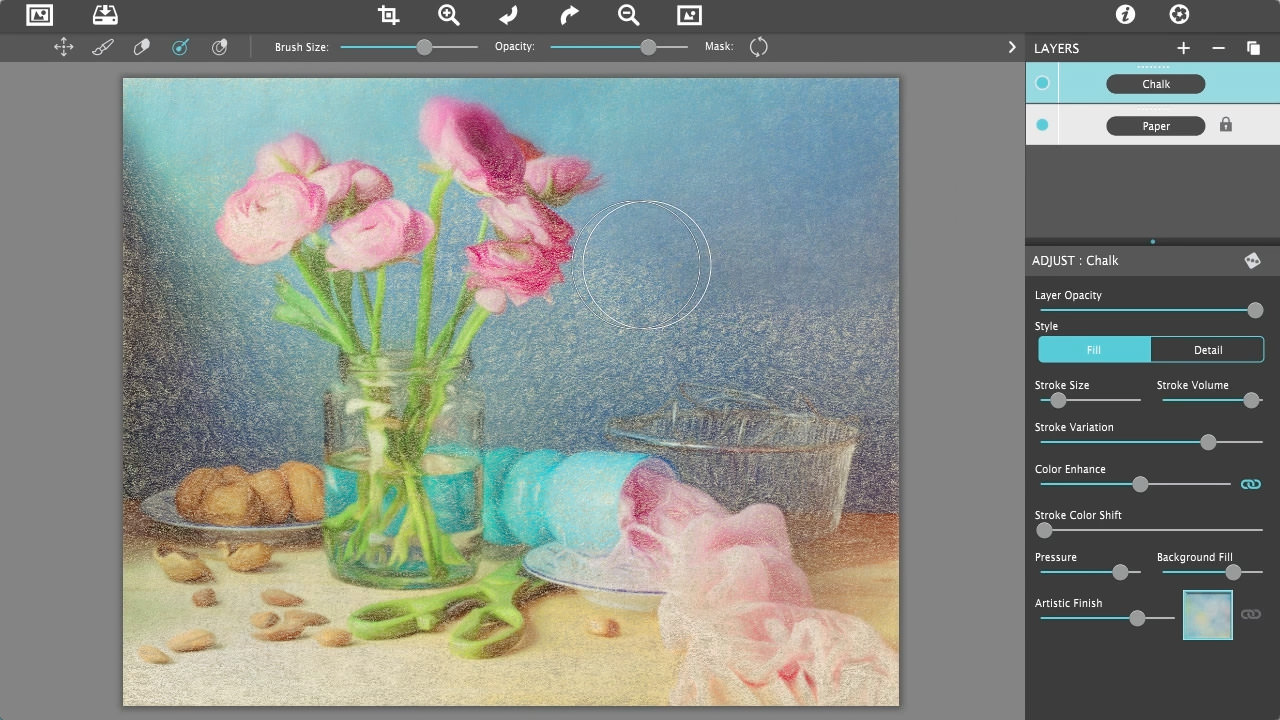
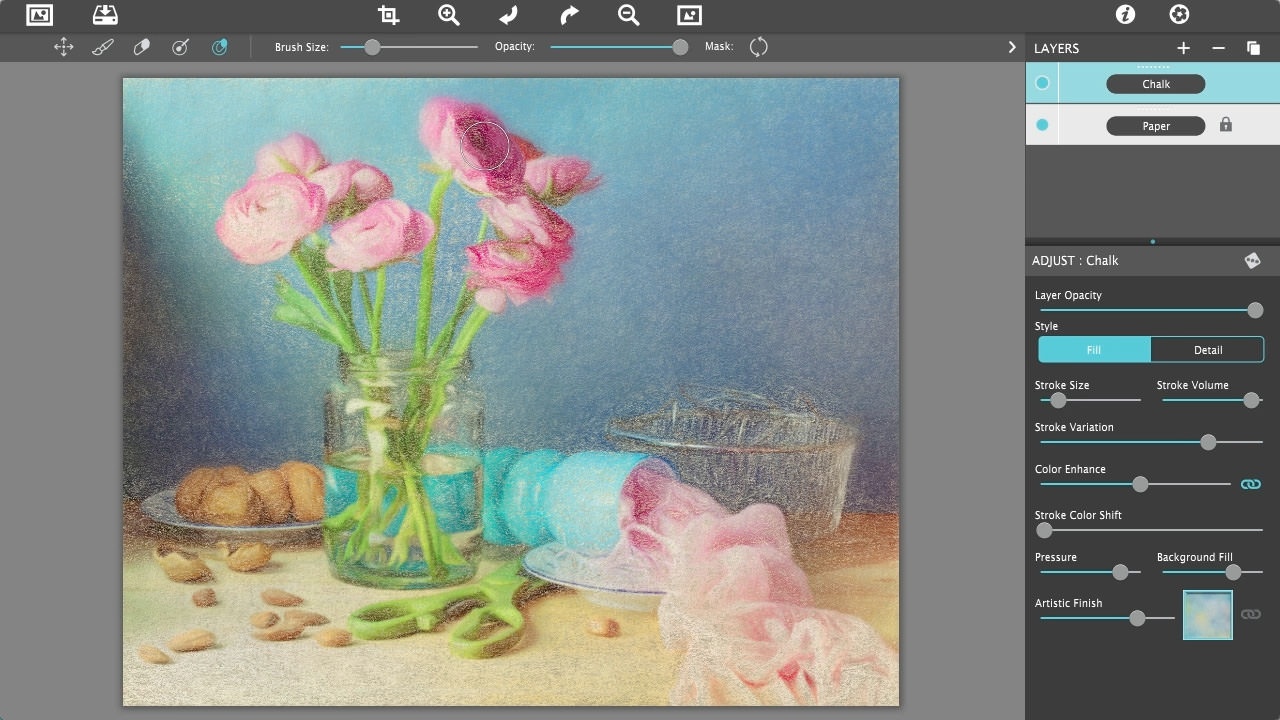
Click the plus symbol in the layers tab and select Chalk to add a Chalk Layer. The Chalk Layer is a light dusty effect with little specks of preserved paper. This chalky pastel is known for it’s soft strokes and velvety texture.
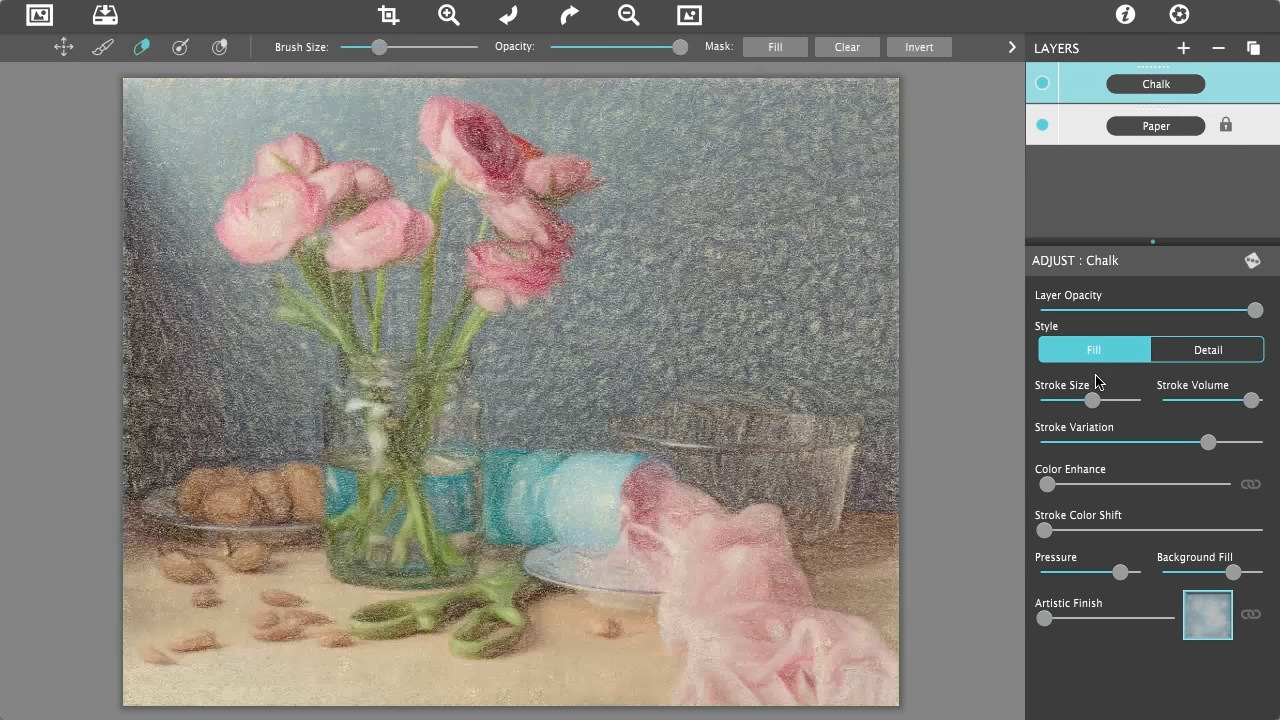
Move the Stroke Size slider left for small detailed strokes or right for large thick strokes.

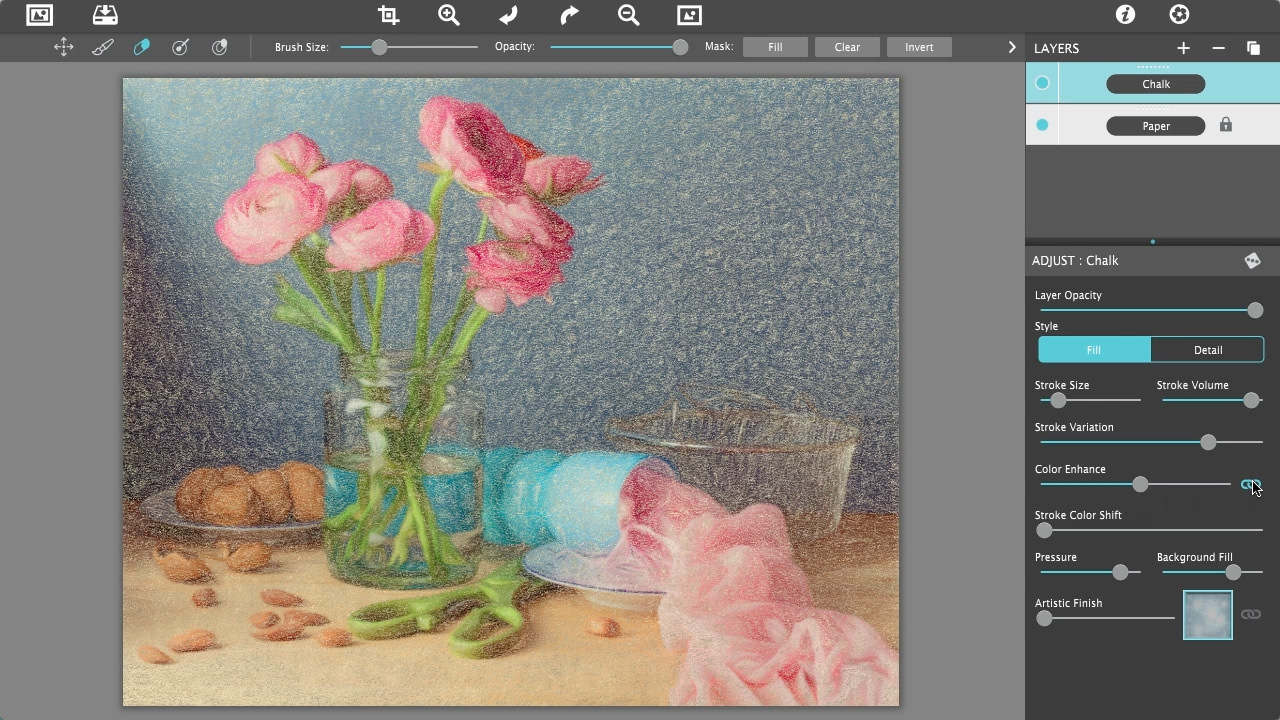
Move the Color Enhance slider right to increase the saturation of the image making the image more bright and colorful. Now use the link icon ![]() next to the slider to link all layers to this setting
next to the slider to link all layers to this setting
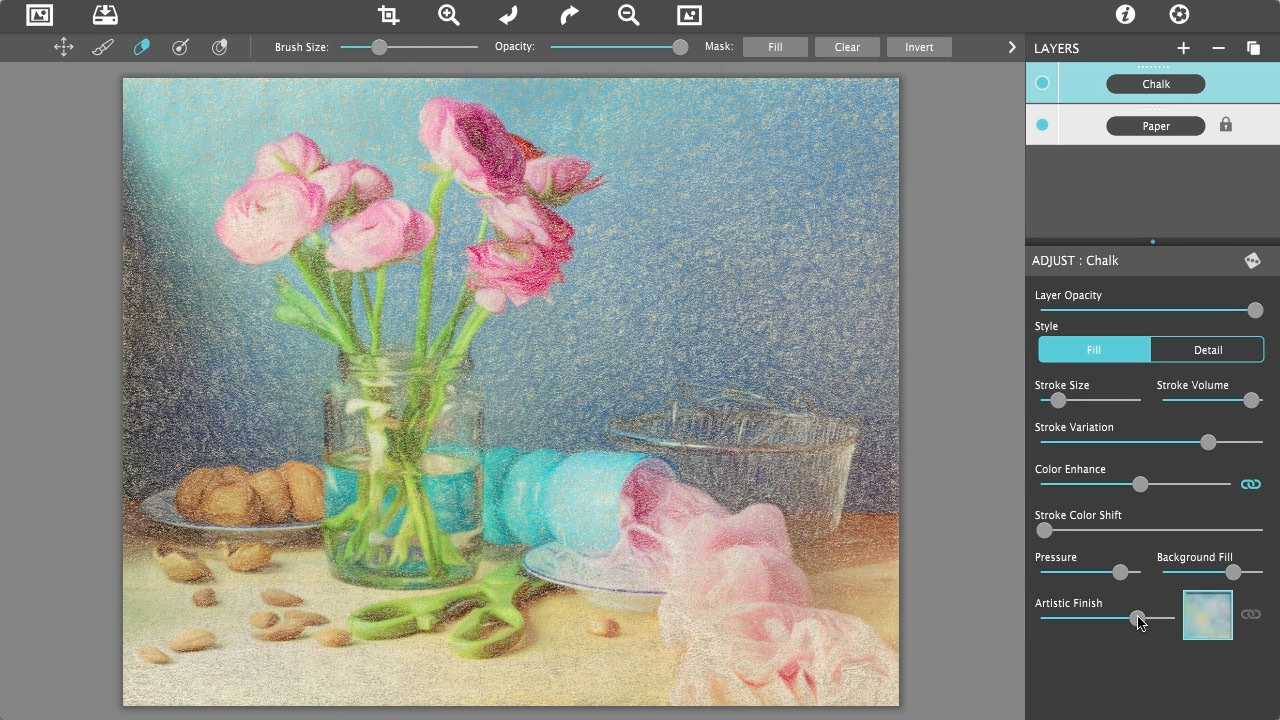
Artistic Finish allows you to add mottled light and color to the image. Click the box to choose between 70 different finishes and use the slider to adjust its opacity. ( You can use the link icon ![]() to link all layers to this setting)
to link all layers to this setting)
Layer Opacity - Adjust to blend layers
Style - Choose to fill the whole image or just the details
Stroke Volume - Adjust the overall thickness of the strokes
Stroke Variation - Move this slider to give the strokes an overall different look
Outline Size - Adjust the thickness of the outline (Only available when Detail is chosen for the Style)
Stroke Color Shift - Controls how much the strokes will vary their overall hue
Pressure - Increase to deepen the chalk color allowing less of the layers below to show through
Background Fill - Add the colors from the original image to uncovered areas in the layer
Use the Smudge Tool ![]() to smear media for a softer appearance. The Smudge Tool is the fourth icon on the second row in the top left corner of the app. (The Smudge Tool is not available when using a Pastel layer or the Paper layer)
to smear media for a softer appearance. The Smudge Tool is the fourth icon on the second row in the top left corner of the app. (The Smudge Tool is not available when using a Pastel layer or the Paper layer)

Use the Brush Size slider to adjust the size of the brush. (You can press [ on your keyboard to decrease the brush size or ] to increase the brush size)
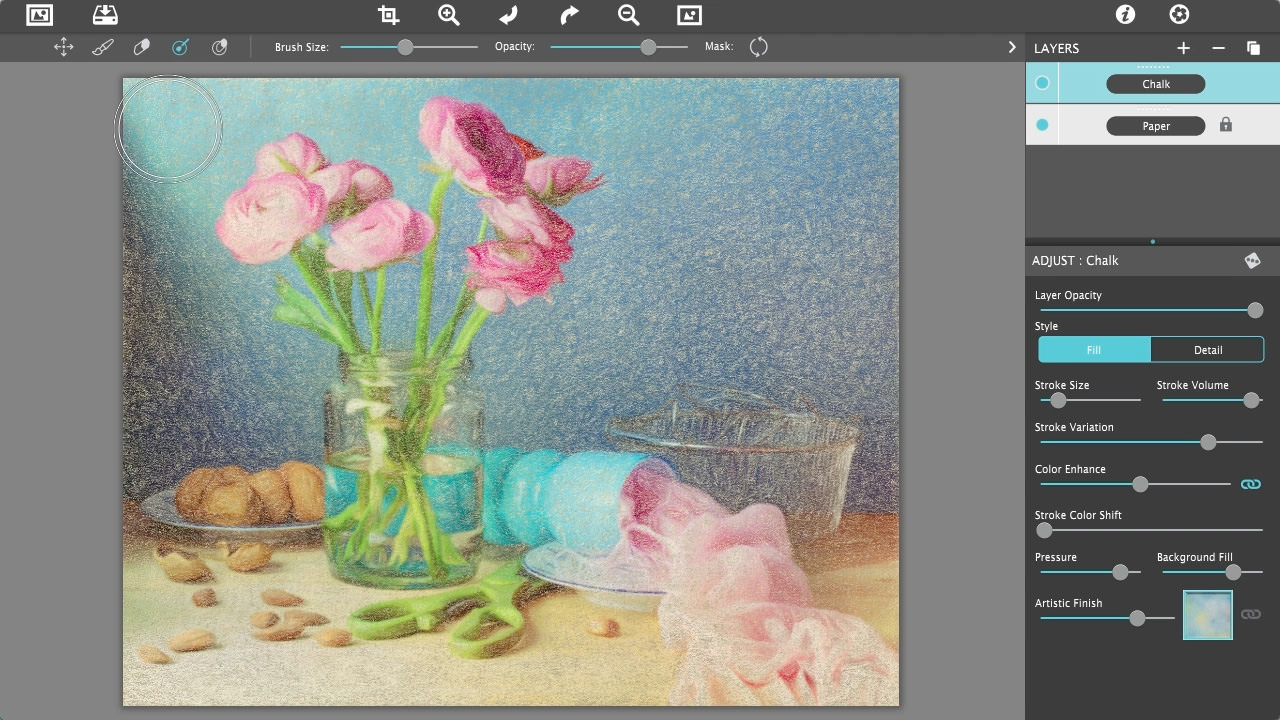
To smudge simply select the Smudge Tool ![]() and click and drag around your image. For this image we are going to use the smudge tool to soften the background.
and click and drag around your image. For this image we are going to use the smudge tool to soften the background.
If you mess up you can remove smudges by selecting the Smudge Removal Tool  and clicking and dragging on smudges in your image that you want to remove. (The Smudge Removal Tool is the 5th icon on the second row in the top left corner of the app)
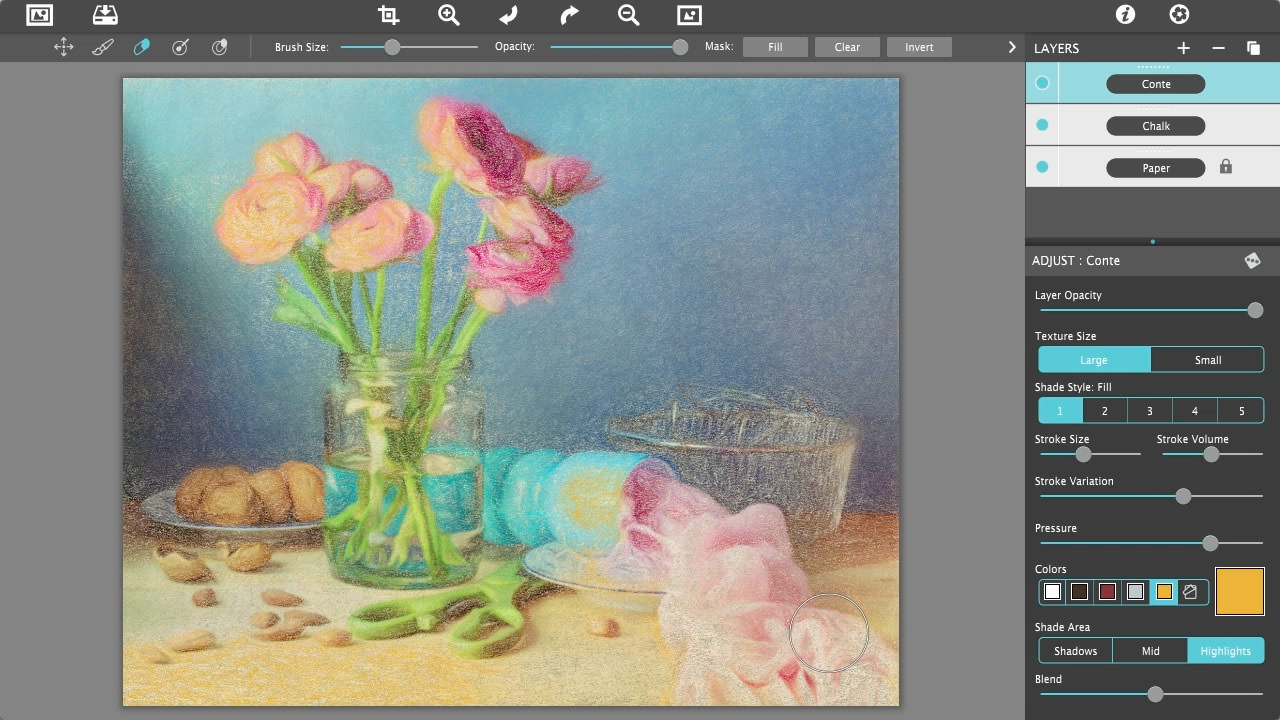
Conté is a beautiful crayon media for enhancing highlights, midtones and shadows using five classic colors: Bistre, Sanguine, White, Grey, Gold or use the color picker to choose your own with options for crosshatching and scumbling.
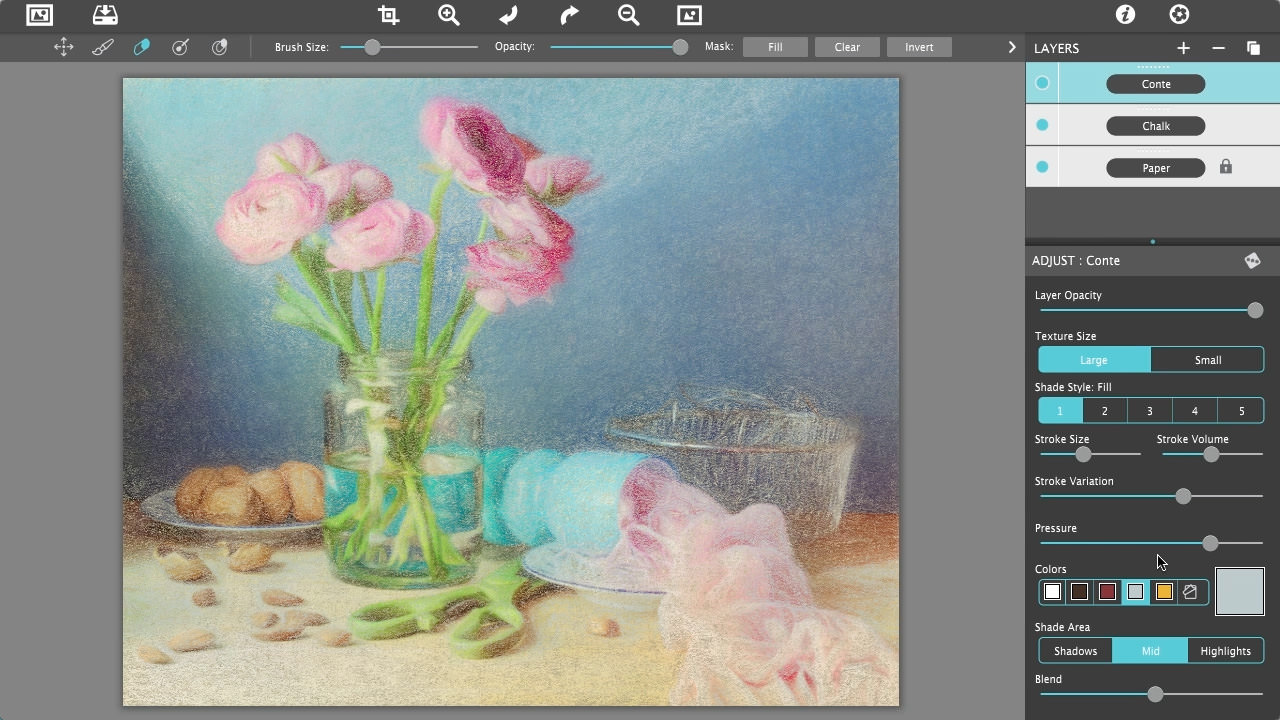
Choose one of our hand picked colors for the effect or use the color box to pick a custom color. For this layer we are going to choose gold.
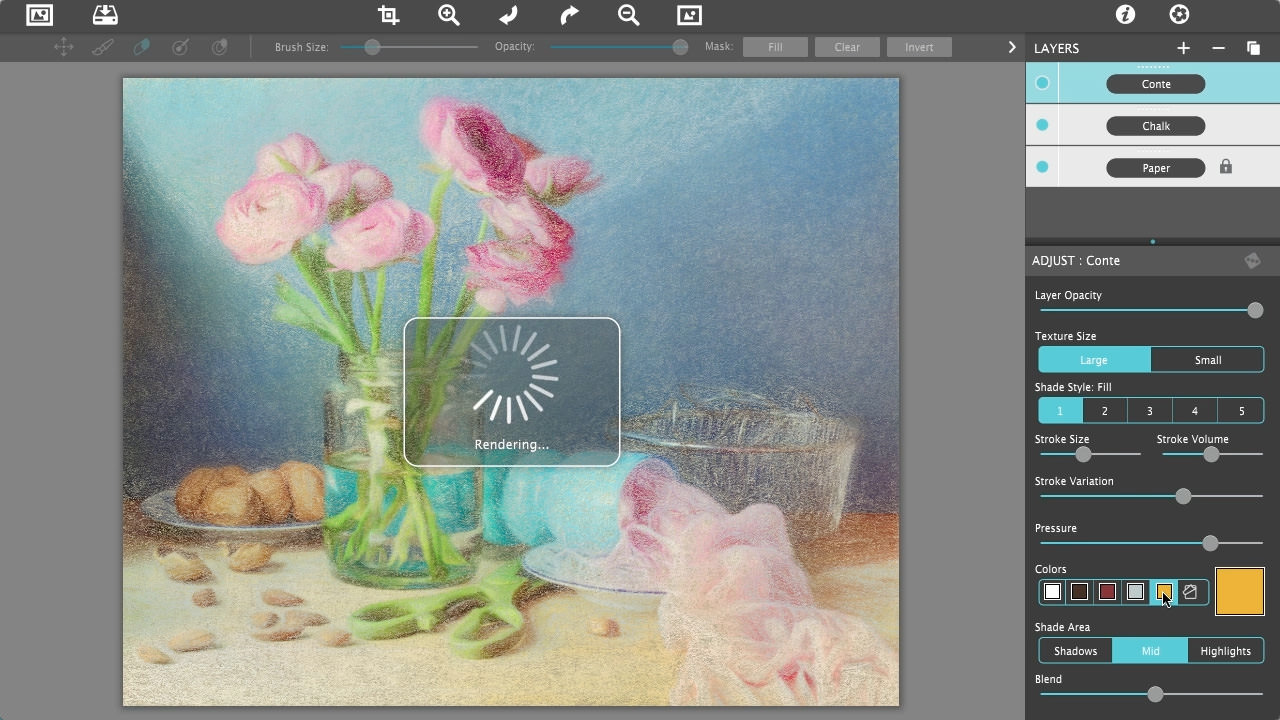
Use the Shade Area option to choose whether the layer appears in the shadows, highlights or mid range areas in the image. For this image we want the gold to appear in the highlighted areas so we will choose Highlights.

If there are parts of your image where you do not want the Conte effect you can select the Erase Tool ![]() and click and drag around your image to remove it. (The Erase Tool is available for all layers)
and click and drag around your image to remove it. (The Erase Tool is available for all layers)
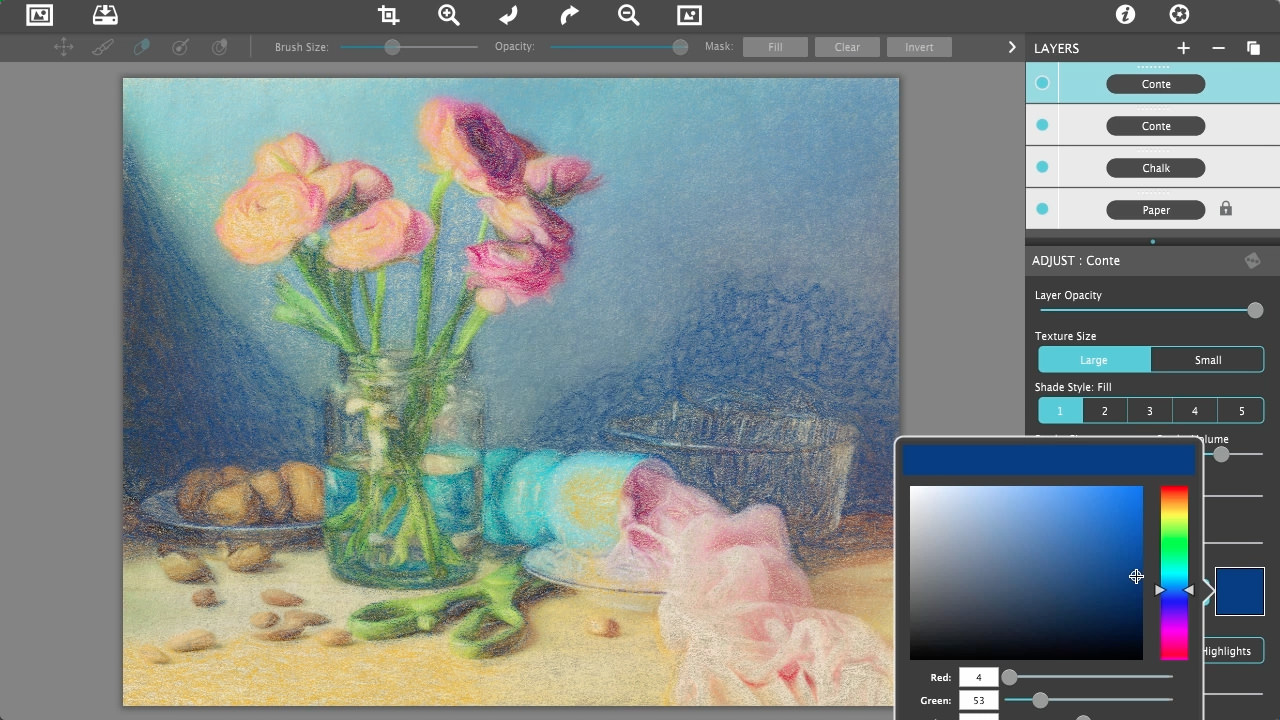
Now we will add another Conte layer and choose a blue color similar to the color of the background.
For this layer we want to add some texture using the Shade Style which can be used to fill the entire layer or to use a crosshatch, hatch, scribble or scumble shading style. We are going to choose scumble

We are going to decrease the Pressure slider to soften the chalk color allowing more of the layers below to show through
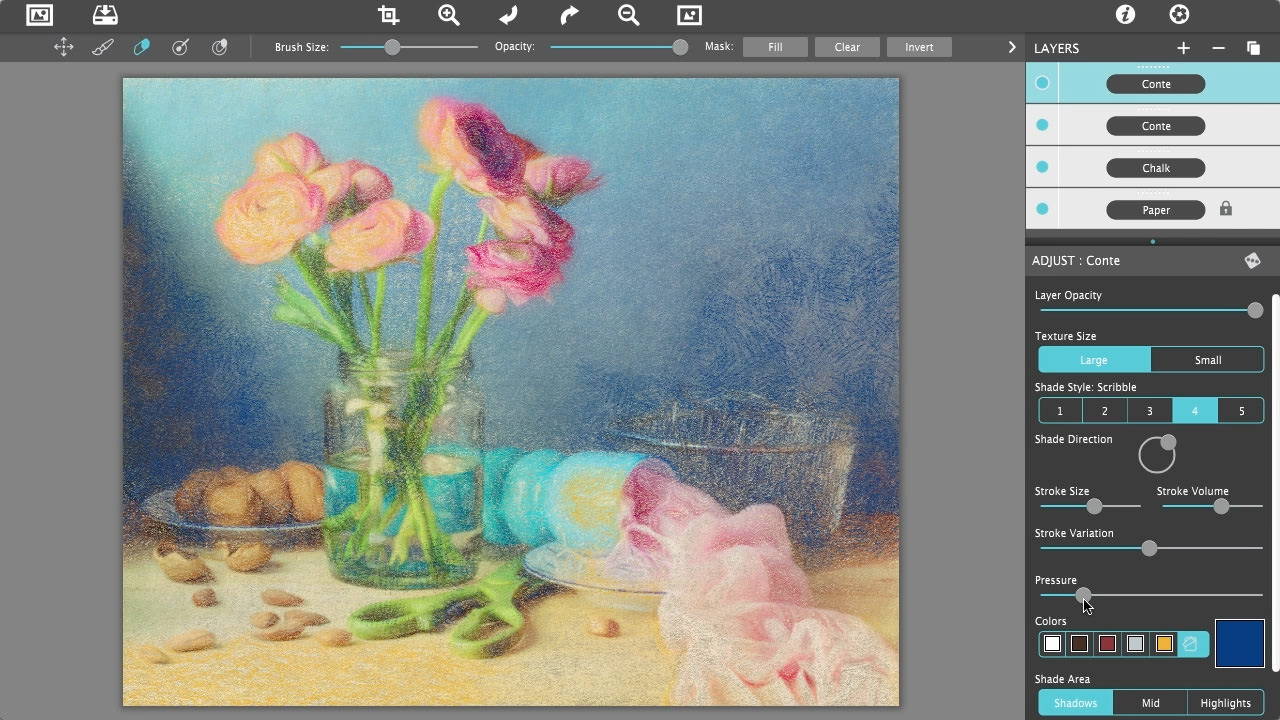
Increase the Blend slider to blend the shading effect with the layers below
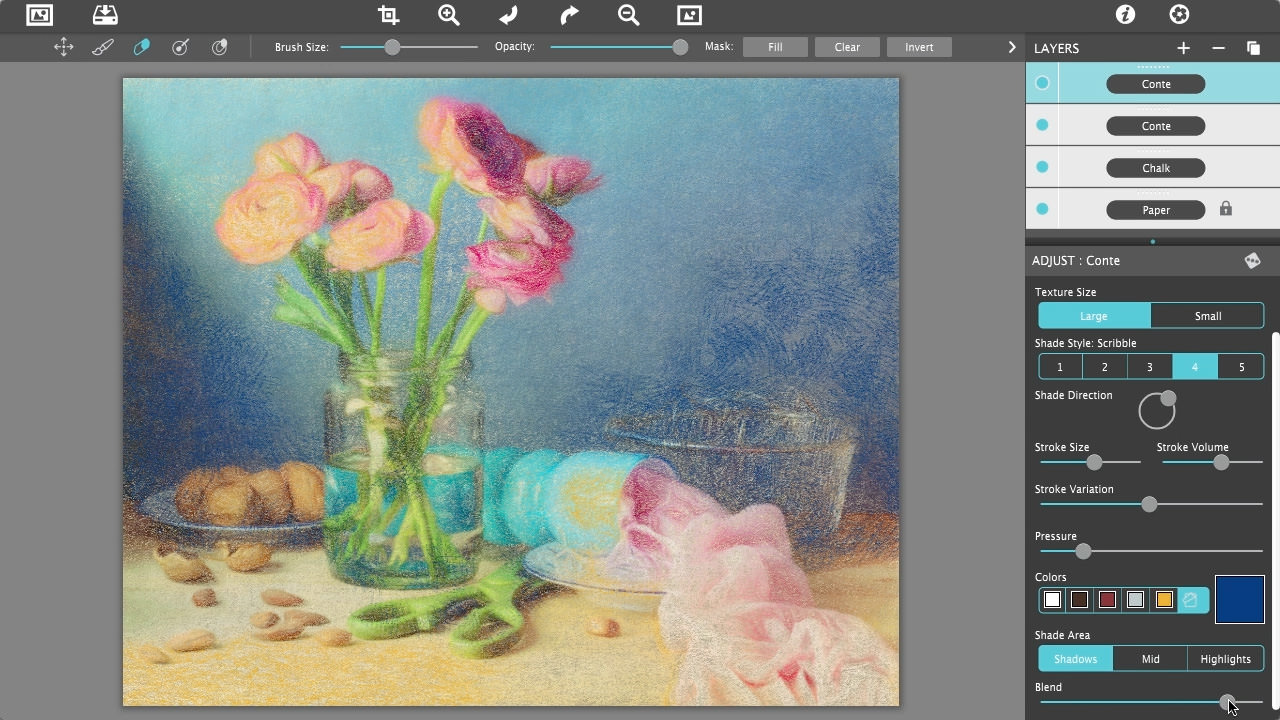
Now we will add one last Conte layer choosing White for the color, Mid range for the Shade Area and turning the Pressure slider down a little
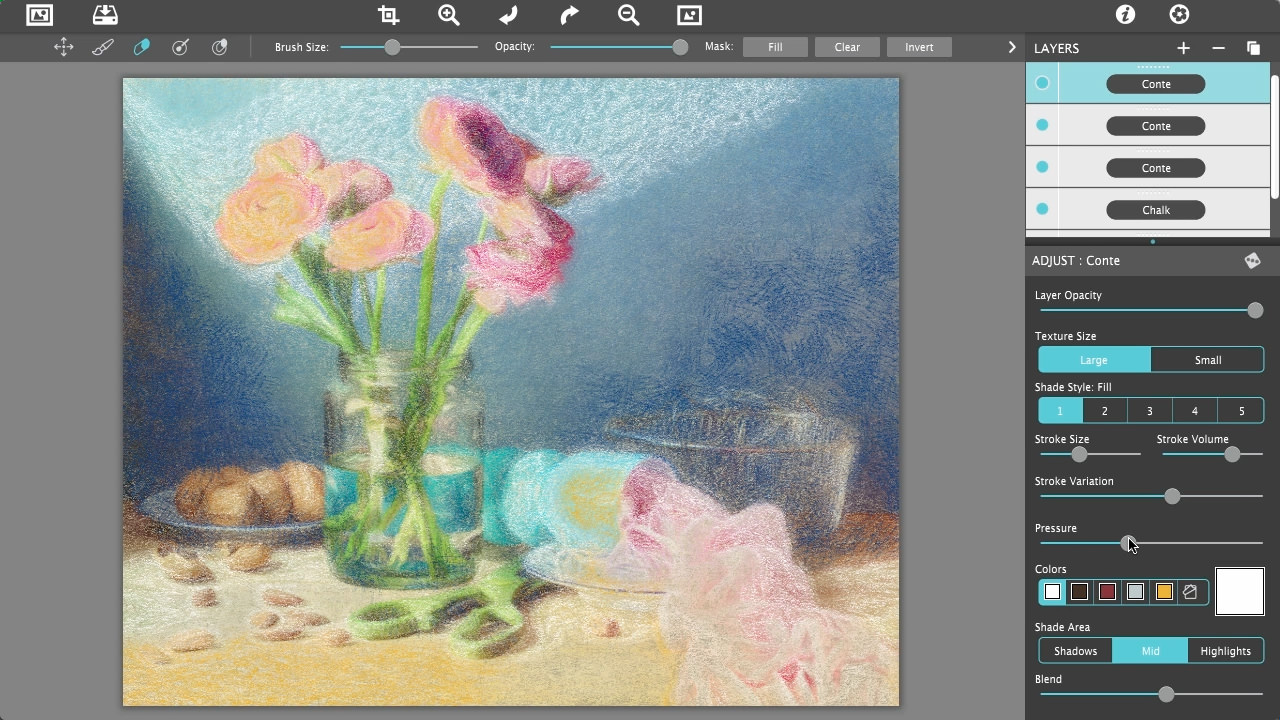
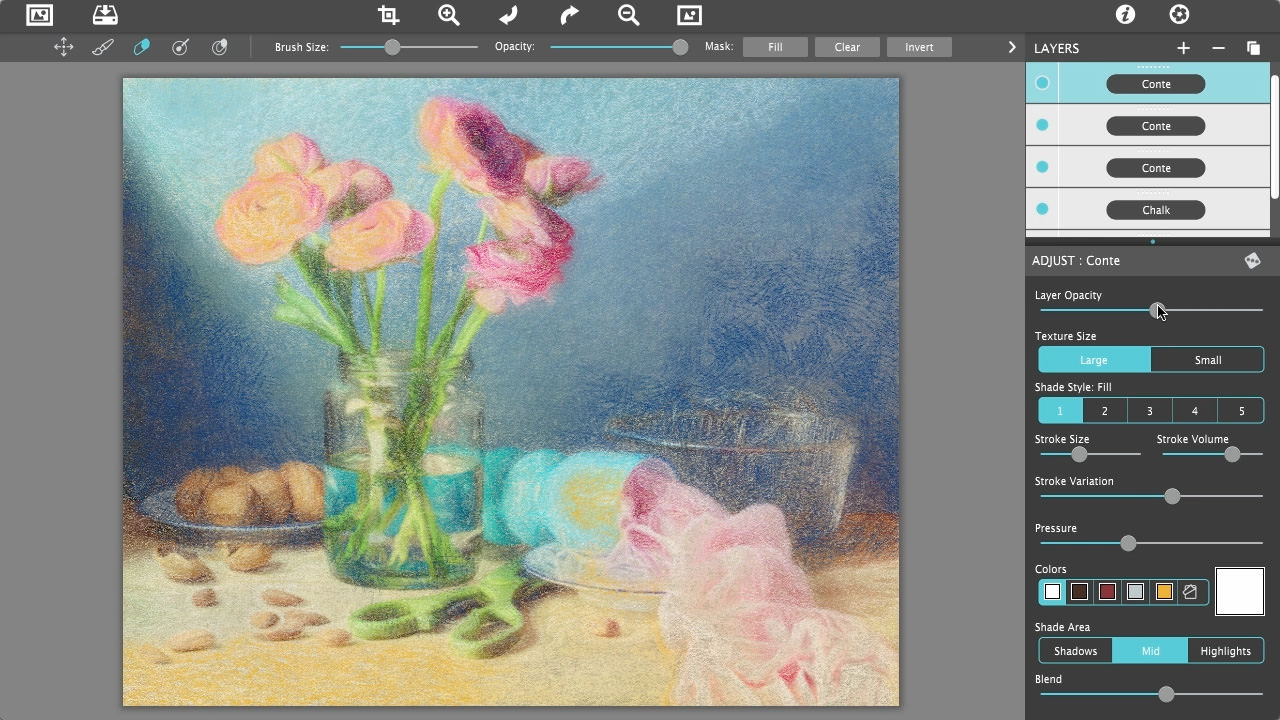
Move the Layer Opacity slider left to decrease the strength of the Conte layer allowing more of the layers below to be seen.
Texture Size - Choose large or small for the texture size
Shade Direction - Control the overall direction of the strokes
Stroke Size - Move left for small detailed strokes and right for large thick strokes.
Stroke Volume - Adjust the overall thickness of the strokes
Stroke Variation - Move this slider to give the strokes an overall different look
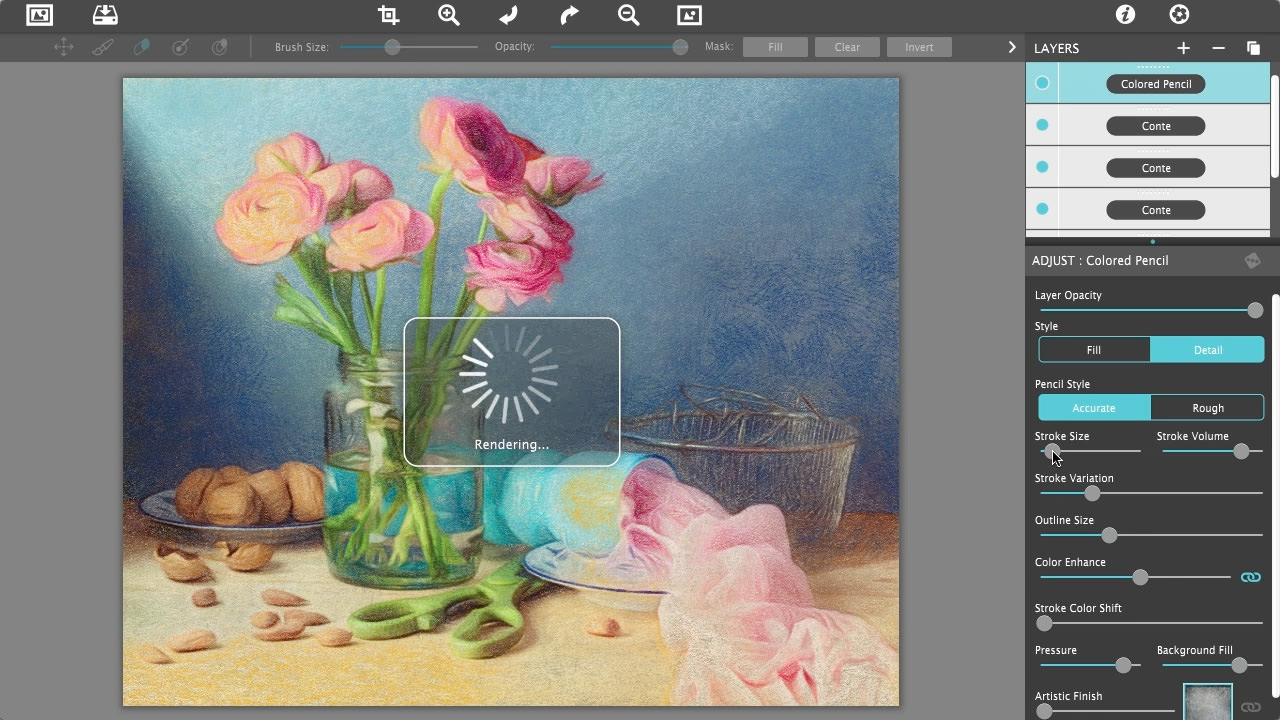
Now we will add a Colored Pencil layer which creates soft colorful strokes in the drawing.

Choose Detail to have the Colored Pencil effect only in the detail and outlines or choose Fill to fill the whole image with the layer

Move the Stroke Size slider left for smaller detailed strokes. You can also move the slider right for large thick strokes.
Move the Outline Size slider right to increase the thickness of the outline. (Only available when Detail is chosen for the Style)

Layer Opacity - Adjust to blend layers
Stroke Volume - Adjust the overall thickness of the strokes
Stroke Variation - Move this slider to give the strokes an overall different look
Pencil Style - Choose between an accurate or rough pencil outline (Only available when Detail is chosen for the Style)
Color Enhance - Increase the saturation of the image making the image more bright and colorful. Use the link icon ![]() to link all layers to this setting
to link all layers to this setting
Stroke Color Shift - Controls how much the strokes will vary their overall hue
Pressure - Increase to deepen the chalk color allowing less of the layers below to show through
Background Fill - Add the colors from the original image to uncovered areas in the layer
Artistic Finish - Adds mottled light and color to the image. Use the link icon ![]() to link all layers to this setting
to link all layers to this setting
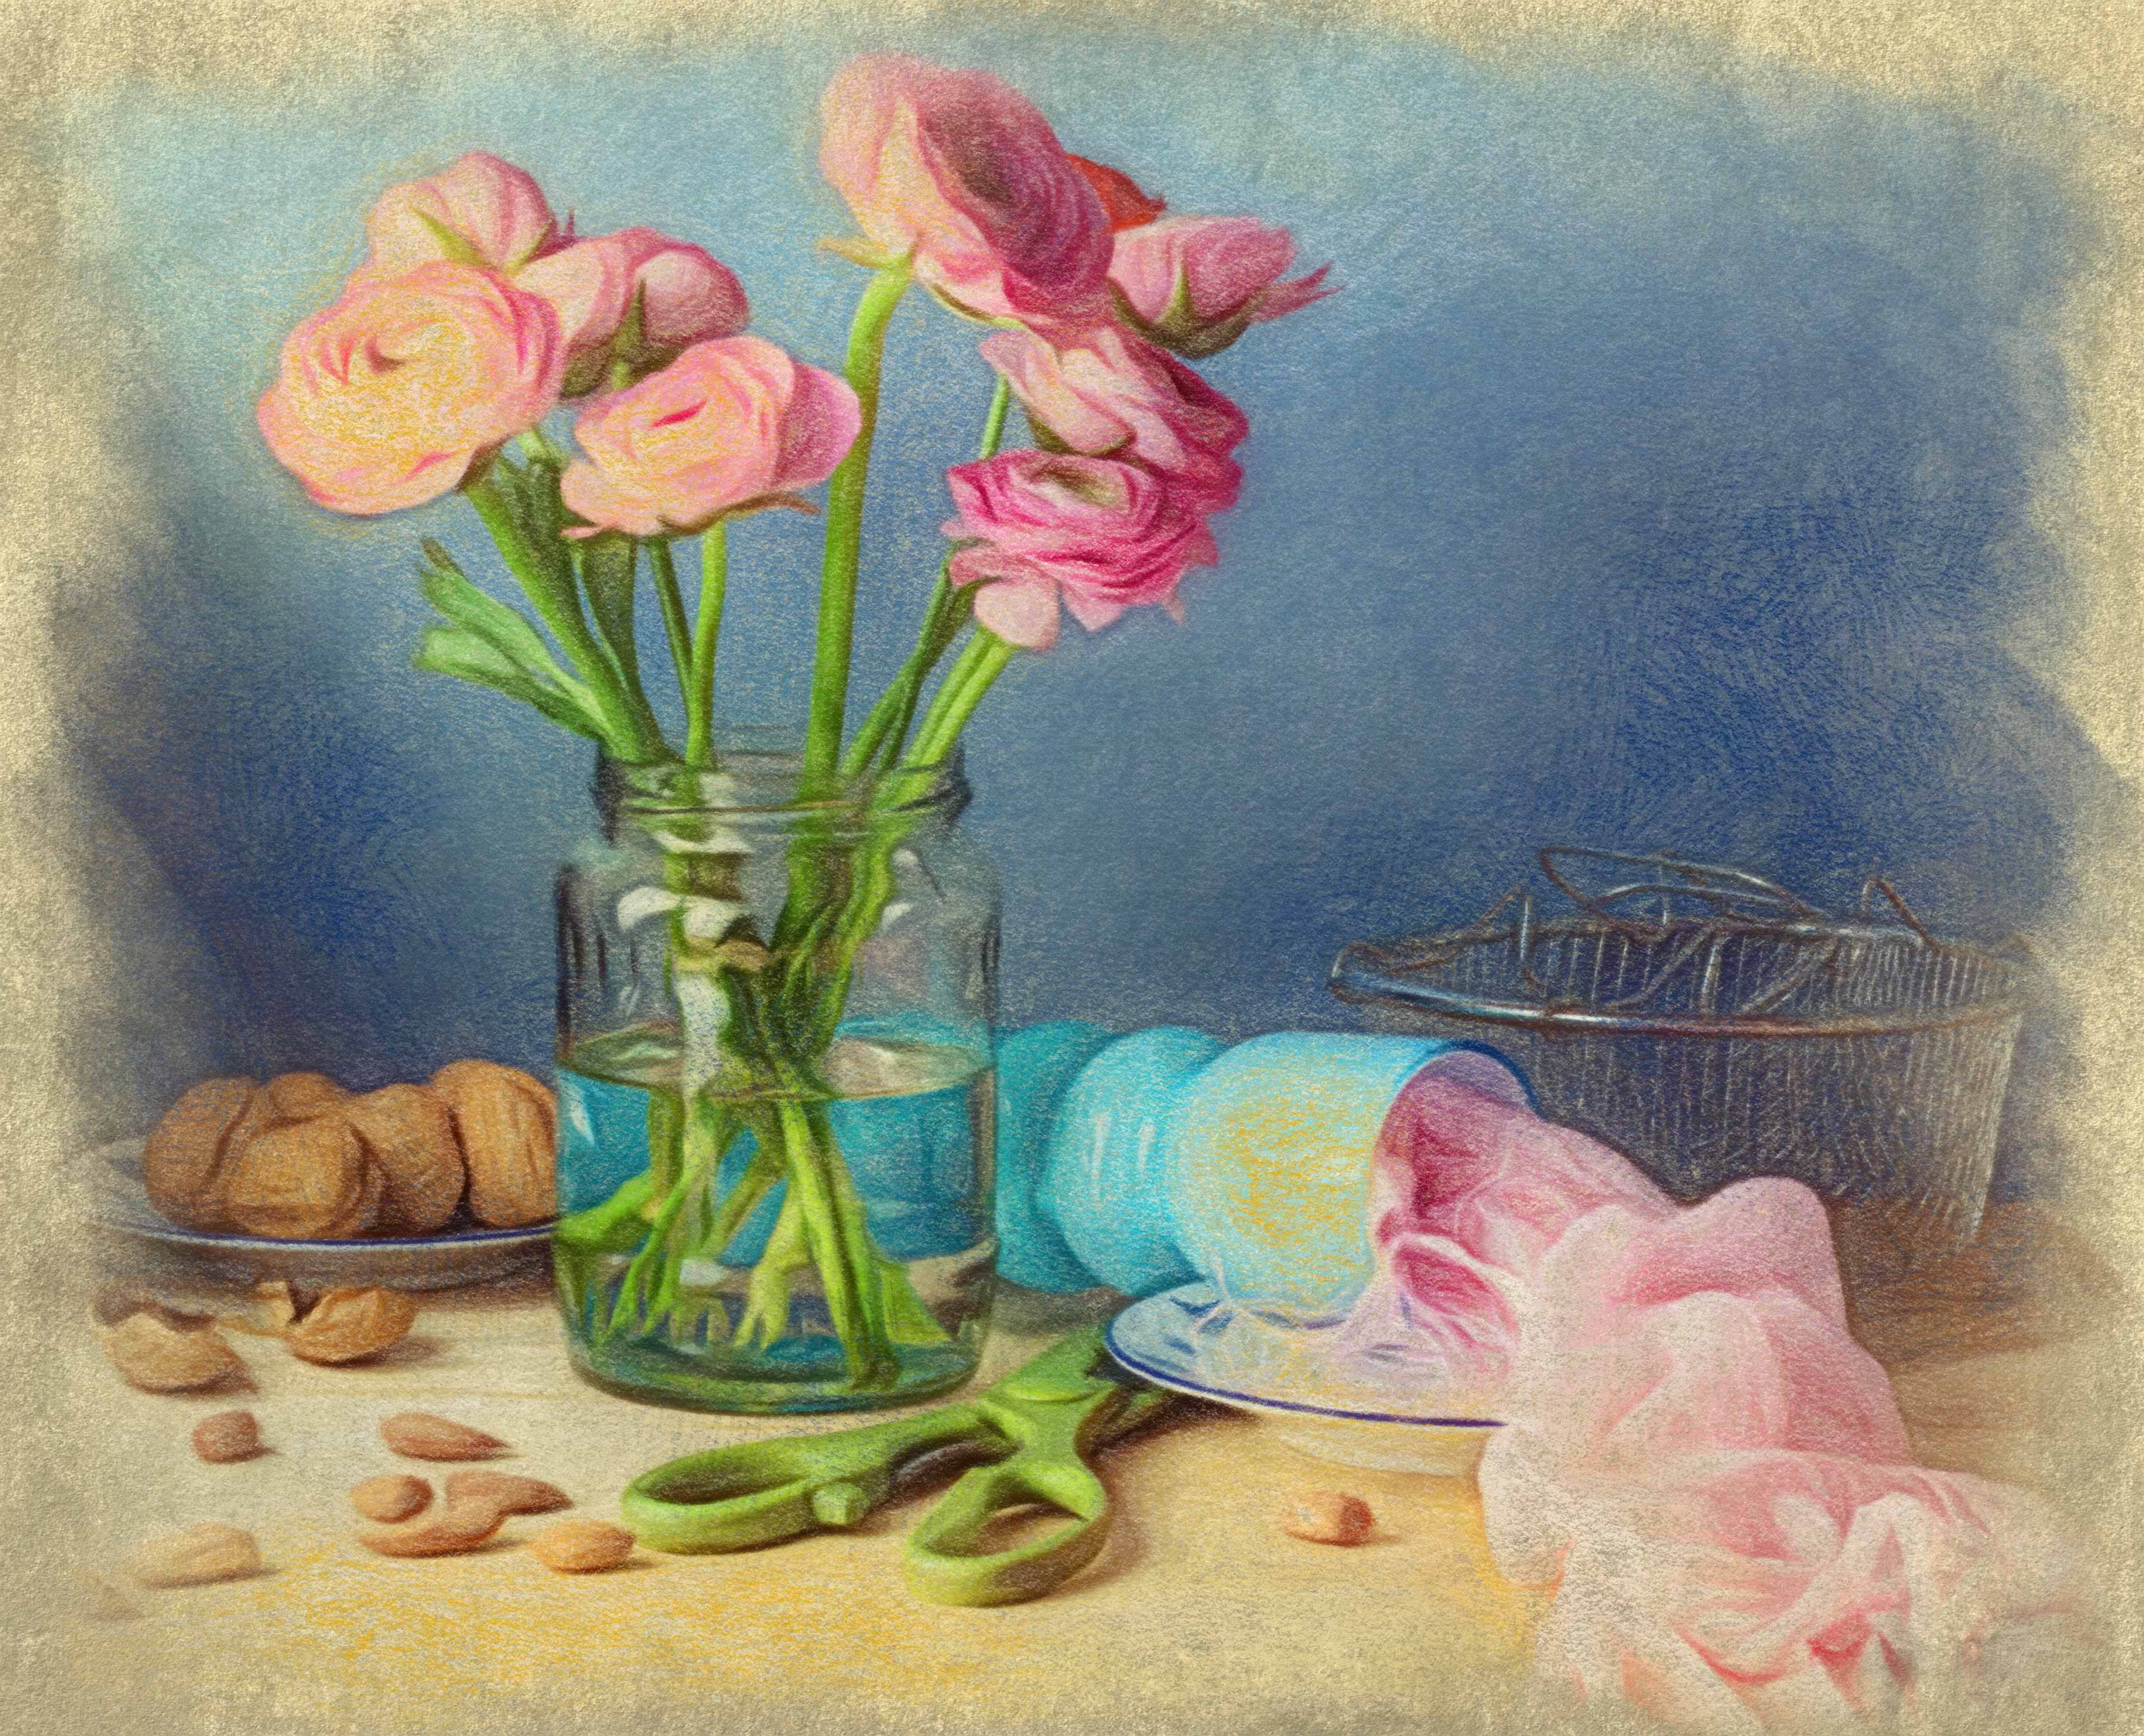
For the last step we will go back to the Paper Layer to add an edge.
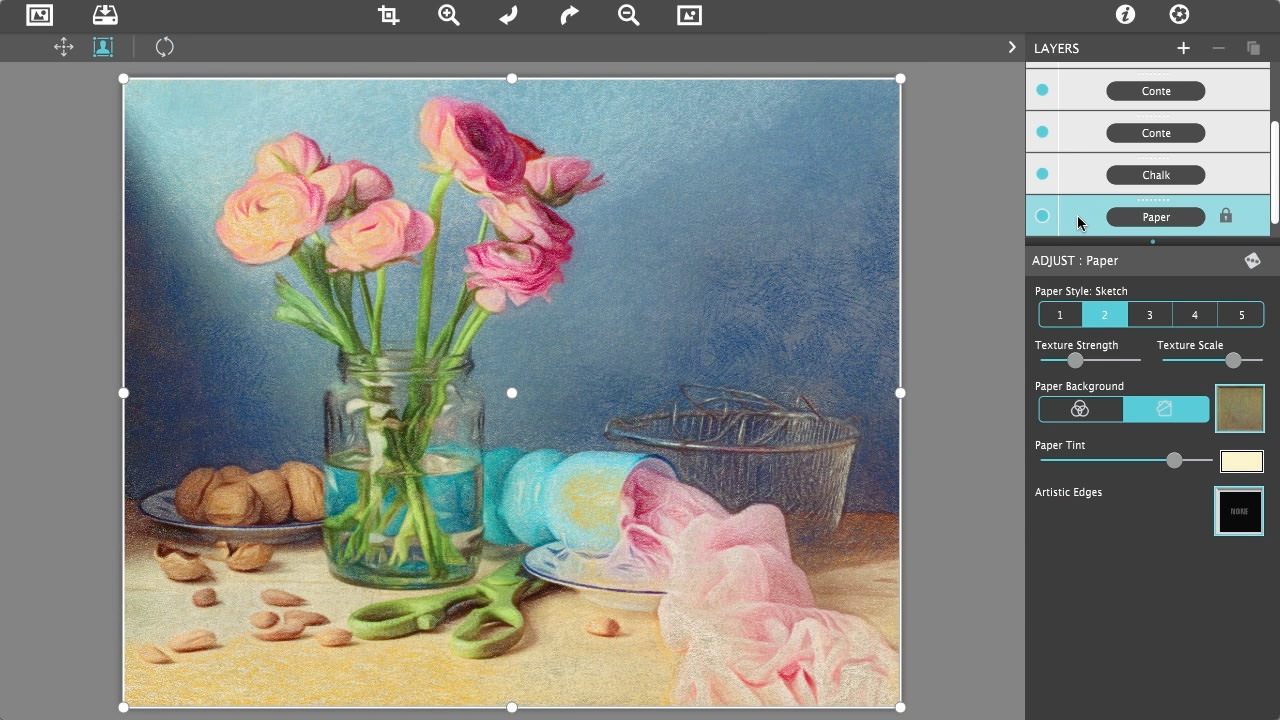
Click the Artistic Edge icon to choose between 24 Artistic Edges
Move the Edge Stroke Size slider right to make the strokes smaller in the edge.
Decrease the Edge Blend slider for a more rough edge or increase the slider to add brush strokes to the edge of the drawing
I hope you enjoyed our tutorial and have a better understanding of Pastello.
Feedback
What do you guys think? Have any tutorials you would like to see in later posts? Feel free to tell us and show us your creations on Facebook or our other social accounts.
In this tutorial we use a lot of keyboard shortcuts, here is a list of the keyboard shortcuts included in Pastello: