Intro | Step 1 | Step 2 | Step 3 | Step 4 | Step 5 | Video | PS Action | Examples

Hi and welcome to our first of many tutorials. This tutorial we will be focusing on using our different Photoshop Plugins on different layers and combining them using blending options to create new works of art. We will be using the plugins Rainydaze, Simply HDR and Grungetastic to create a grungy image. If you get lost there is a video at the end of the tutorial going through all the steps.
At the bottom of the page you will find a Photoshop Action with instructions on how to use it along with additional examples.
To get started first we will need to open an image in photoshop.

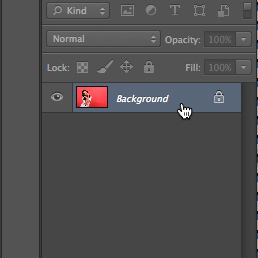
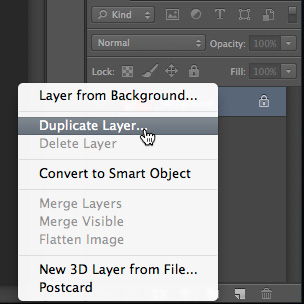
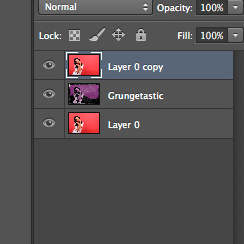
Once the image is opened duplicate the "Background" layer. To duplicate the layer right click the layer and select "duplicate layer".
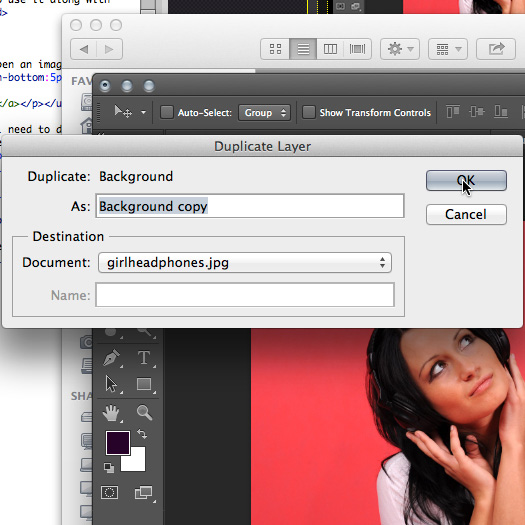
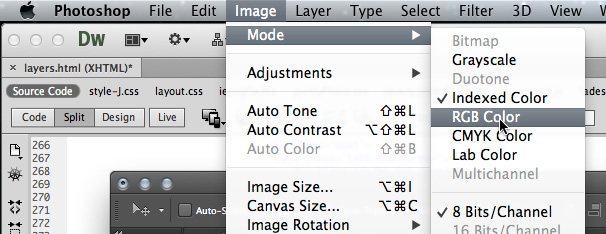
* TIP - If your layer is named "index" and is locked to unlock it go to the menu and select Image then Mode then select RBG Color. This should unlock your layer making it possible to duplicate it.
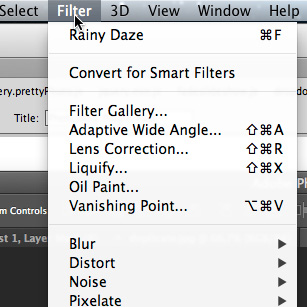
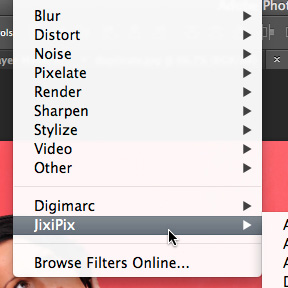
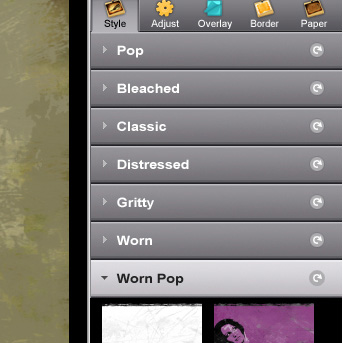
To start, the first plugin we will use is Grungetastic. To use Grungetastic go to Photoshop's menu and choose 'Filter' then 'Jixipix' and then select 'Grungetastic'.

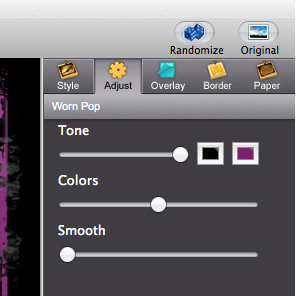
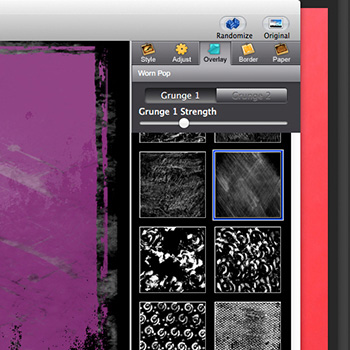
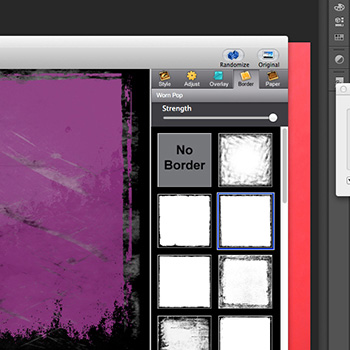
You are free to use any settings you prefer within Grungetastic but here is the break down of the settings I used. First I chose the style 'Worn Pop', then adjusted the grunge by going to the 'Adjust' tab where the 'Tone' color boxes are located. Here I selected purple and black for my colors (clicking on the boxes brings up a color selector). I also turned the 'Colors' slider to about half way on the bar to keep the picture simple using three colors (this will need to be changed depending on your image). Next, I turned the 'Smooth' down by moving the slider all the way to the left to keep the sharpness of the image up. Now we'll adjust the scratches by going to the 'Overlay' tab. Click on the button labled 'Grunge 1' , choose the thumbnail texture located in the right column - count 66 thumbnails straight down to find it. The " Strength" slider should be turned to the left to give you just a little bit of grunge.
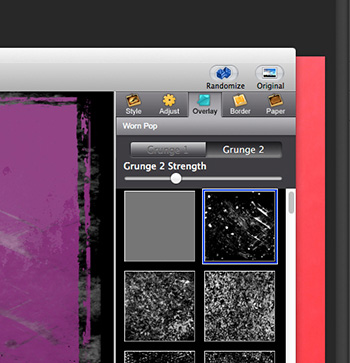
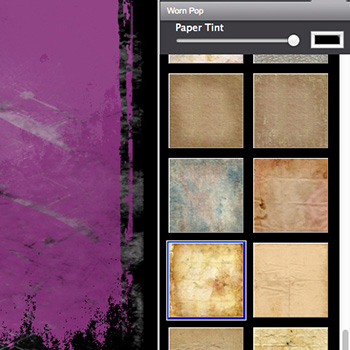
You've just adjusted the scratchse for 'Grunge 1' so next we'll adjust the scratches for 'Grunge 2'. Same process, click on button labeled 'Grunge 2' in the right column choose the first thumbnail and the slider should also a little to the left side. For the Border I used a simple border to keep the image from becoming to busy and turned the strength all the way up by moving it to the right. To find this go to 'Border' tab, second column count down to the second thumbnail. Now go to the 'Paper' tab and choose the paper by going to the first column of thumbnails counting straight down to number 21. Notice the 'Paper Tint' slider on top is set to black to go with the color scheme and turn all the way to the right.
*TIP - Save a style preset by going to the menu and selecting File and then choosing 'Save Preset'. This will come in handy when you want to reproduce this same effect later. You will find the saved presets on the 'Style' tab when you're ready to use it.
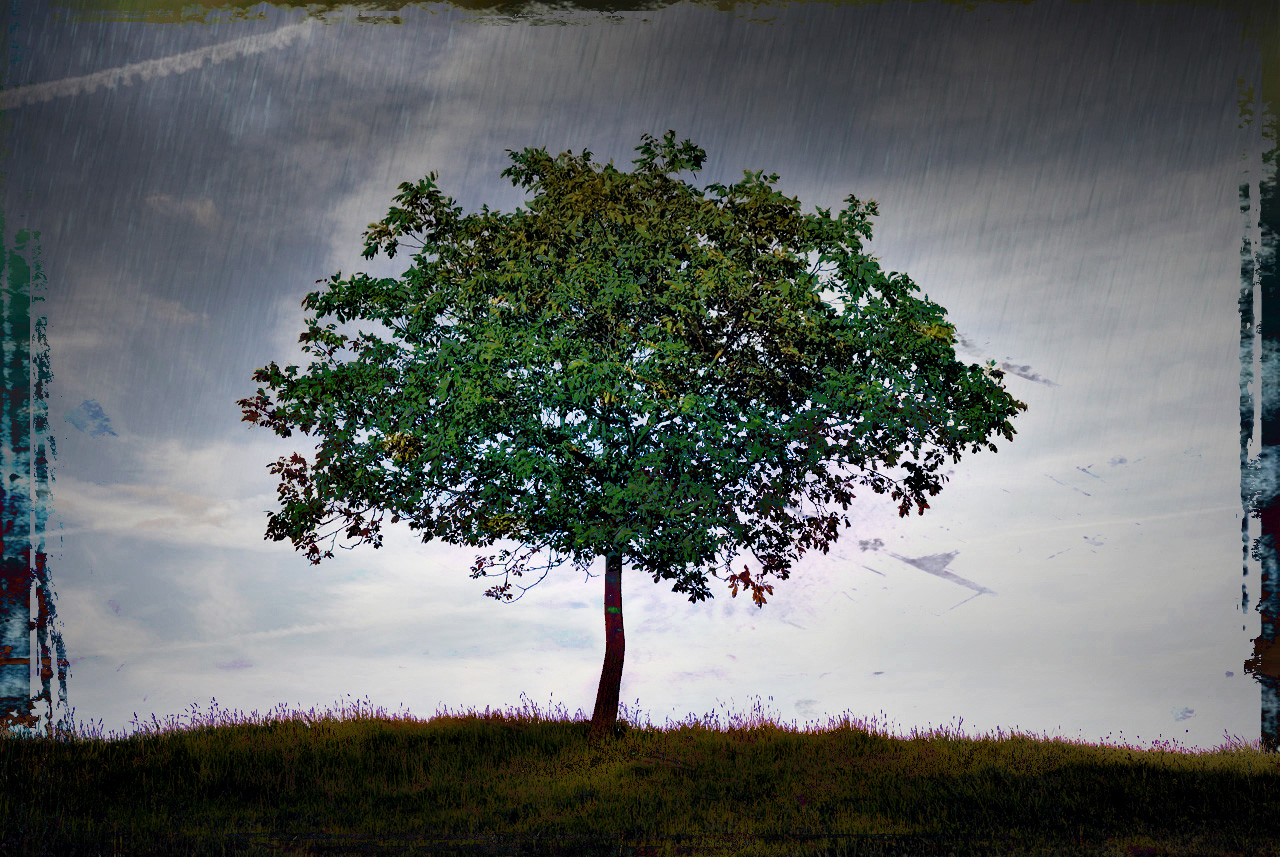
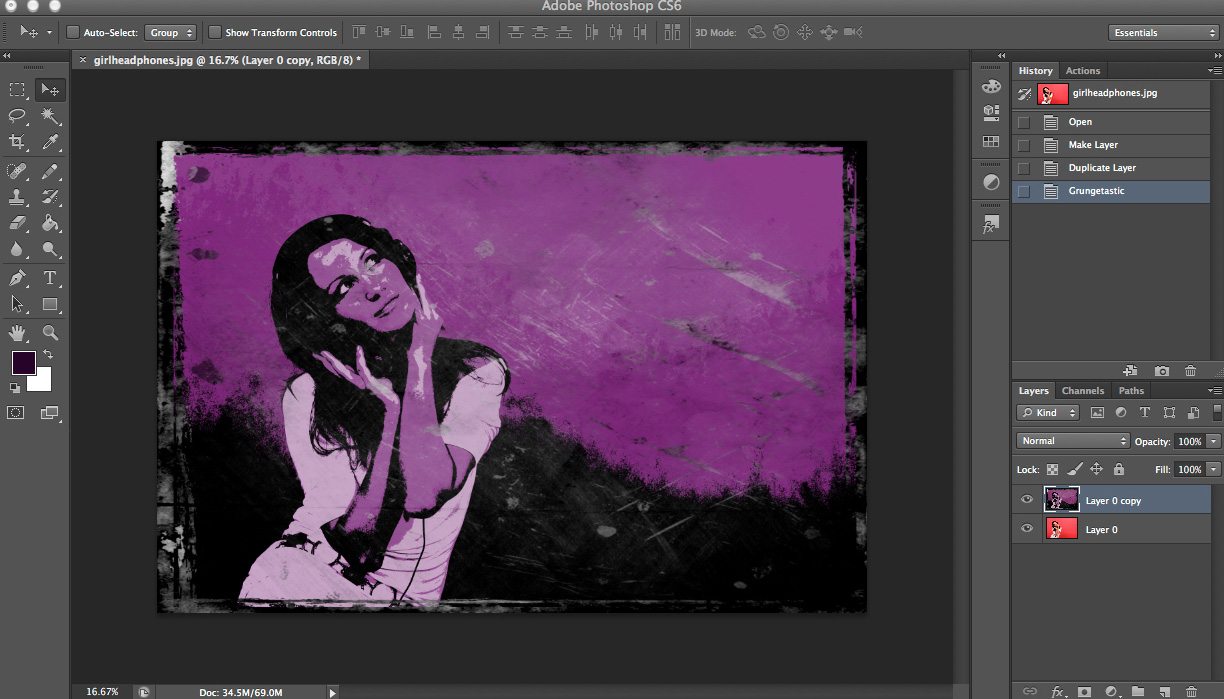
Now click 'Apply Photo' to render this effect and return to Photoshop. With the above settings you should get something like this.
*TIP - You can rename your layers by double clicking the layer name. I rename mine according to the plugin used for a reference later.
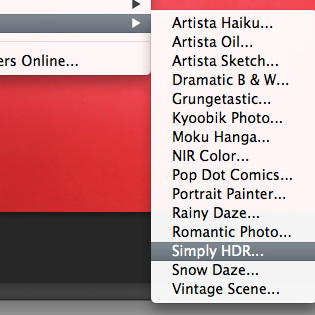
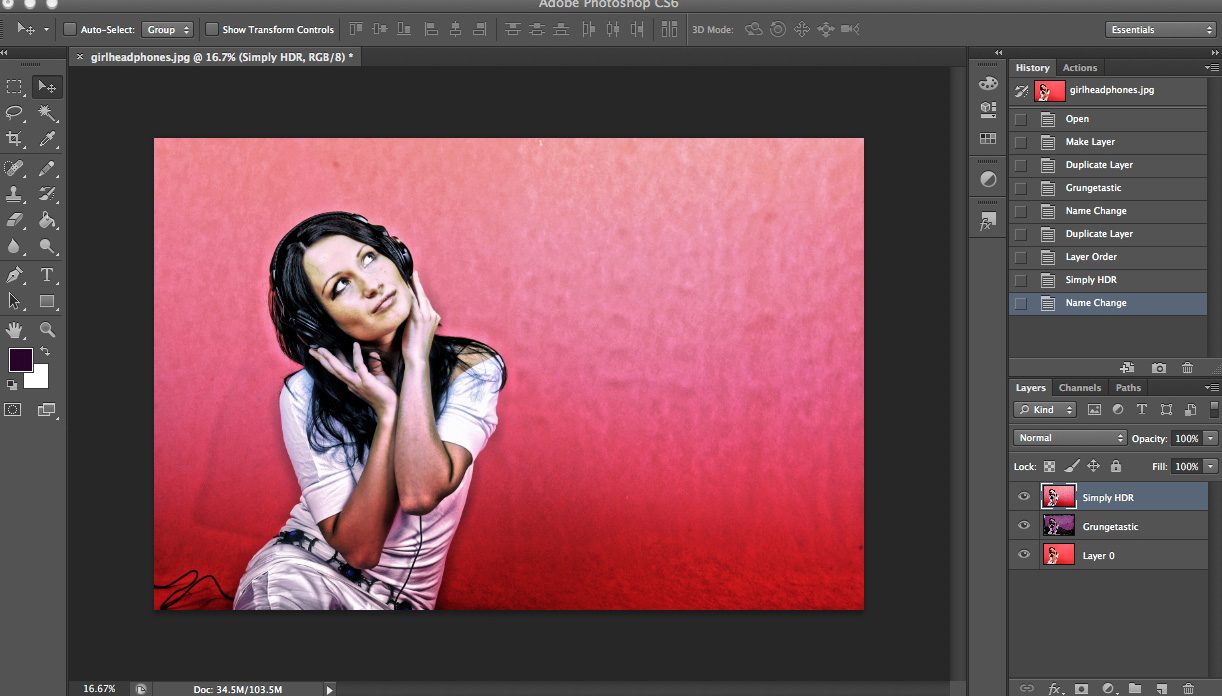
For this step we will once again need to duplicate the original image layer. Right click on the original image labeled 'Background' then select duplicate. After that is done move this layer to the top by dragging the layer to the top above all the other layers. Once this is done we will want to open simply HDR by going to the menu and selecting 'Filters' then 'Jixipix ' and then 'Simply HDR'.
*Make sure you have the right layer selected*
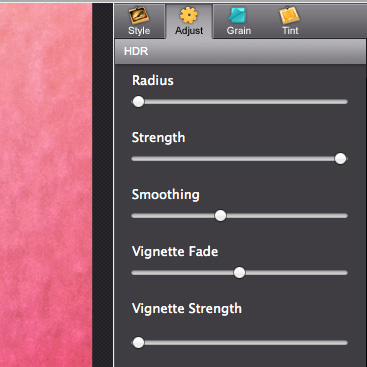
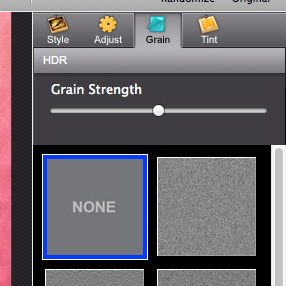
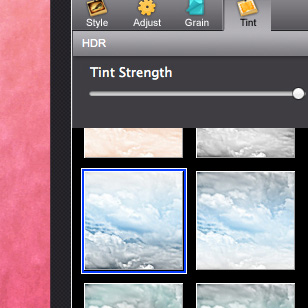
For 'Simply HDR' I'm going to keep it simple so I will use the 'High Dynamic Range' style. In the 'Adjust' tab turn the 'Strength' slider all the way up. Move the 'Radius' slider all the way down and set the 'Smoothing' to a little below half. Vignettes are not needed but can be used to help focus on the middle of the image; if the 'Vignette Strength' slider is moved all the way to the left the vignette is off. We won't be using grain so go to the 'Grain' tab and choose None. For 'Tint' we want to use something that is bright on the focal point of the image (ex. the face) and dark in other places so I will use the Tint 8 on column one. Feel free to use any settings you like though.
*TIP - Use the 'Smooting' Brush Tool in 'Simply HDR' to get rid of unwanted noise on your image. I will use it here to erase excess noise on the arms.
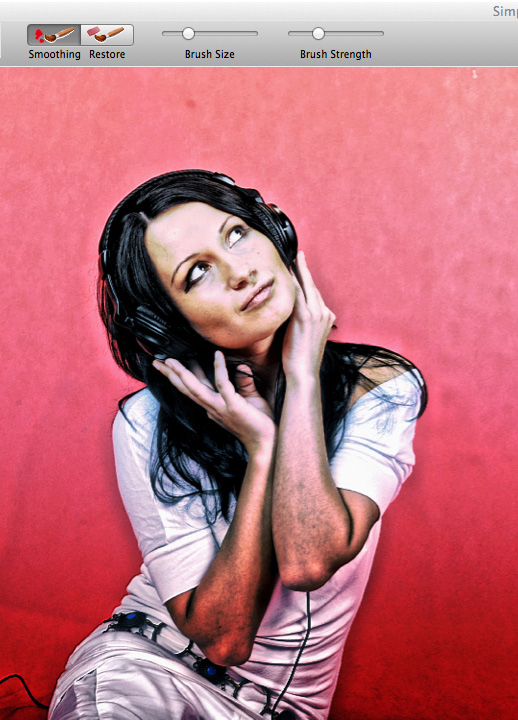
After you are done removing noise click 'Apply Photo' to render the effect and return to Photoshop. Now your layers should look like this.
This is a good time to save your Photoshop file, if you haven't done that already.
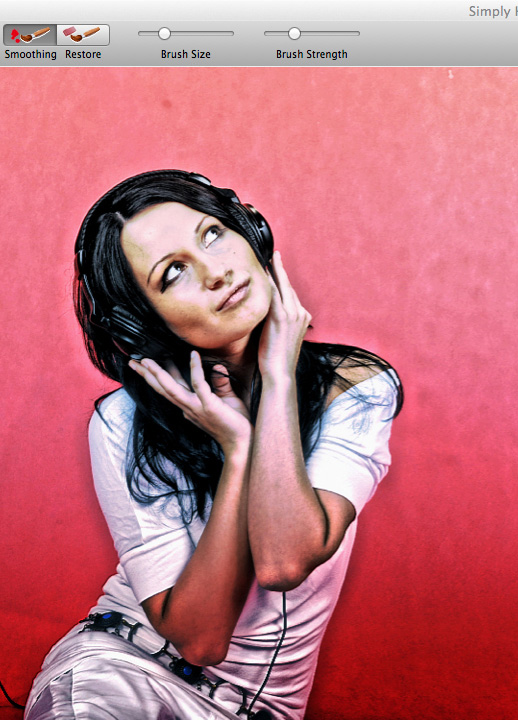
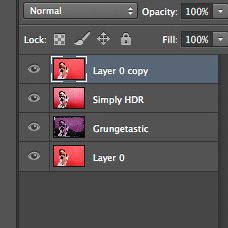
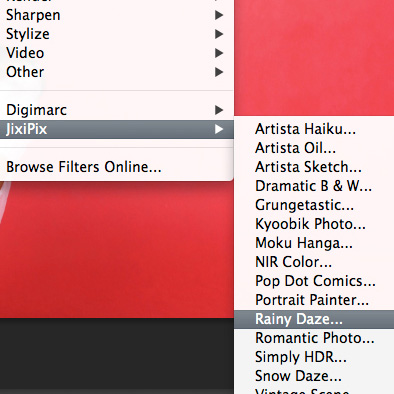
The last Plugin we will use is 'Rainy Daze' to add a little rainy day emotion to our creation. Once again, duplicate the original image on the 'Background' layer and move it to the top of the layer list so it looks like the image below. After that is done open 'Rainy Daze' by going to the menu selecting 'Filters' then 'Jixipix' and then 'Rainy Daze'.
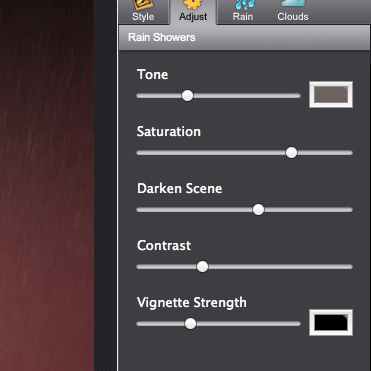
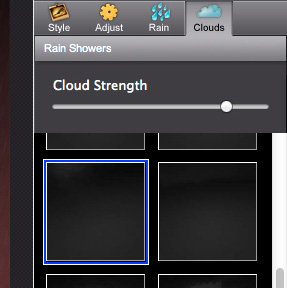
*Once 'Rainy Daze' is open you can easily add rain using the preset thumbnail on the 'Style' tab labled ''Rain Shower 10' (below style names), this preset is a nice compliment to the look and feel of our composition. Make a minor adjustment to the preset style by going to the 'Rain' tab here you can change the rain color, the direction and the visibility of your rain. You can also add clouds under the 'Cloud' tab.
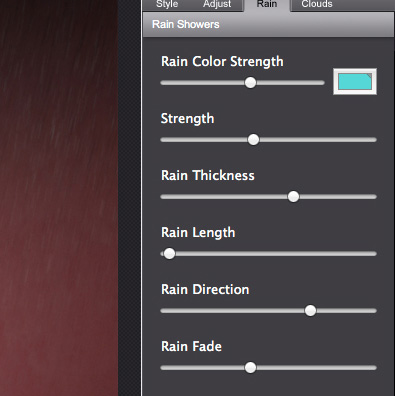
*TIP - Use the 'Erase Rain' brush found on top to remove unwanted rain off of faces or other areas of your image.
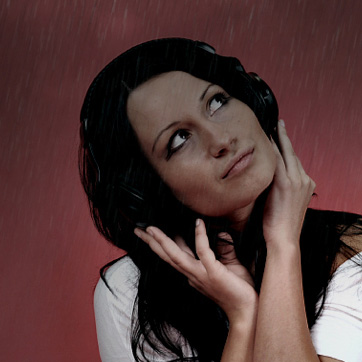

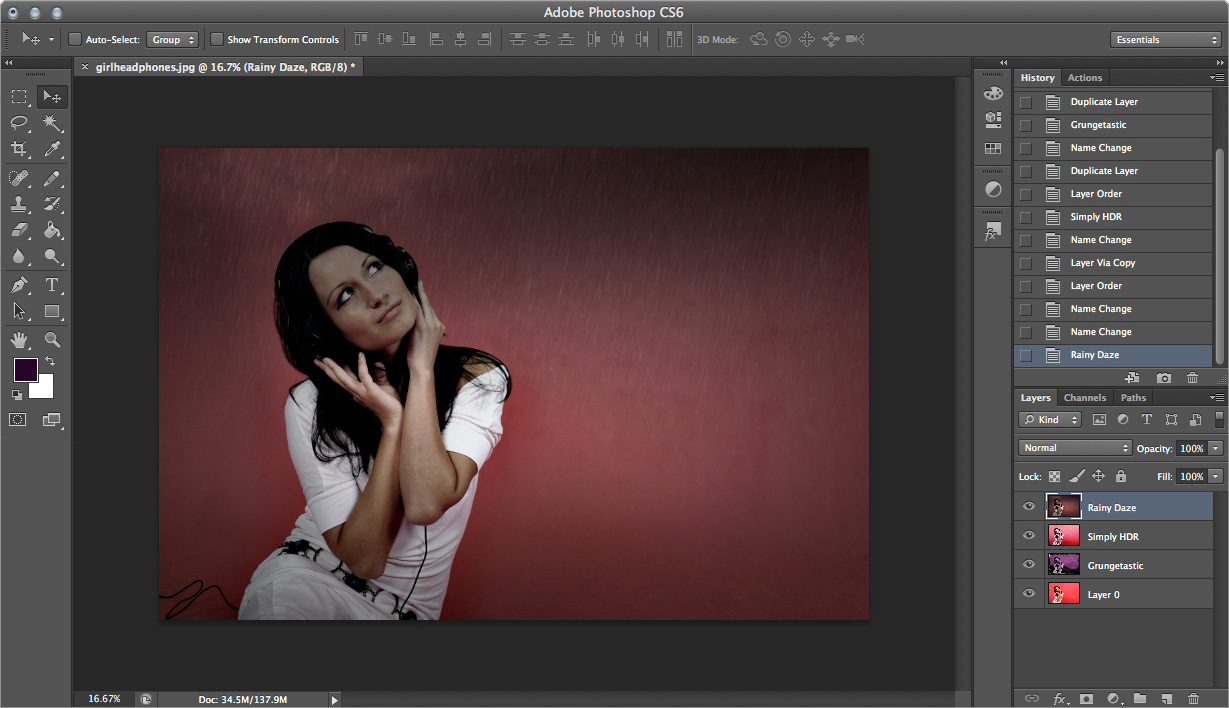
After you have finished click 'Apply Photo' to return to Photoshop. Now your layers should look similar to the image below, if so continue to the next step.
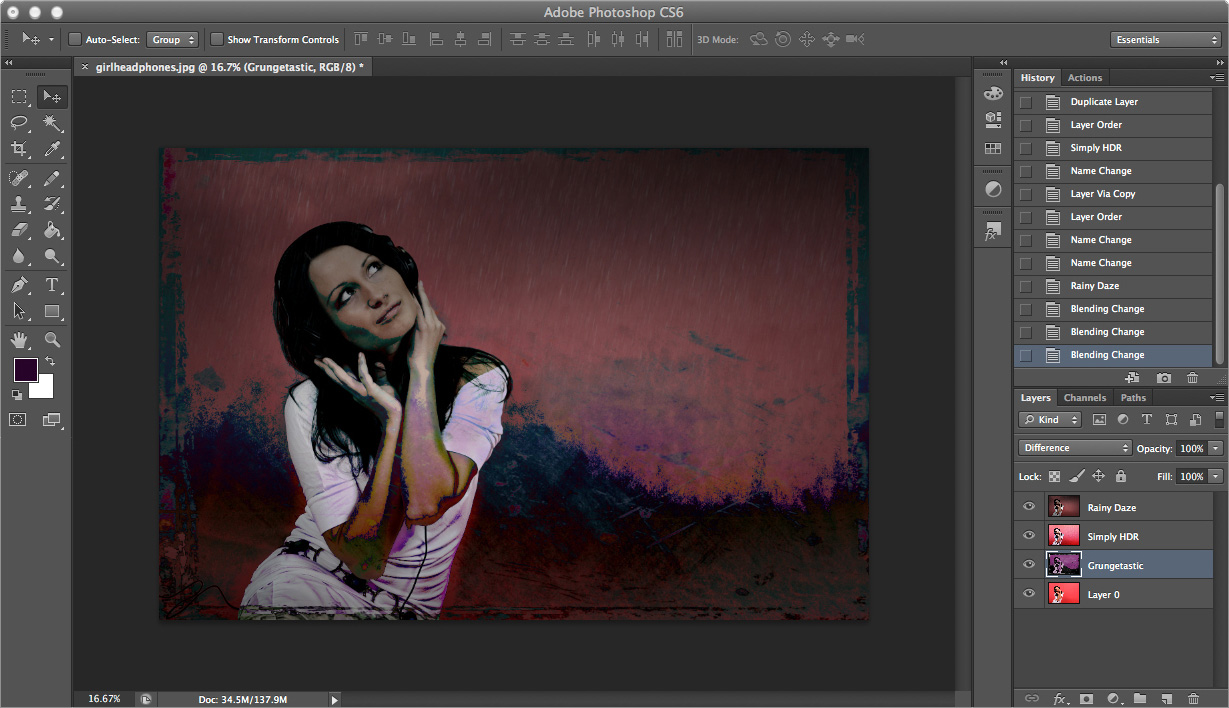
This step is where our Plugins combined with Photoshop really shines. As you can see moving back and forth between Jixi's Plugins and Photoshop saves time and puts our effects right where you need them.
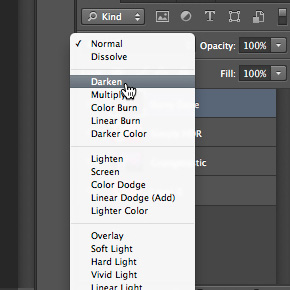
The last step we will use Photoshop's blending modes and apply them to each of our new layers. Start by selecting the top layer with the rain effect rendered to it. Change the 'Blending' mode by going to the top of the layer's palette then where it says 'Normal' click to open a drop down list then choose 'Darken' off the menu..
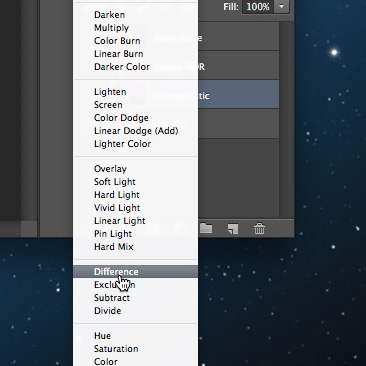
After you've done this change the blending mode on both the SimplyHDR and Grungetastic layers to 'Difference'. We use these blending modes to get this specific look but feel free to play around with different blending styles to create something completely different.


This should give you something like this.
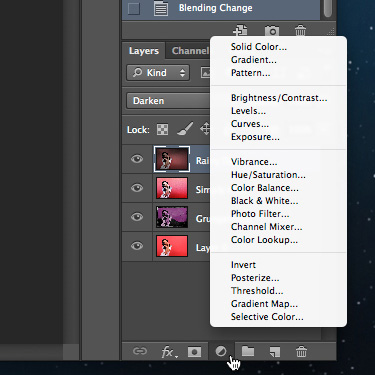
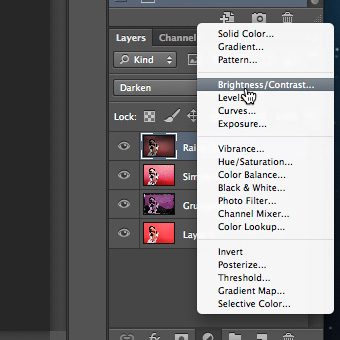
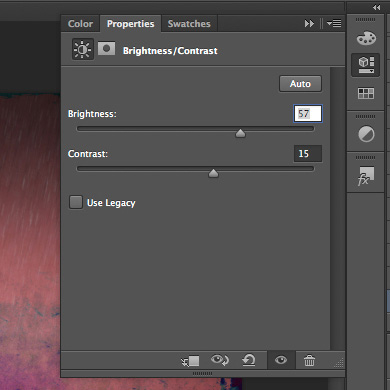
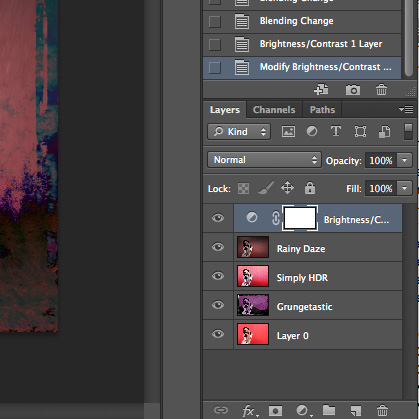
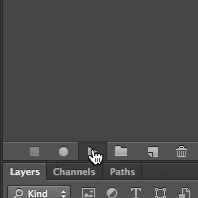
We are almost done! The last thing we need to do is change the brightness and contrast of the image. We'll do this by adding an 'Effect' layer, click the 'Circle' icon on the bottom middle of the layers palette. A drop down window will appear, select 'Brightness/Contrast'. This will create an effect layer called 'Brightness/Contrast' on your layer palette, make sure this layer is above all the other layers. When you make an effect layer notice an adjusment window will open as well. Use this to change the amount of the brightness and contrast. Do this by moving the 'Brightness' and 'Contrast' sliders, for this image i used 'Brightness' 57% and 'Contrast' 15%. Play around with these settings to find out what works best for your image.
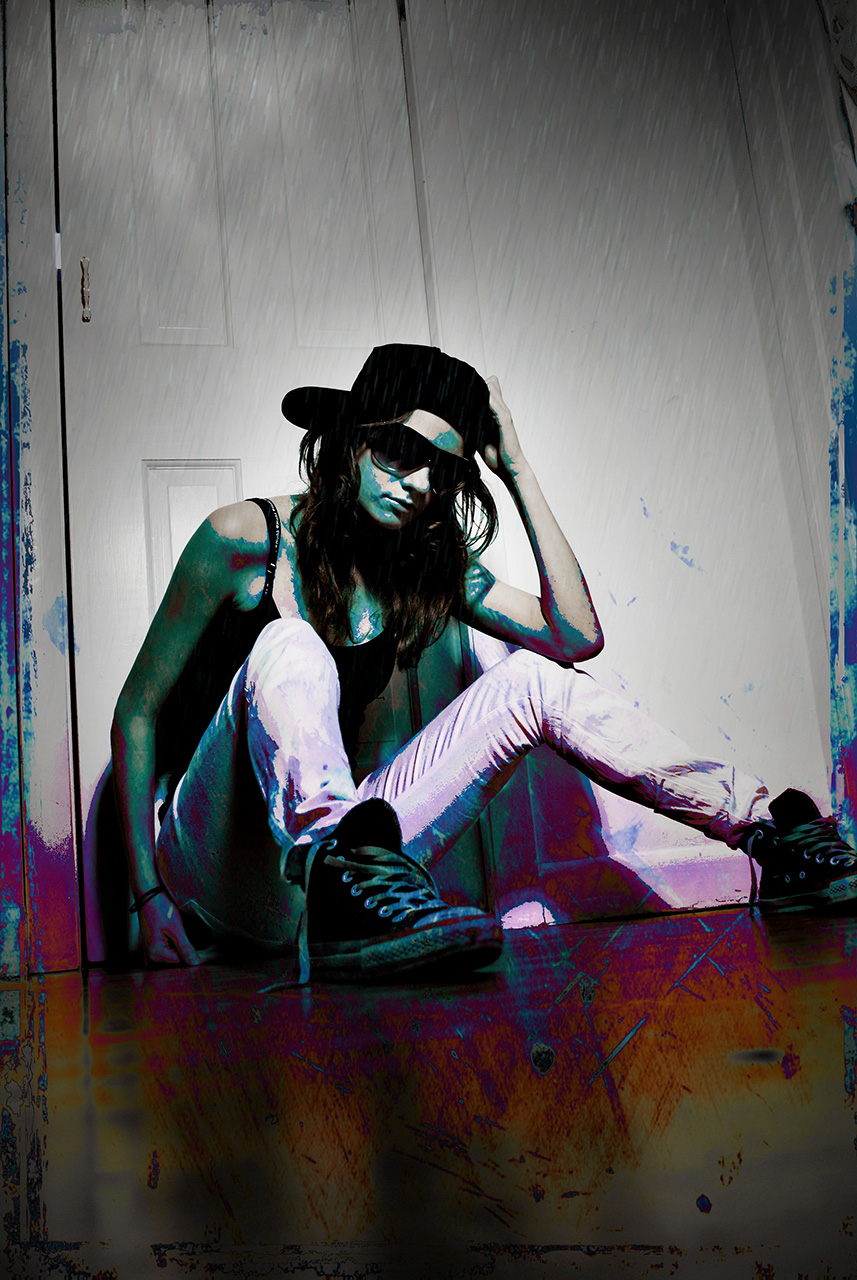
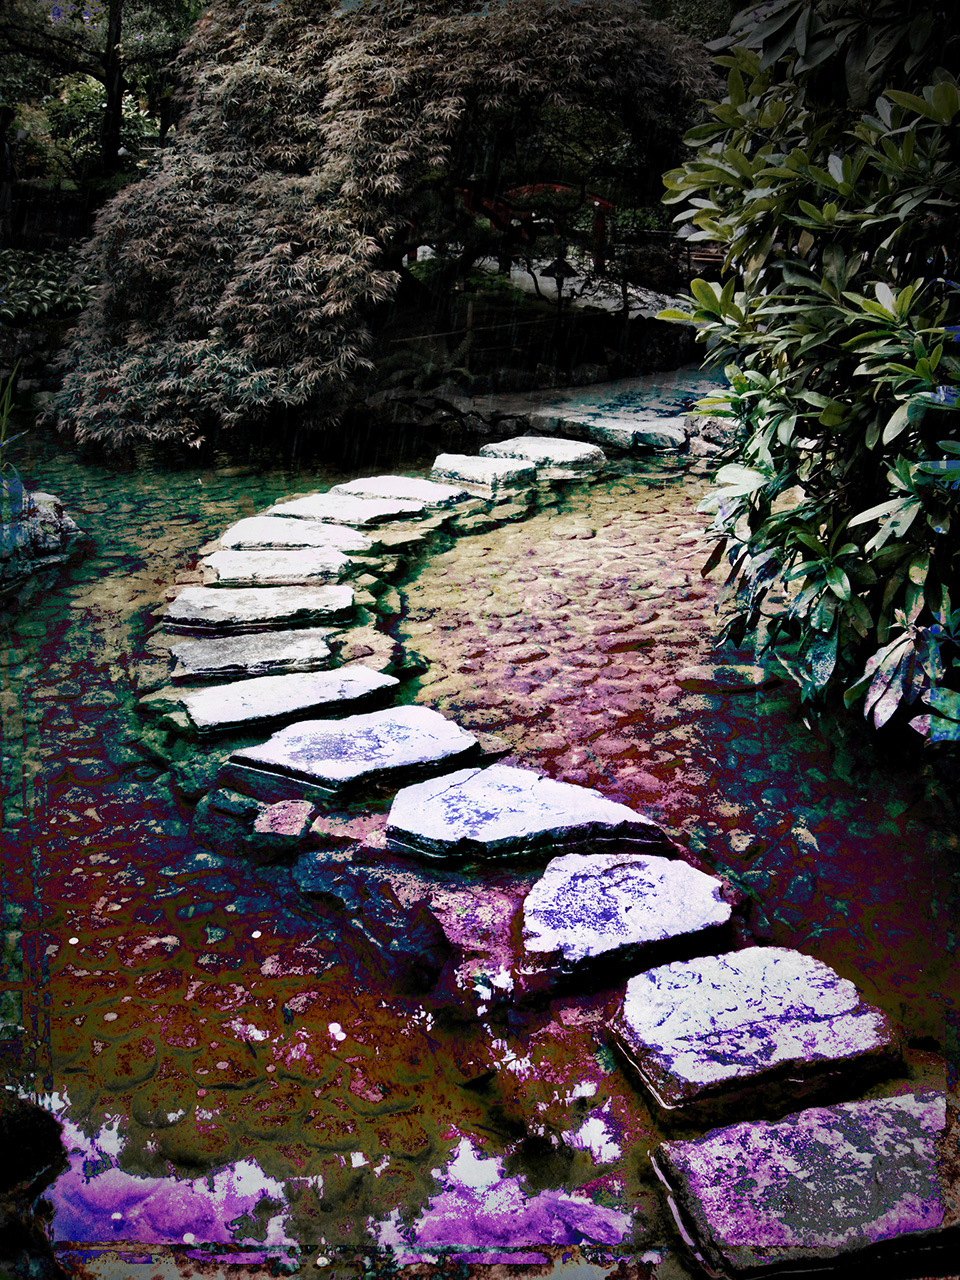
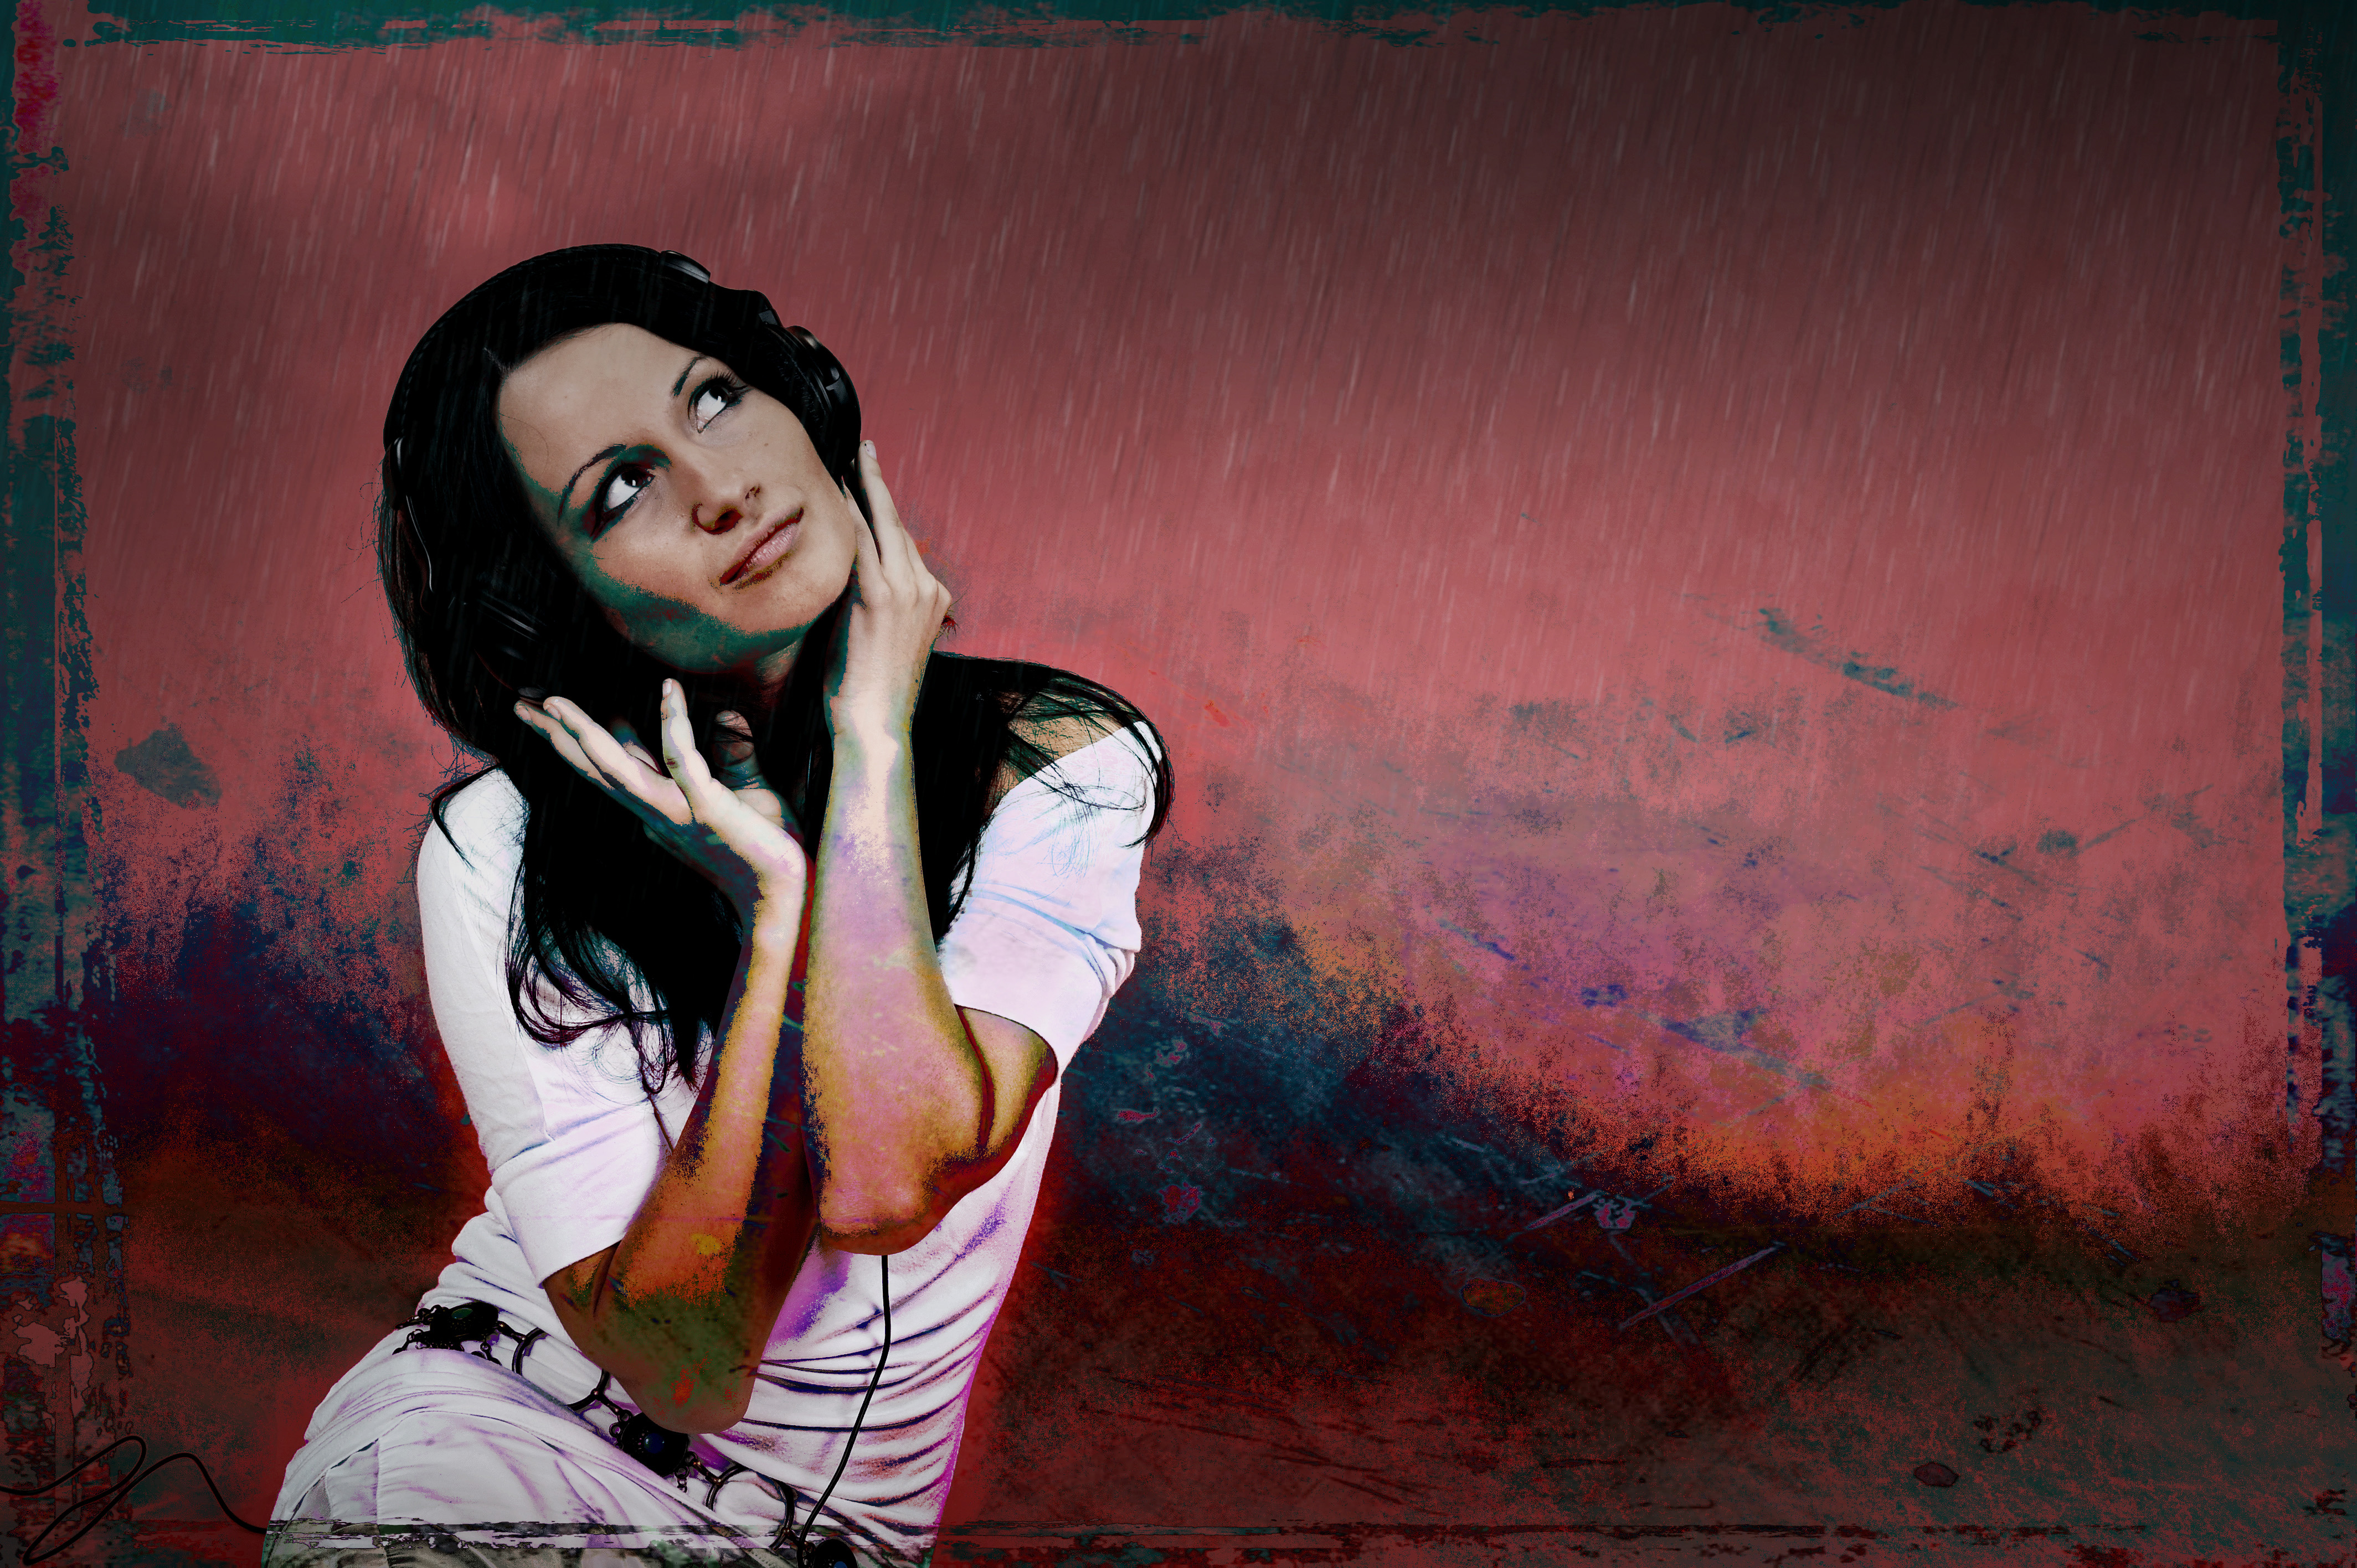
And with the last finishing touches you should get something like this:
I hope you enjoyed our tutorial and can see the beauty of blending our plugins with Photoshop layers and blending modes. This is just the first step of creativity. You can use these same steps to combine our other plugins to create something completely different.
Feedback
What do you guys think? Have any app or plugin combinations you like? Any tutorials that you would like to see in later posts? Feel free to tell us and show us your creations on our Facebook and Flickr accounts.
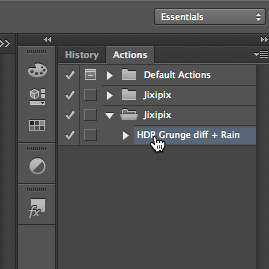
To many steps? Download our Photoshop Action here to have Photoshop do the work for you.
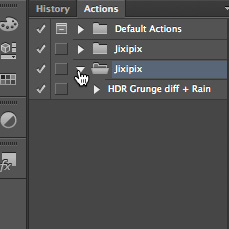
To use the action download the action and double click it. That should open photoshop and add the action to your actions list. Go to your actions tab ( if not visible go to the menu and select Windows then select Actions). Click the arrow next to Jixipix and click on 'HDR Grunge Difference + Rain' then click the play button at the bottom of the actions tab to start the action.
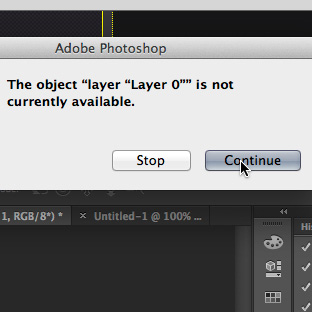
Layer Locked?
If your layer is named "index" and locked you will need to unlock it before the action will work. to unlock it go to the menu and select Image then Mode then select RBG Color. Also when you run the action it will bring up two windows asking you to continue, just click continue.
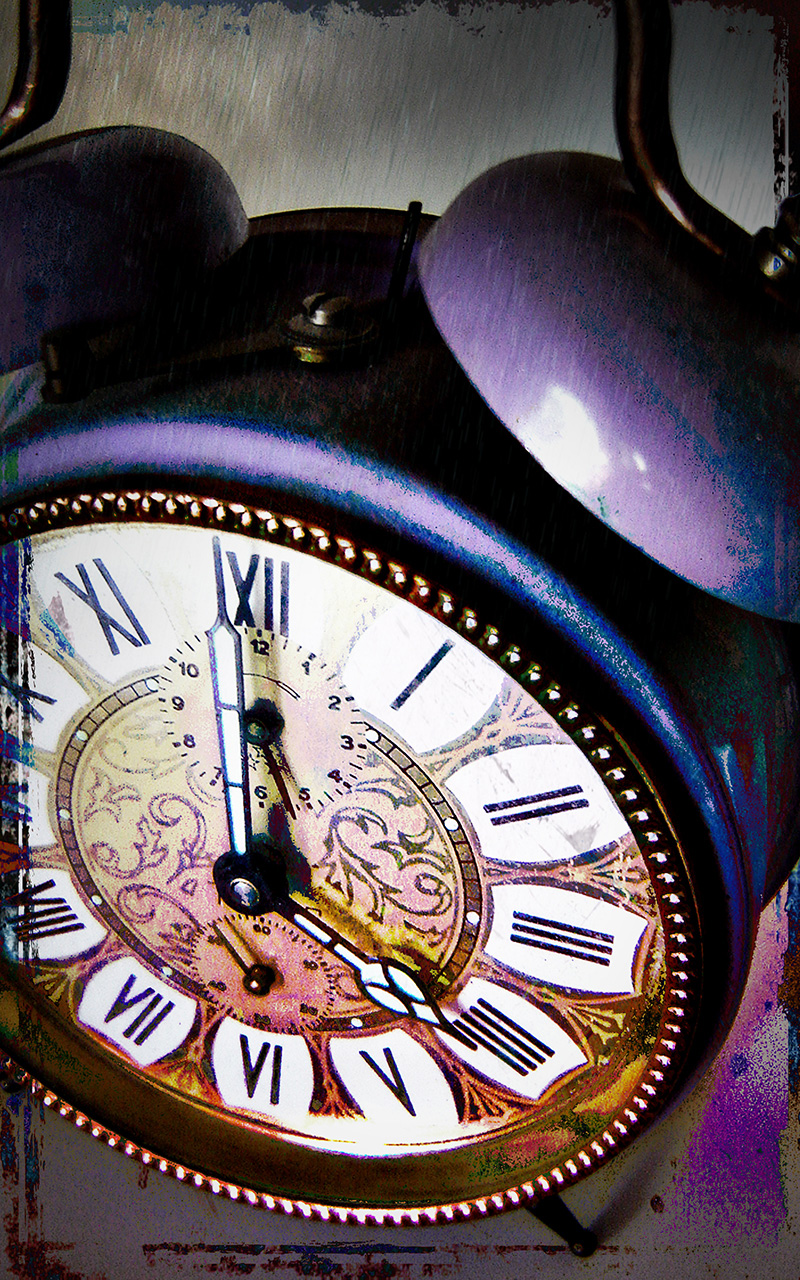
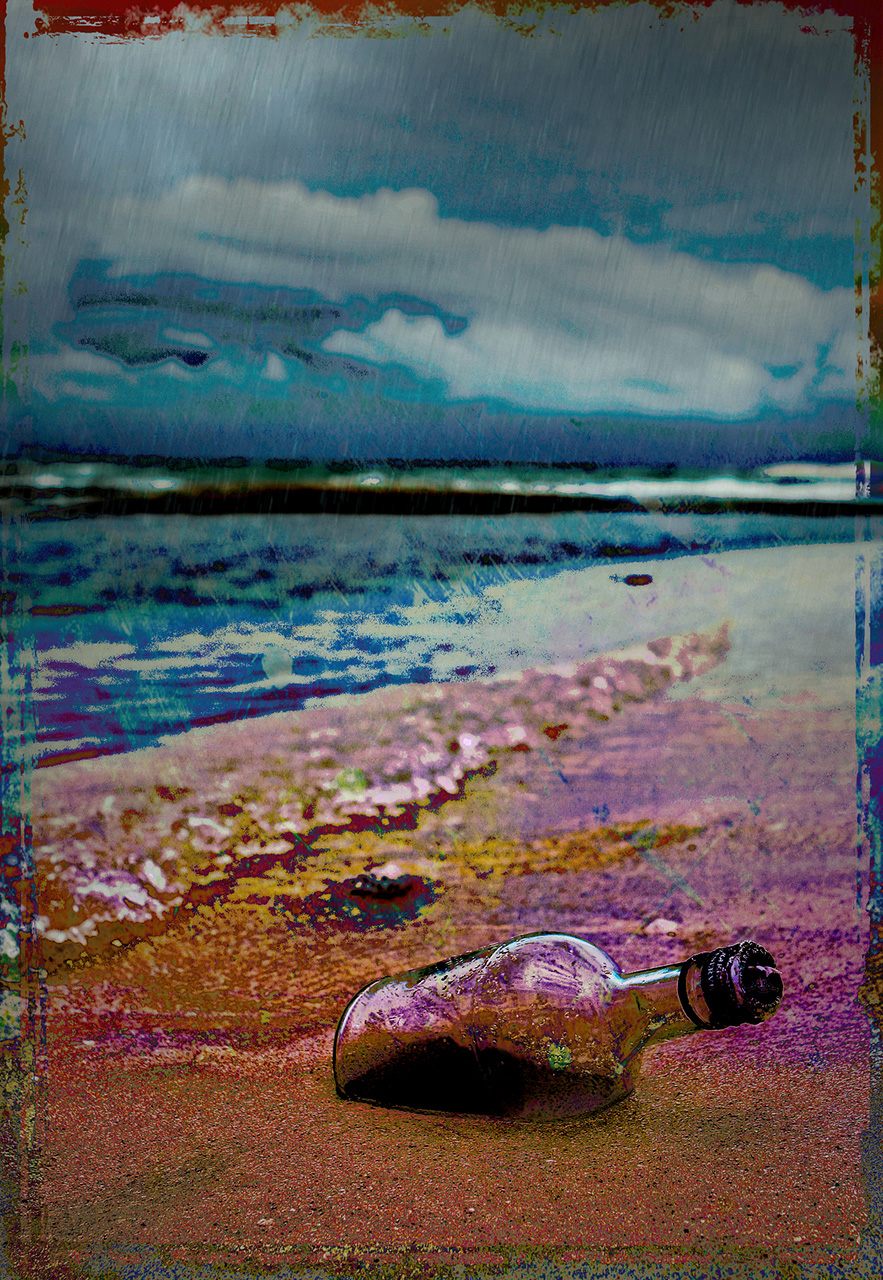
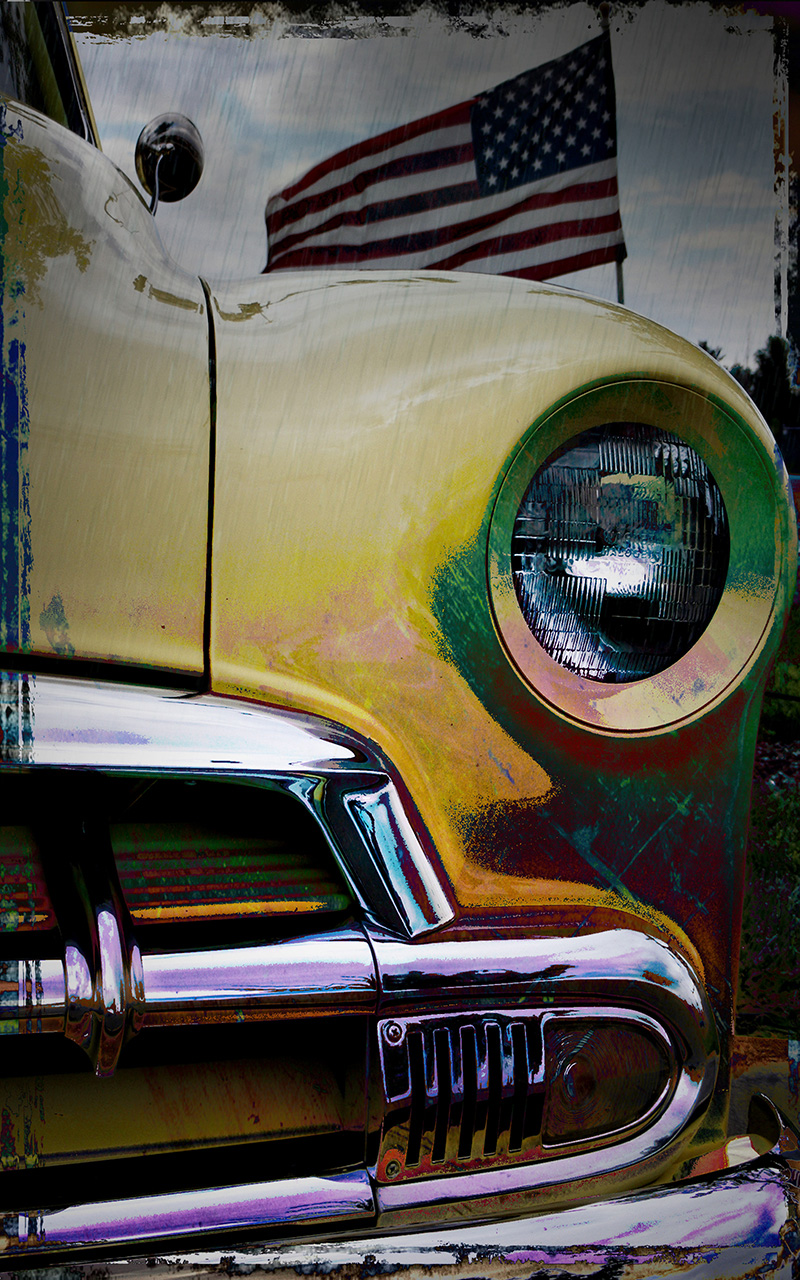
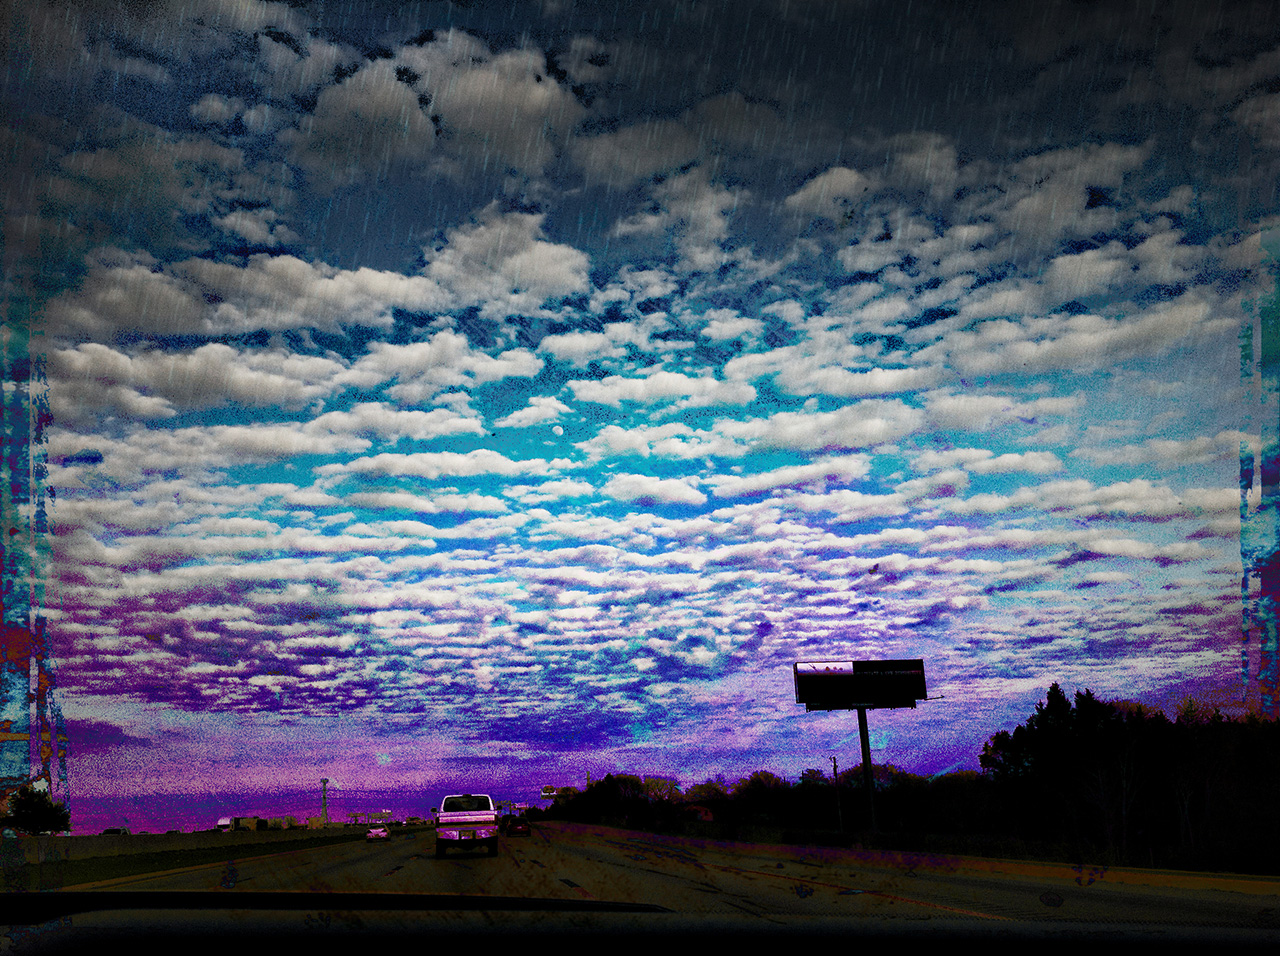
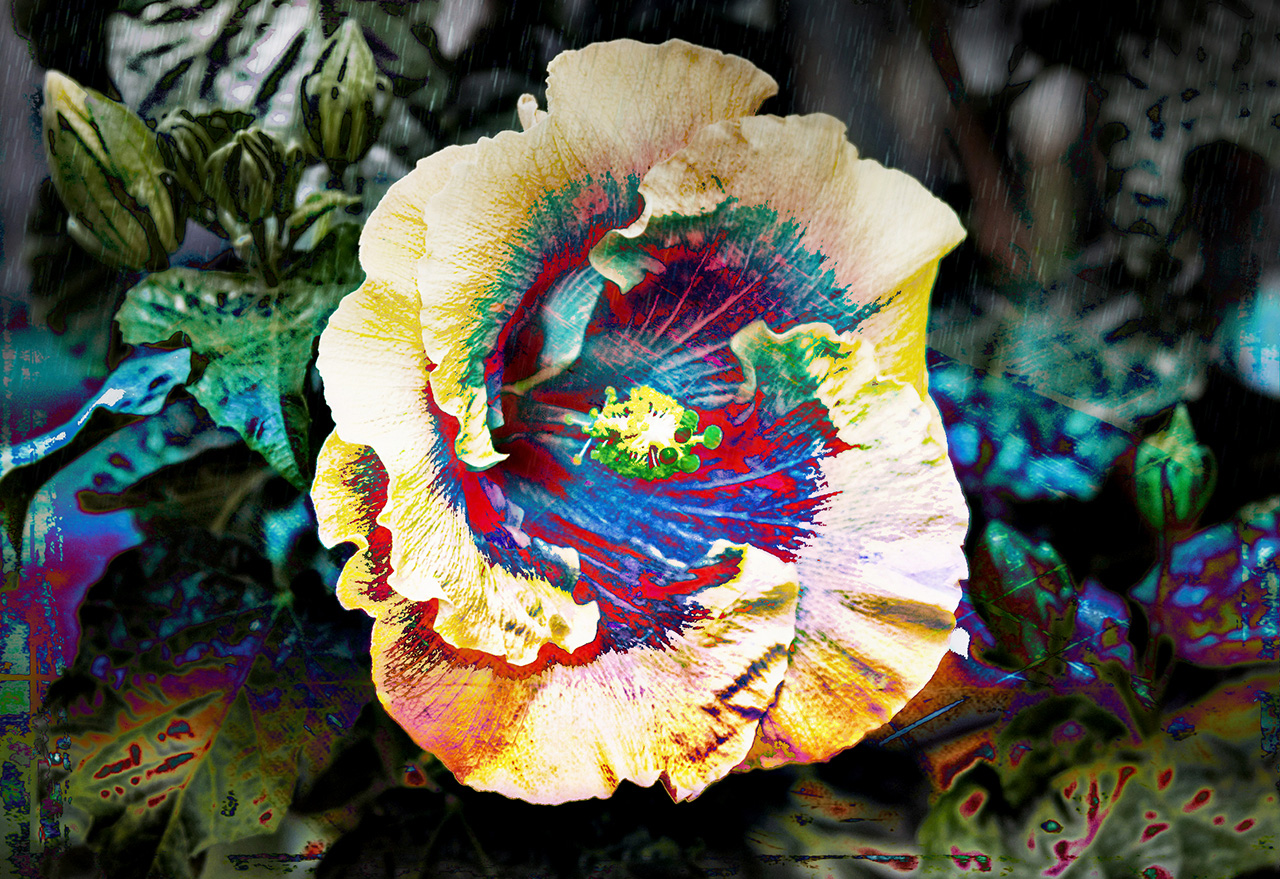
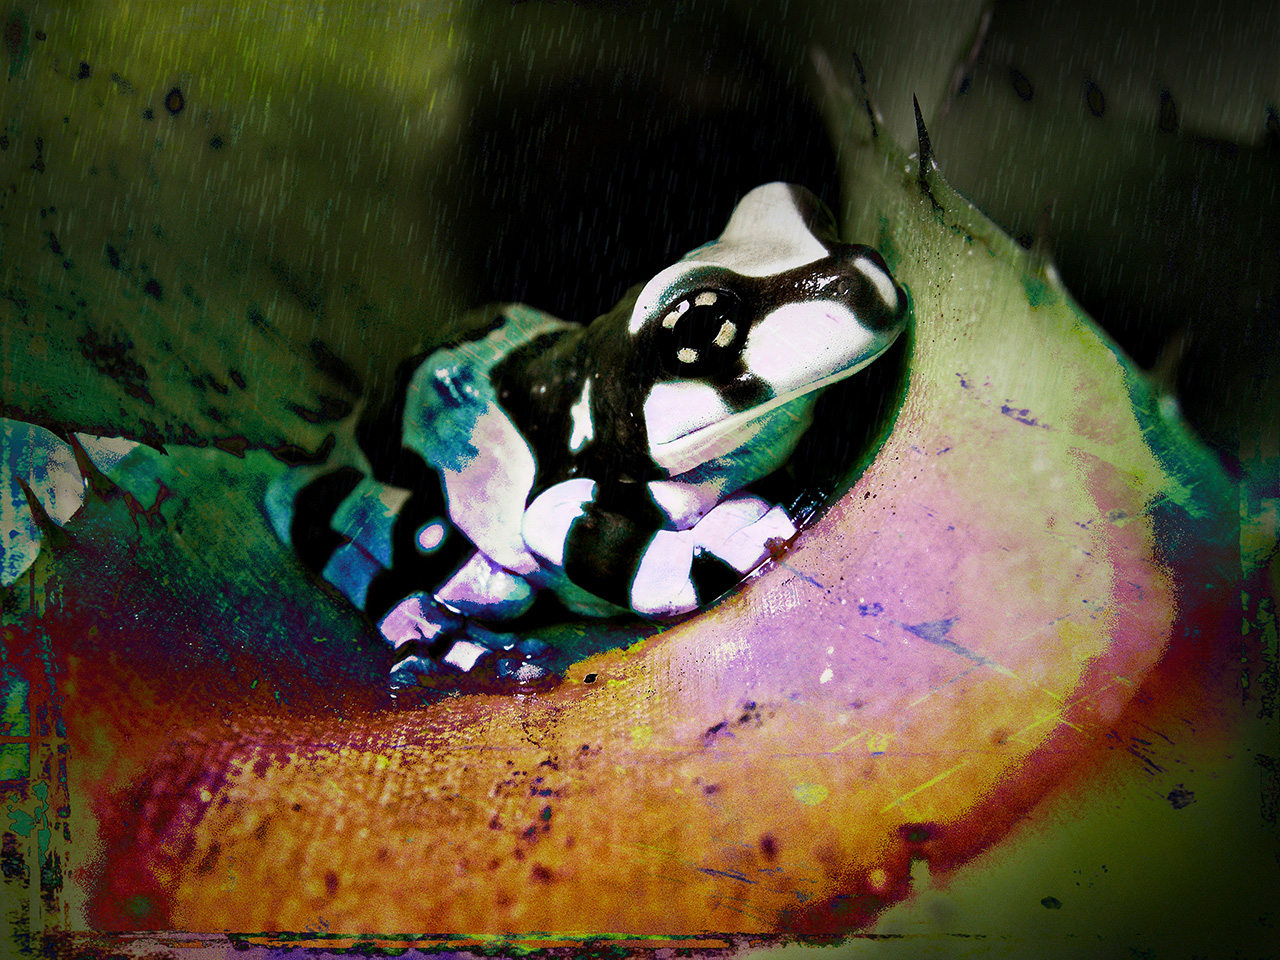
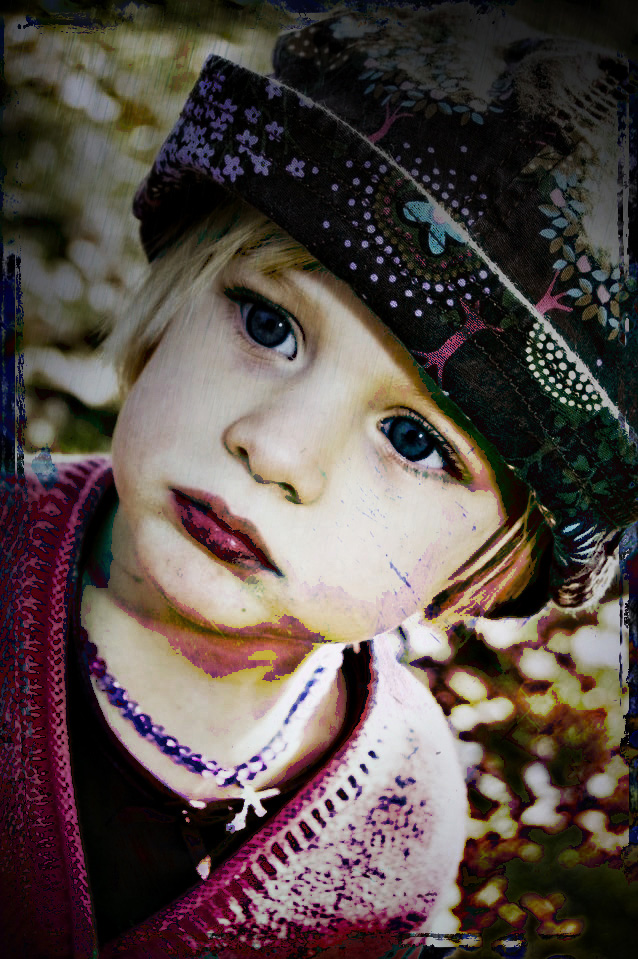
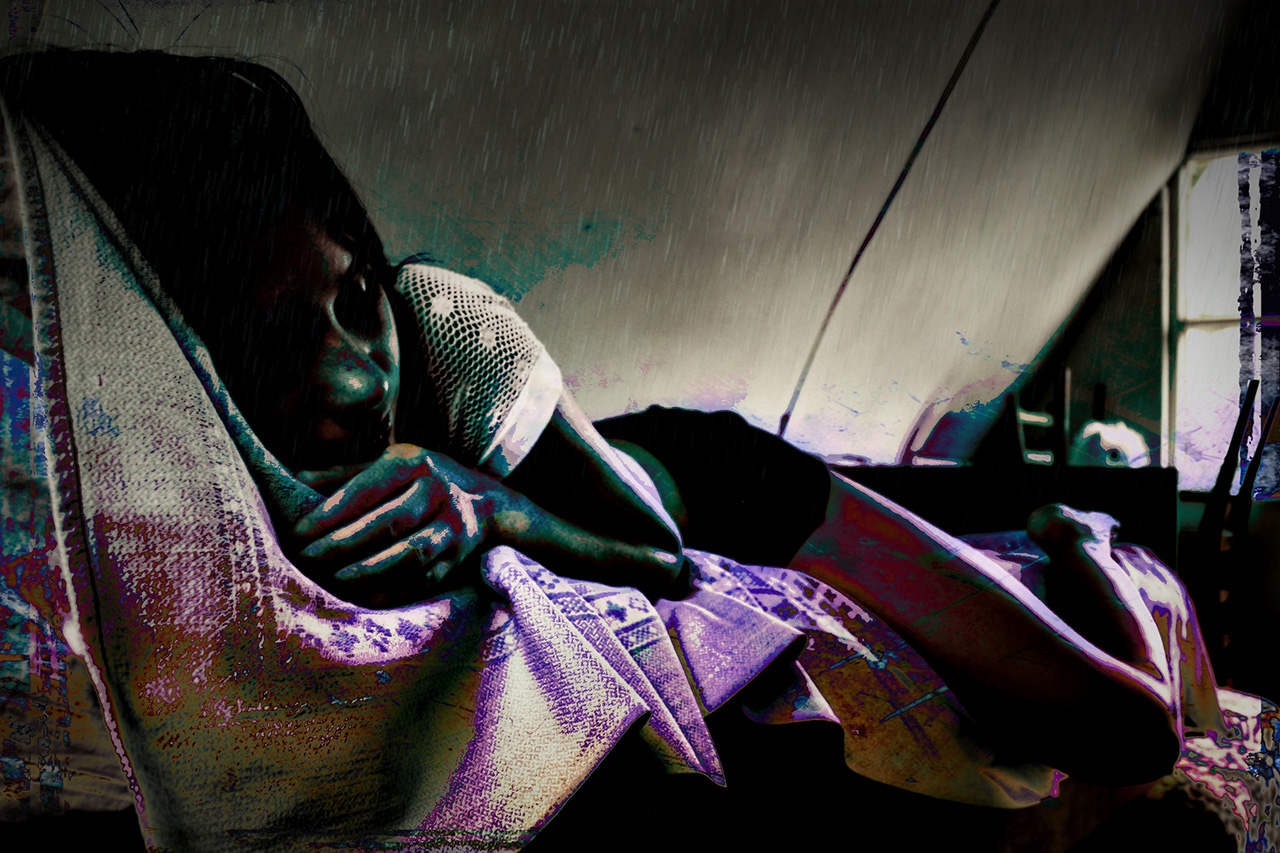
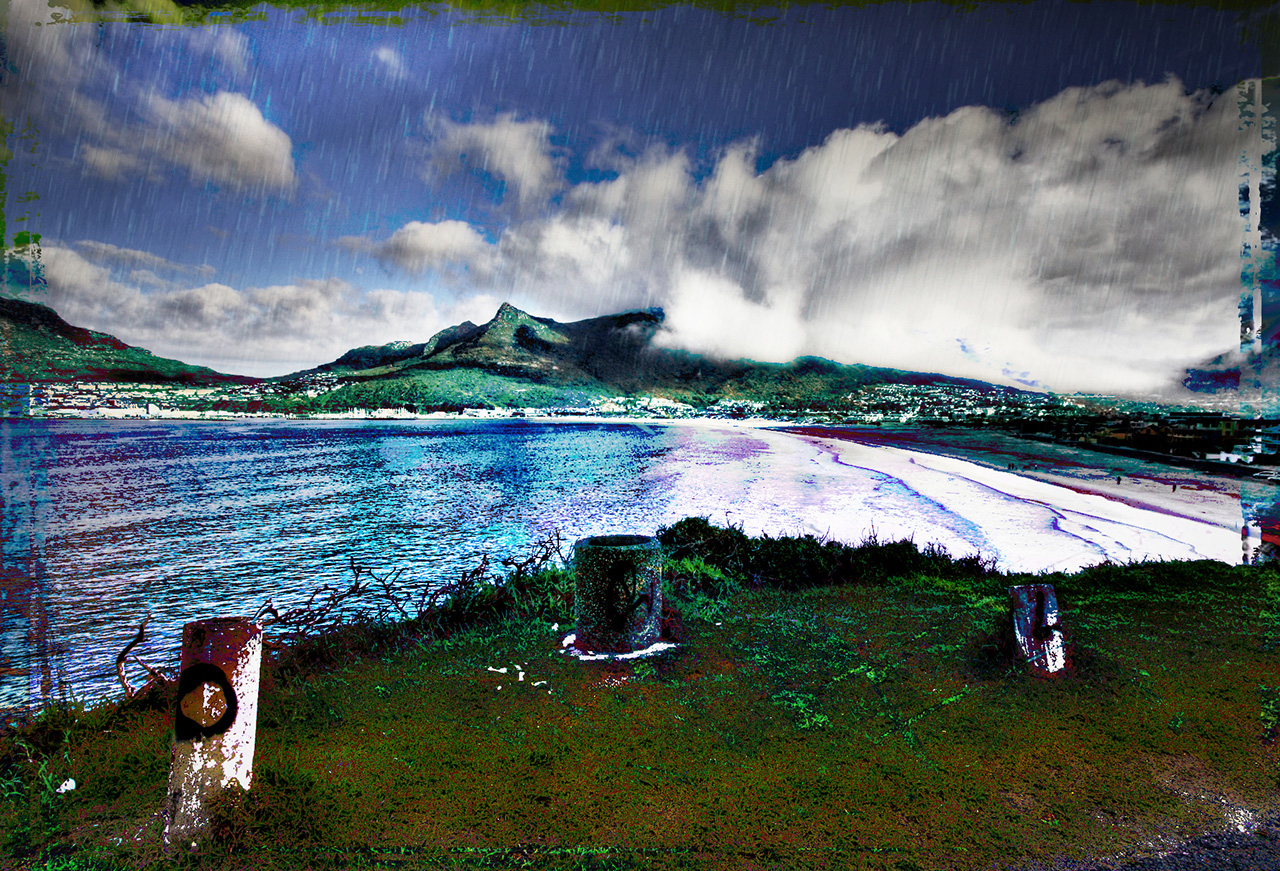
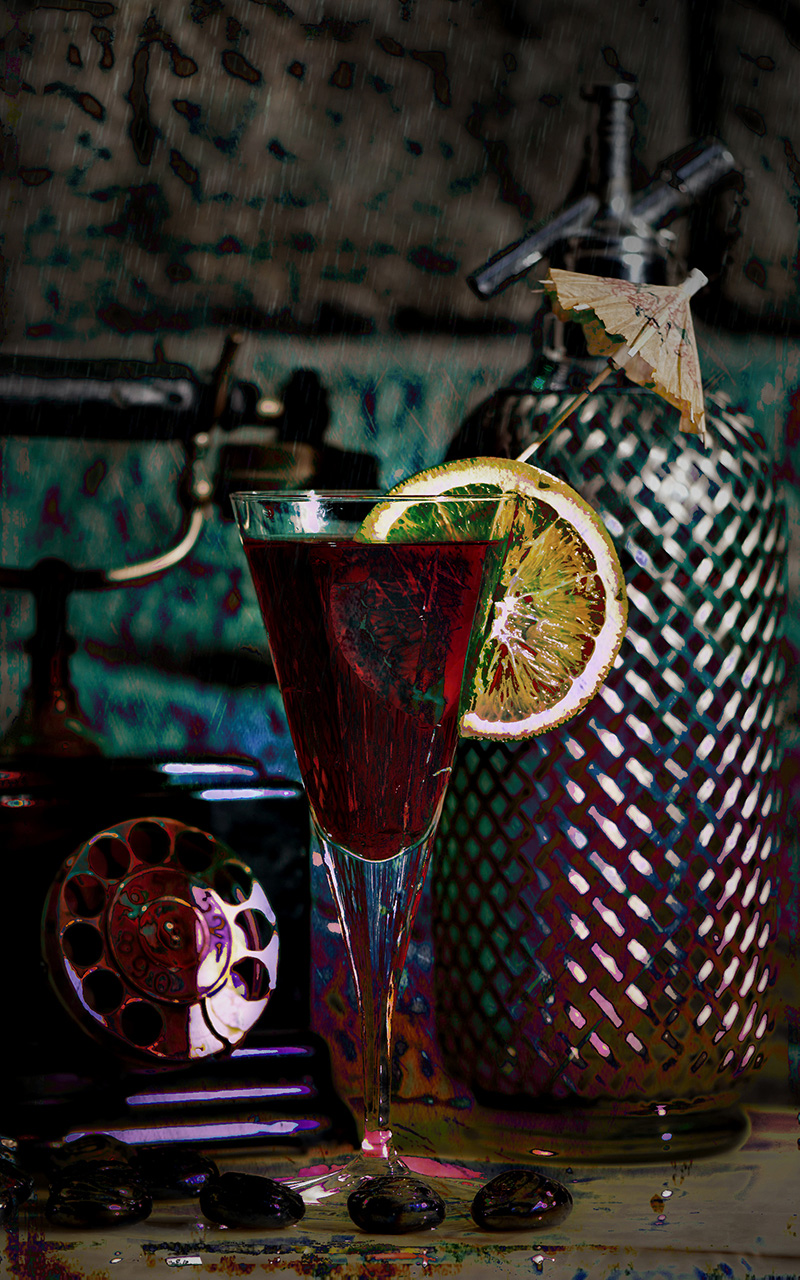
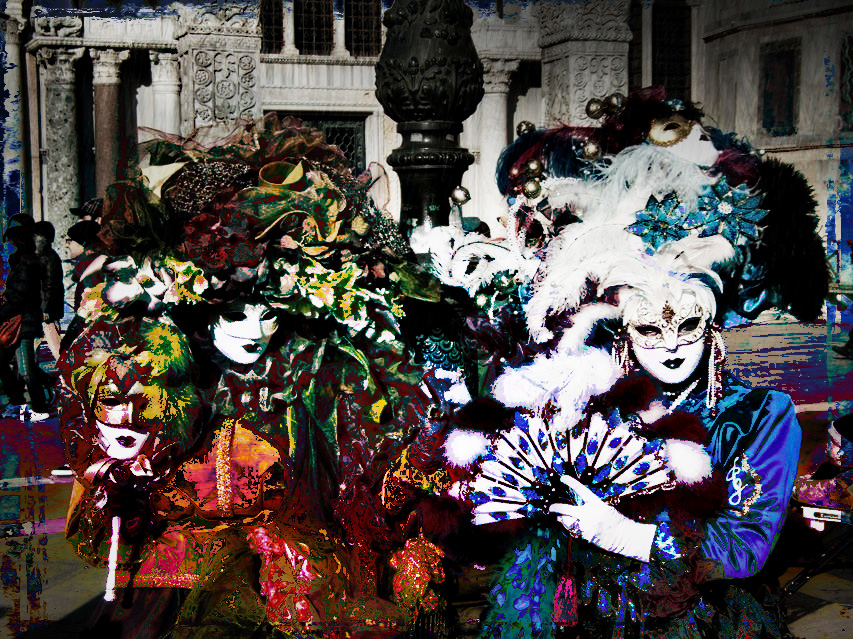
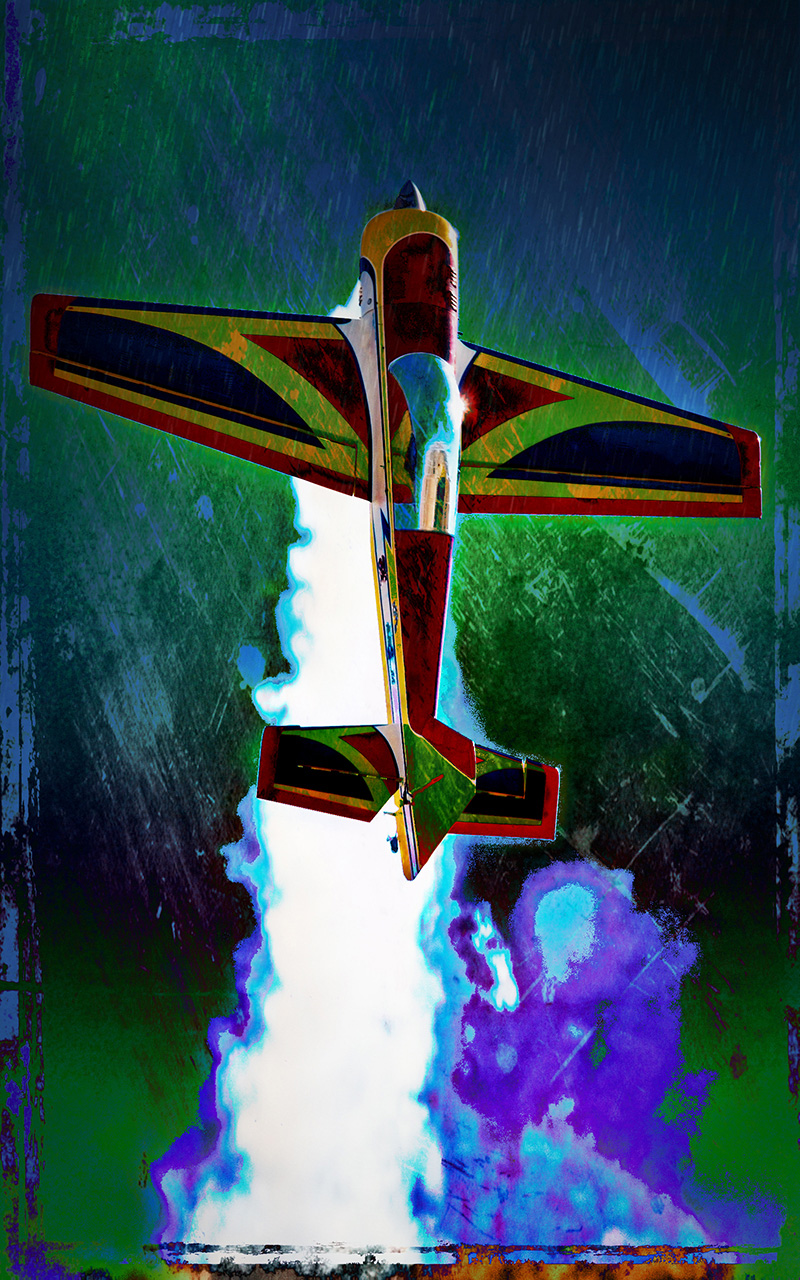
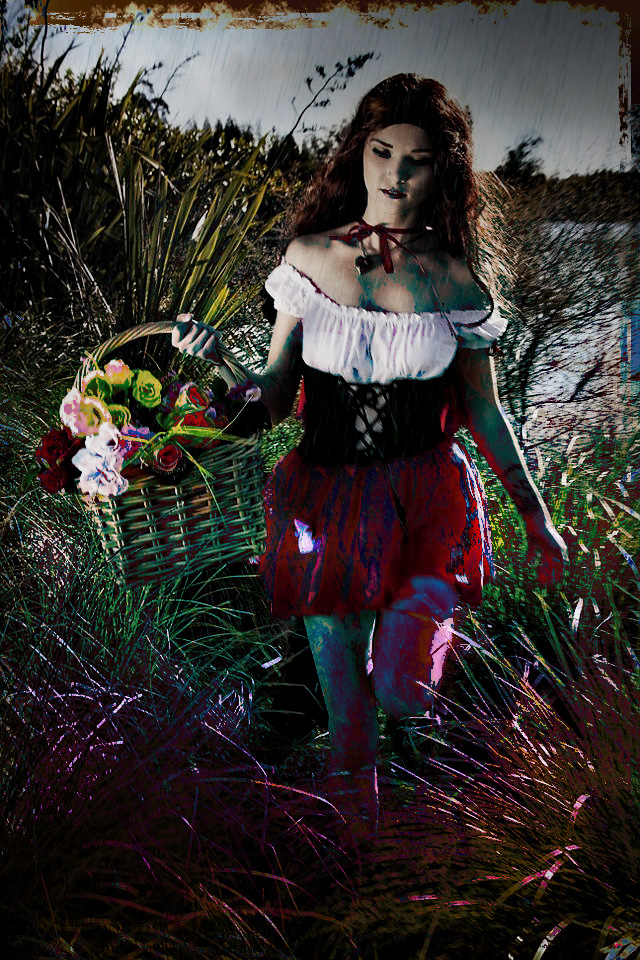
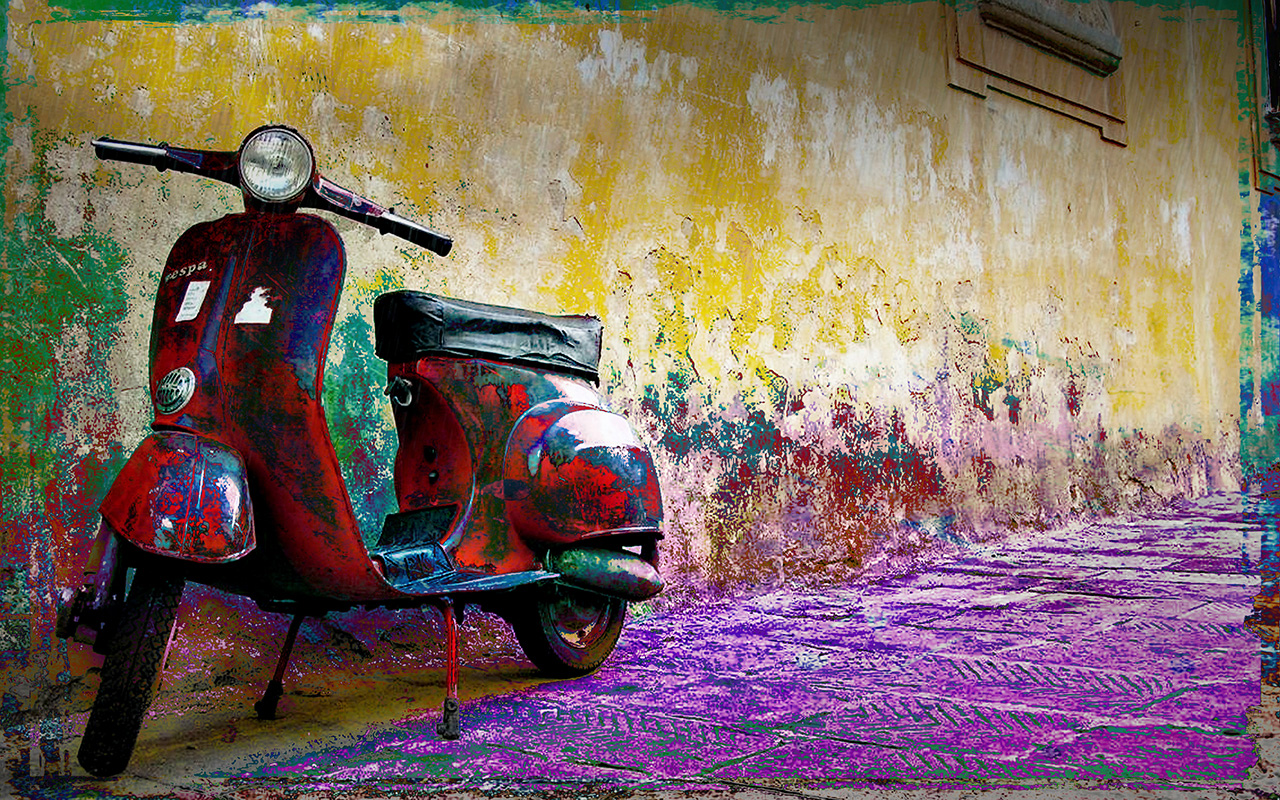
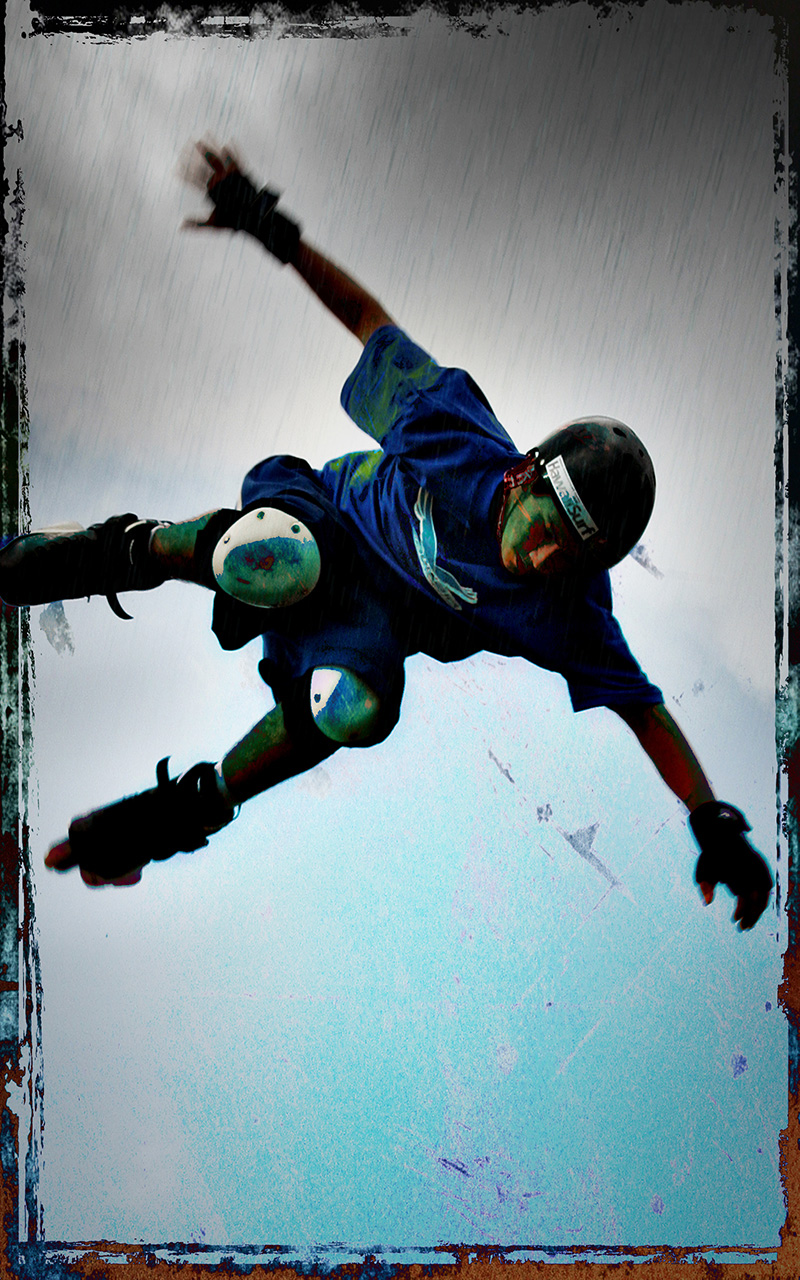
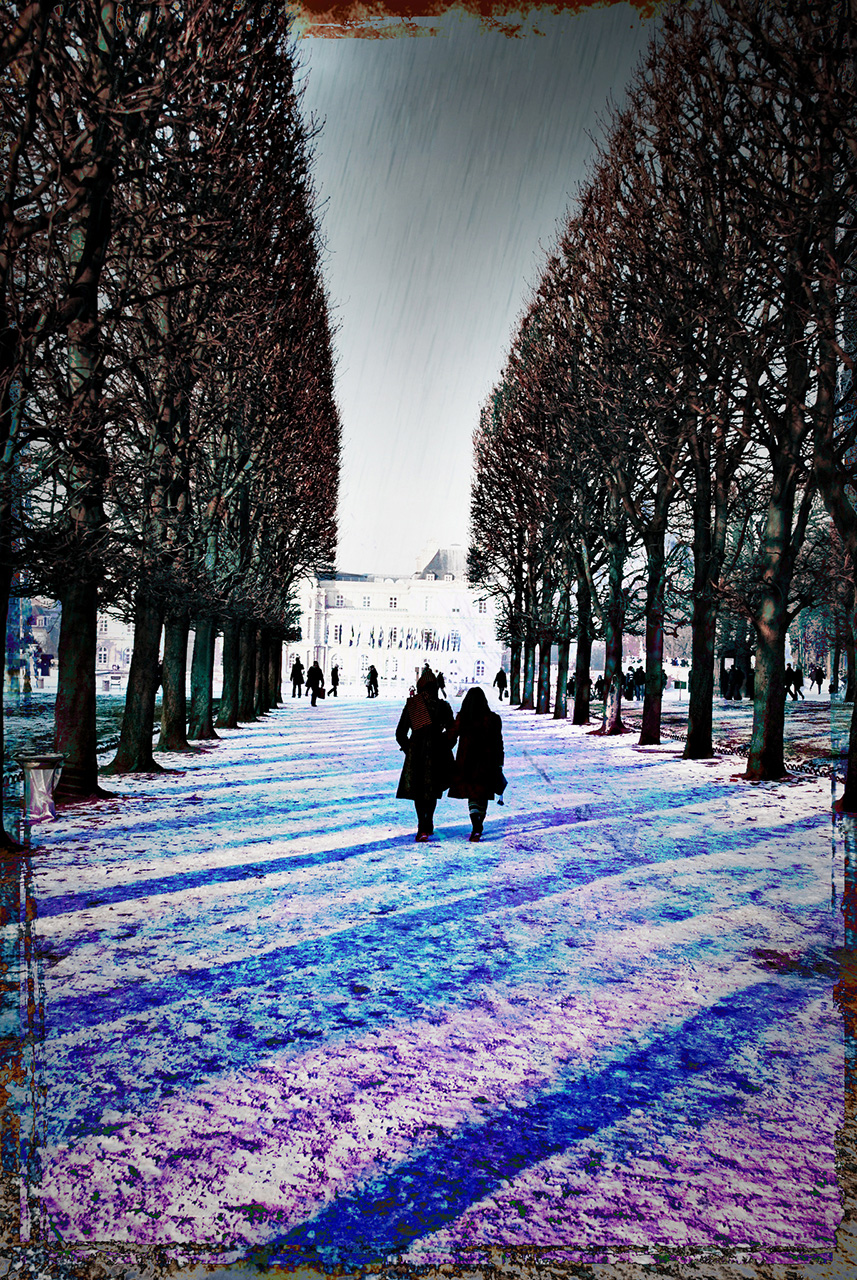
These examples were created using almost the exact same settings as the tutorial above.