Updated November 17, 2026. Use Cmd on Mac and Ctrl on Windows. Screenshots show the regular Mac app. Digital box examples use Front view. Click any screenshot or artwork to enlarge it.
Start with a scene preset, make a small change, and save a project you can return to. Each Design layer represents one sheet in the finished scene.
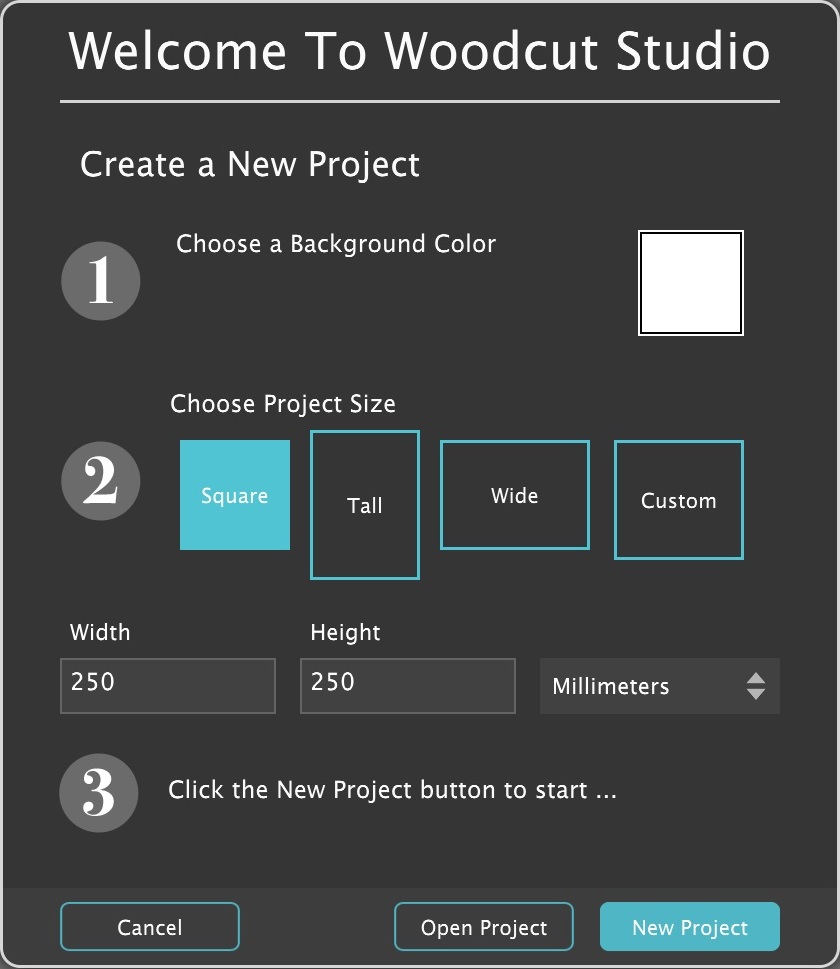
At launch, choose Square, Tall, Wide, or Custom in Create New. Check the width, height, and units, then click New Project.
Choose a category in the preset browser at the bottom and click a scene thumbnail. A full scene preset replaces the current stack, so save any work you want to keep first.
Select a Design layer in Layers. Click its edit icon or Edit Sheet… to open the shapes and lettering inside it.
Choose Move, select an item, and drag it. Try a library shape or edit a text item. If automatic bridges are paused, click Generate Bridges to check the finished sheet.
Click Apply to return to the scene. Select the main Background to set project-wide bridges and shadows.
Choose File → Save Project or press Cmd/Ctrl+S to save an editable .jwc file. Follow the saving guide to create a digital display, or choose File → Export Project… to make a physical project.
In the app Choose the size and units, then click New Project. The dialog’s three numbered steps show the starting choices. Click to enlarge.
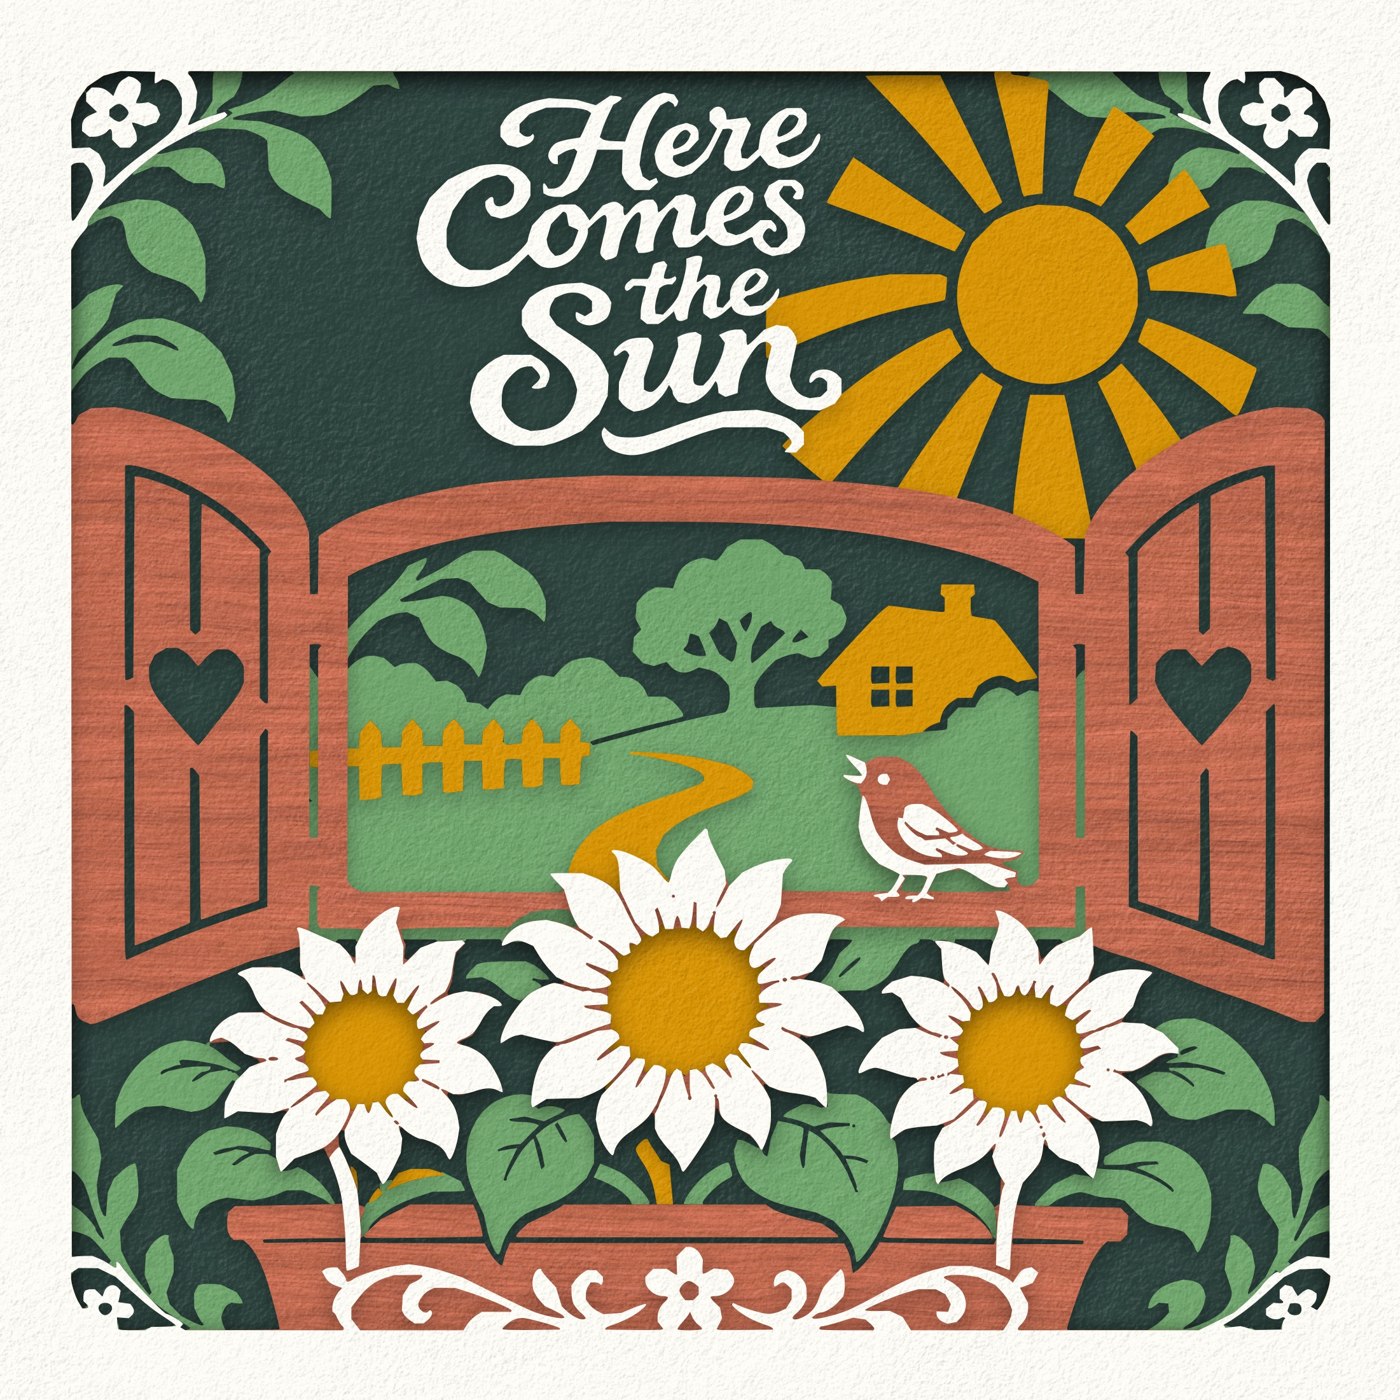
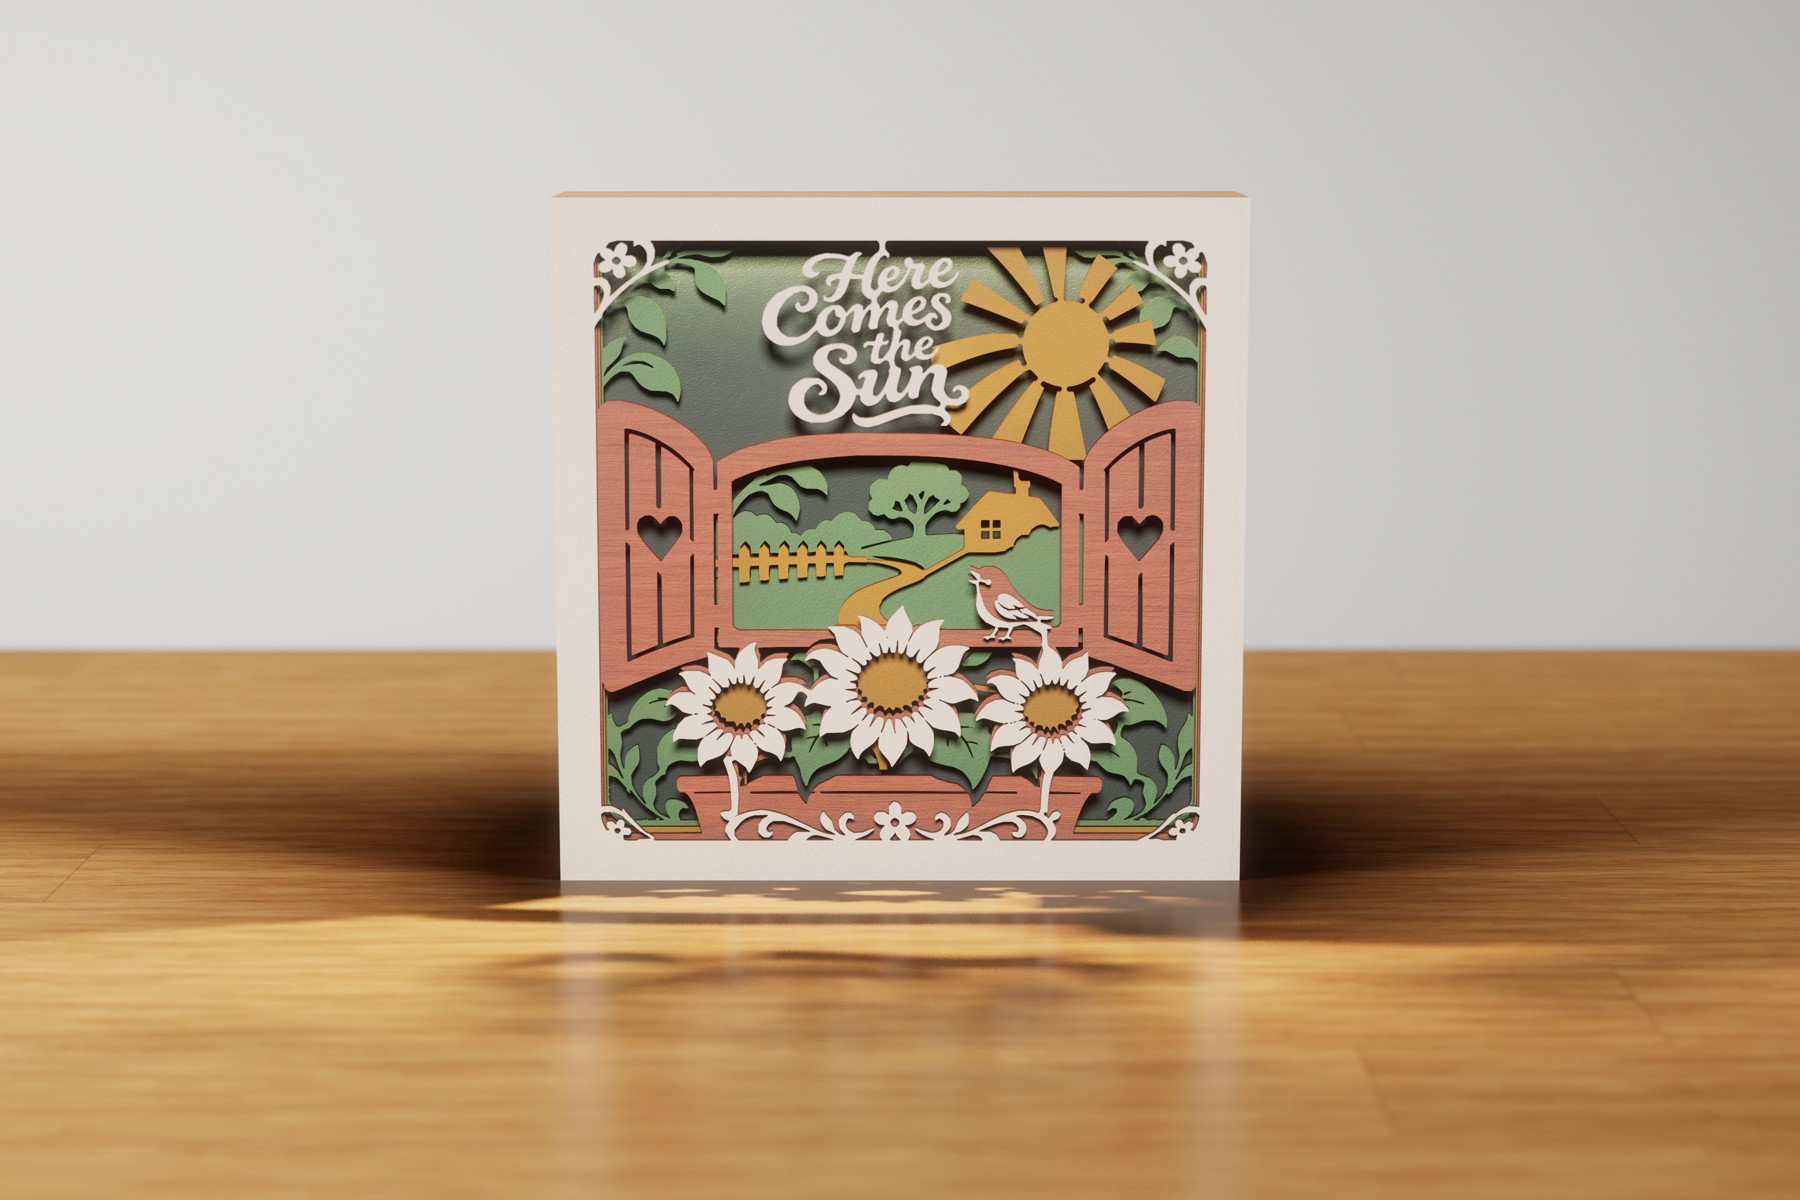
Here Comes the Sun: a flat scene rendering. Click to enlarge.The same preset shown in Front view with Save As Digital Box. Sample bridge settings and lighting can differ. Click to enlarge.
Work on the whole scene in the main window. Open the Sheet Editor when you want to change the contents of one sheet.
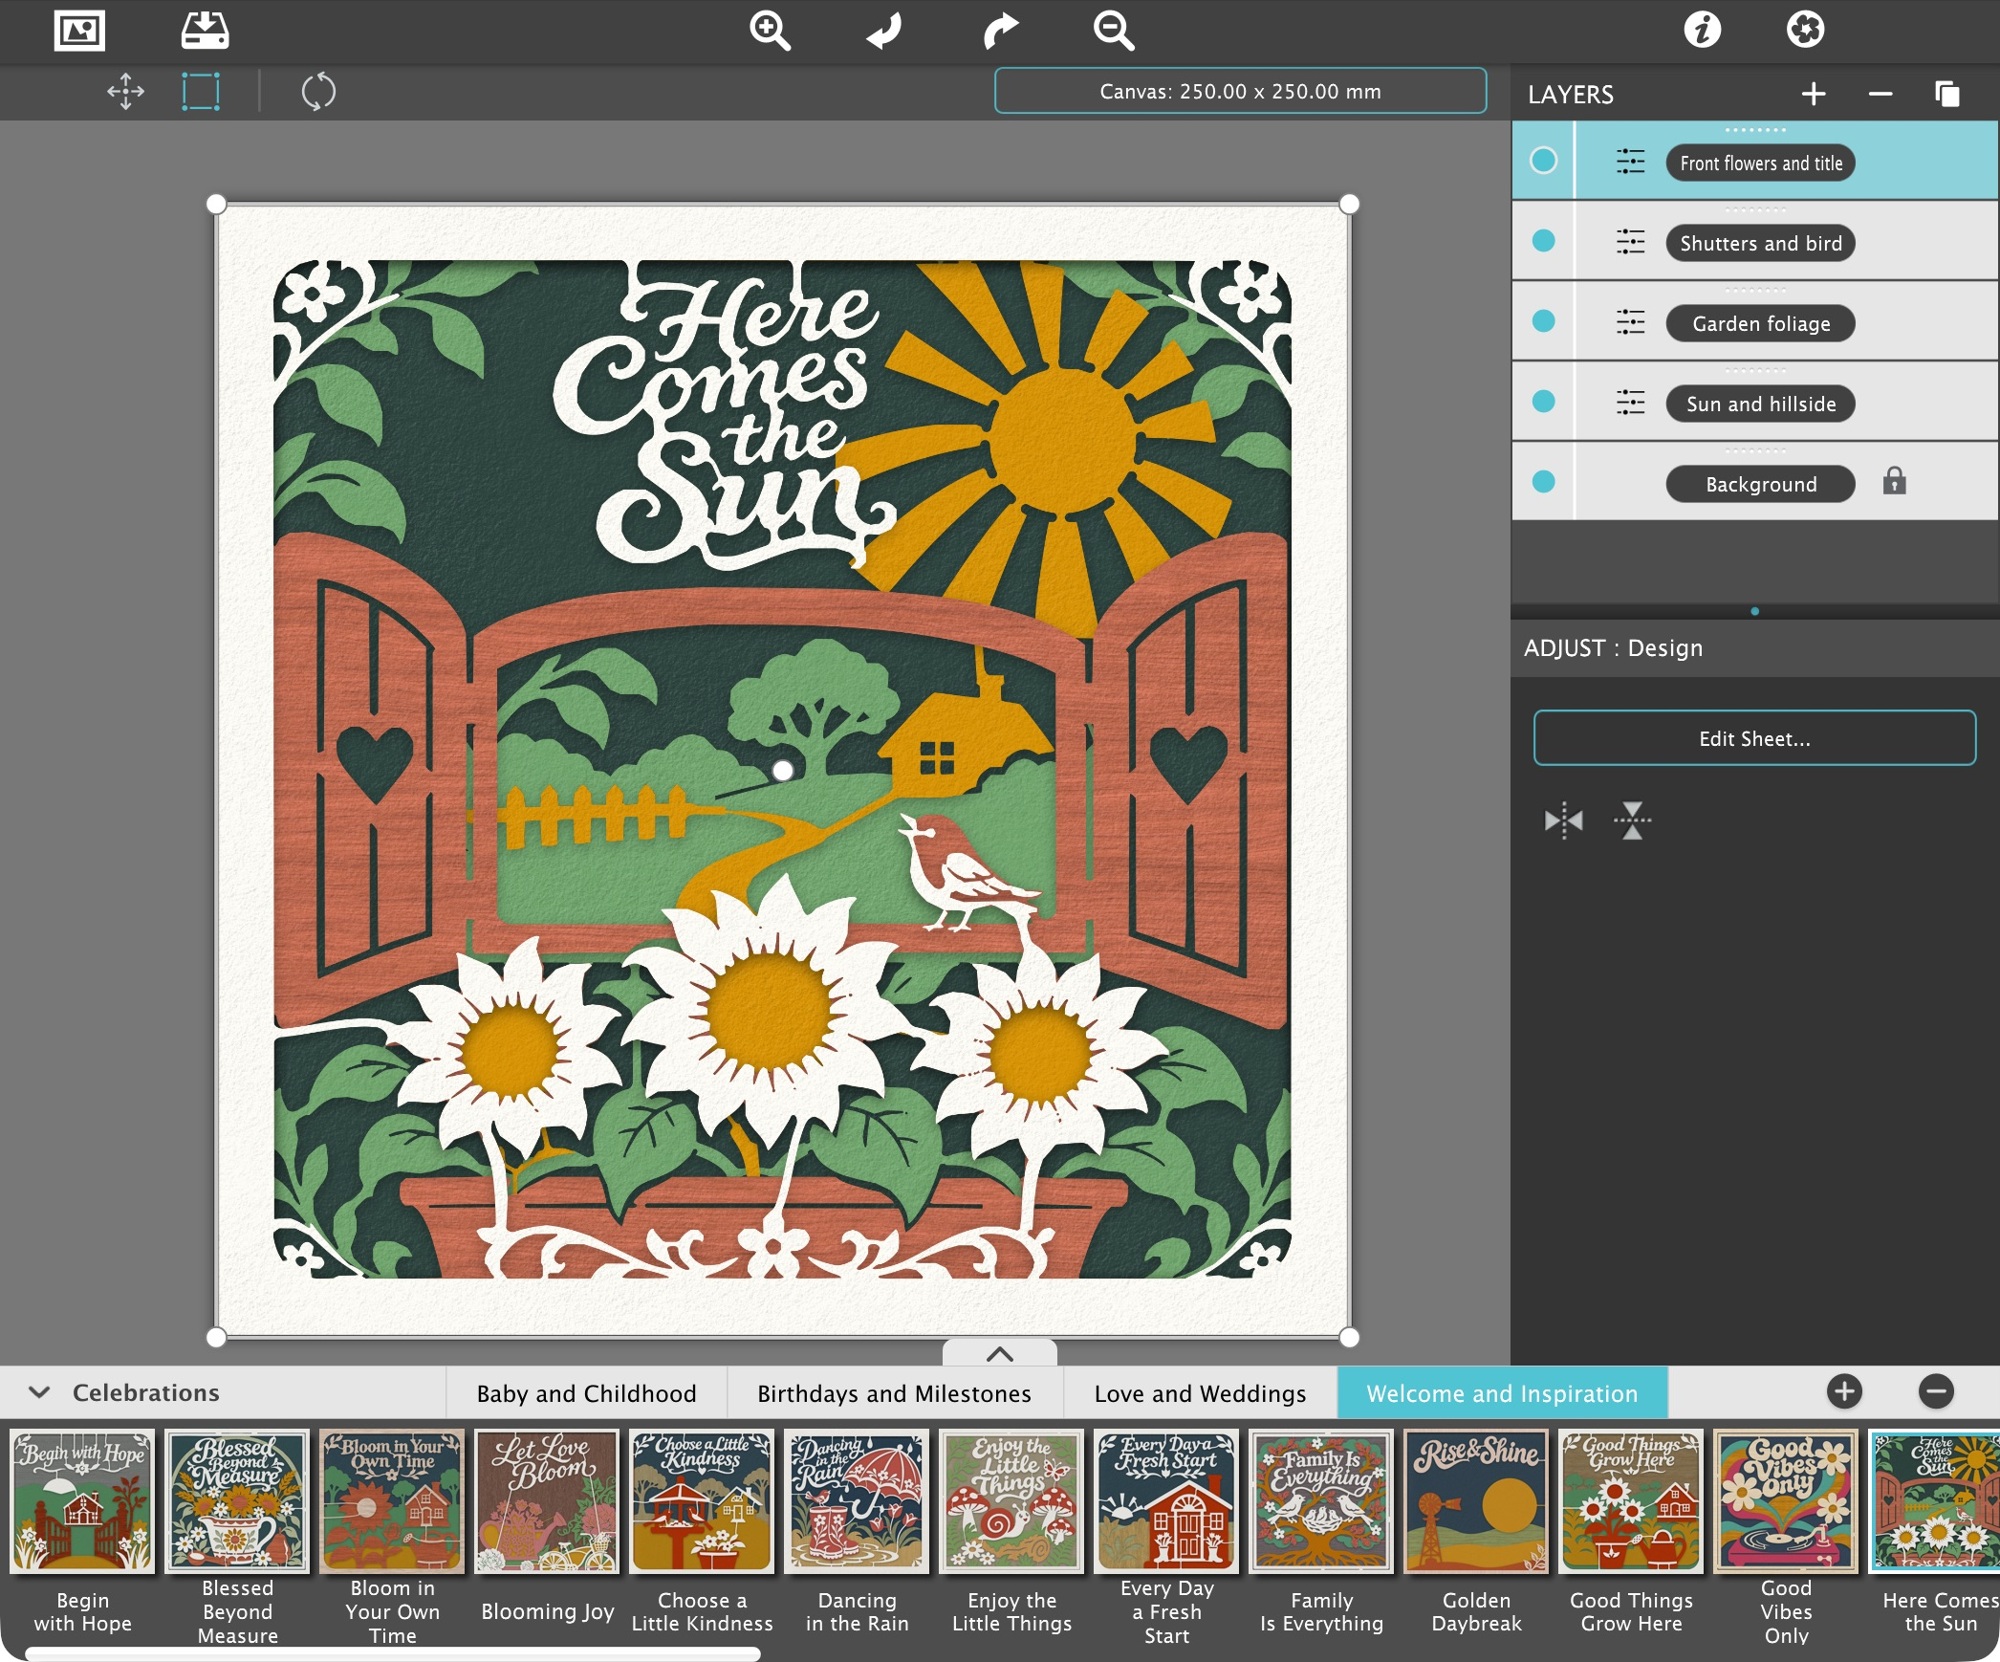
In the app Create/open and Save are at the upper left; Canvas is above the artwork. Select a sheet in Layers at the right, then click Edit Sheet. Scene presets run along the bottom. Click to enlarge.
Control
What it does / when to use it
Create / open
The picture button at the upper left opens the project choices. Create a new canvas or open a saved Woodcut project.
Save button
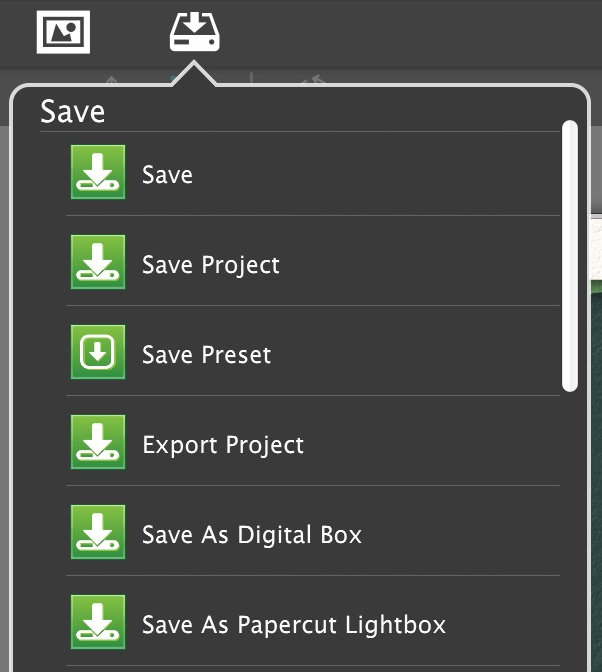
Click to open the menu for saving artwork, projects and presets, or exporting a physical project. See Save projects, presets & digital displays for the menu choices.
Canvas
Change the physical width, height, and units of the current project.
Layers
The top Design layer is at the front. Select a row to see its controls below; rename rows and use visibility to inspect the scene.
Main Background
The fixed backdrop behind the sheets. It holds the project cutout shape, project-wide bridges and bridge width, material, and drop shadows.
Preset browser
Browse complete scenes and available layer samples along the bottom. User Presets holds looks you save.
Undo / Redo
Step through document changes. While the Sheet Editor is open, these commands work on its local draft.
Zoom / Fit
Change the view without changing the physical dimensions or the cutting size.
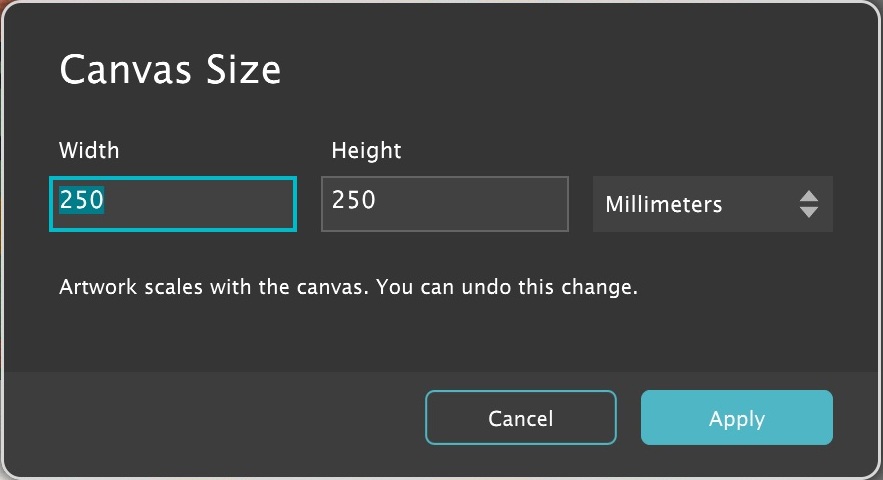
Set the canvas to the size you intend to make. Millimeters and inches describe the same physical design; zoom only changes how large it looks on screen.
In the app Enter the physical width and height, choose the unit, and Apply. Cancel returns to the scene without resizing. Click to enlarge.
Control
What it does / when to use it
Square / Tall / Wide
The starting sizes are 250 × 250 mm, 210 × 297 mm, and 297 × 210 mm. You can edit the size fields or choose Custom.
Canvas
Resize an existing project from above the workspace. The artwork scales with the canvas; Undo restores the earlier size.
Fit In Window
Show the whole canvas. In the Sheet Editor, use Fit or Cmd/Ctrl+0.
Zoom
Use the zoom controls; in the Sheet Editor, scroll or press Cmd/Ctrl+= and Cmd/Ctrl+−.
Pan
In the Sheet Editor, hold Space and drag; Option/Alt-drag or middle-button drag also pans.
Grid & Rulers
Click the project button at the upper left and choose Show Grid & Rulers or Hide Grid & Rulers. Rulers follow the document units and view. They are excluded from exported artwork.
Canvas size changes can alter fine lettering, openings, and supports. Inspect the sheets and export sizes again after resizing. A sheet must fit your chosen cutting material, including any enlarged box front or back.
Presets provide editable starting scenes. Choose a category in the bottom browser, then click a thumbnail to apply it. Explore a few scenes before building one from scratch.
In the app Pick a category tab, then a scene thumbnail. Here Comes the Sun is the starting scene used in these walkthrough screenshots. Click to enlarge.
Control
What it does / when to use it
Complete scene
Replaces the layer stack and its Background cutout settings. Save the current .jwc project before trying another scene.
Layer samples
Available layer presets append artwork to the scene rather than replacing the complete stack. Added sheets follow the active project cutout.
User Presets
Choose this category when saving your own reusable scene. Use Save Preset from the save menu and give the look a meaningful name.
Different canvas proportions
Presets adapt to the target canvas. Check subject proportions, lettering, margins, and bridges after applying one to a different shape.
Project vs preset
Use a .jwc project for the editable design you are working on. Save a preset separately when you want the arrangement available from the browser.
A preset is a starting composition. Open its sheets to inspect and edit the artwork. Click to enlarge.
Back up your saved projects and custom libraries. On Mac, the preset library normally lives in ~/Library/Application Support/Jixi Woodcut Studio/EffectPresets. User Shapes has its own folder beside it.
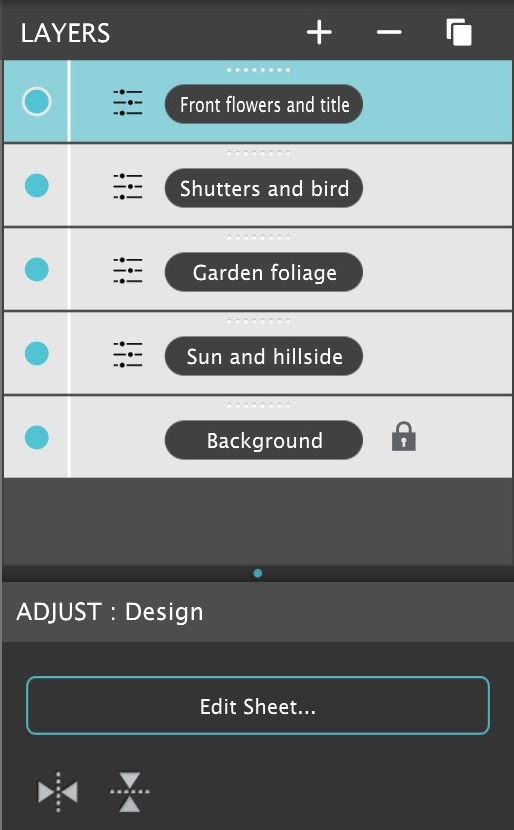
Think of Layers as the order in which the sheets sit in front of one another. An upper sheet can hide part of a lower one. The main Background stays behind the stack.
In the app The front sheet is selected. Use the edit icon beside its name or Edit Sheet below the stack. Names in this demonstration project have been shortened for clarity. Click to enlarge.
Control
What it does / when to use it
Select / rename / hide
Click a row to select it. Edit its name in the row; use its visibility control to inspect what it contributes.
Reorder
Drag rows with the layer reorder gesture to move a sheet forward or backward in the scene.
Add / Duplicate / Delete
Use the Layers toolbar to create a Design, duplicate a selected sheet, or remove a sheet. Undo recovers a change.
Edit Sheet…
Open the selected sheet’s internal artwork. You can also use the edit icon beside its name.
Select several sheets
Shift-click or Cmd/Ctrl-click rows or canvas artwork. Drag across empty canvas to select visible sheet material. Cmd/Ctrl+A selects visible artwork and excludes Background.
Move selected artwork
Drag the selection or its center handle. The artwork inside the selected sheets moves while each sheet’s outside edge stays fixed.
Resize selected artwork
Drag a corner to scale the artwork together, anchored at the opposite corner. Shift permits independent width/height stretching in the main workspace. Release to rebuild; Escape cancels.
Flip Horizontal / Vertical
The selected sheet’s controls mirror the whole sheet, including its artwork and bridges. Open Edit Sheet to continue editing the mirrored contents.
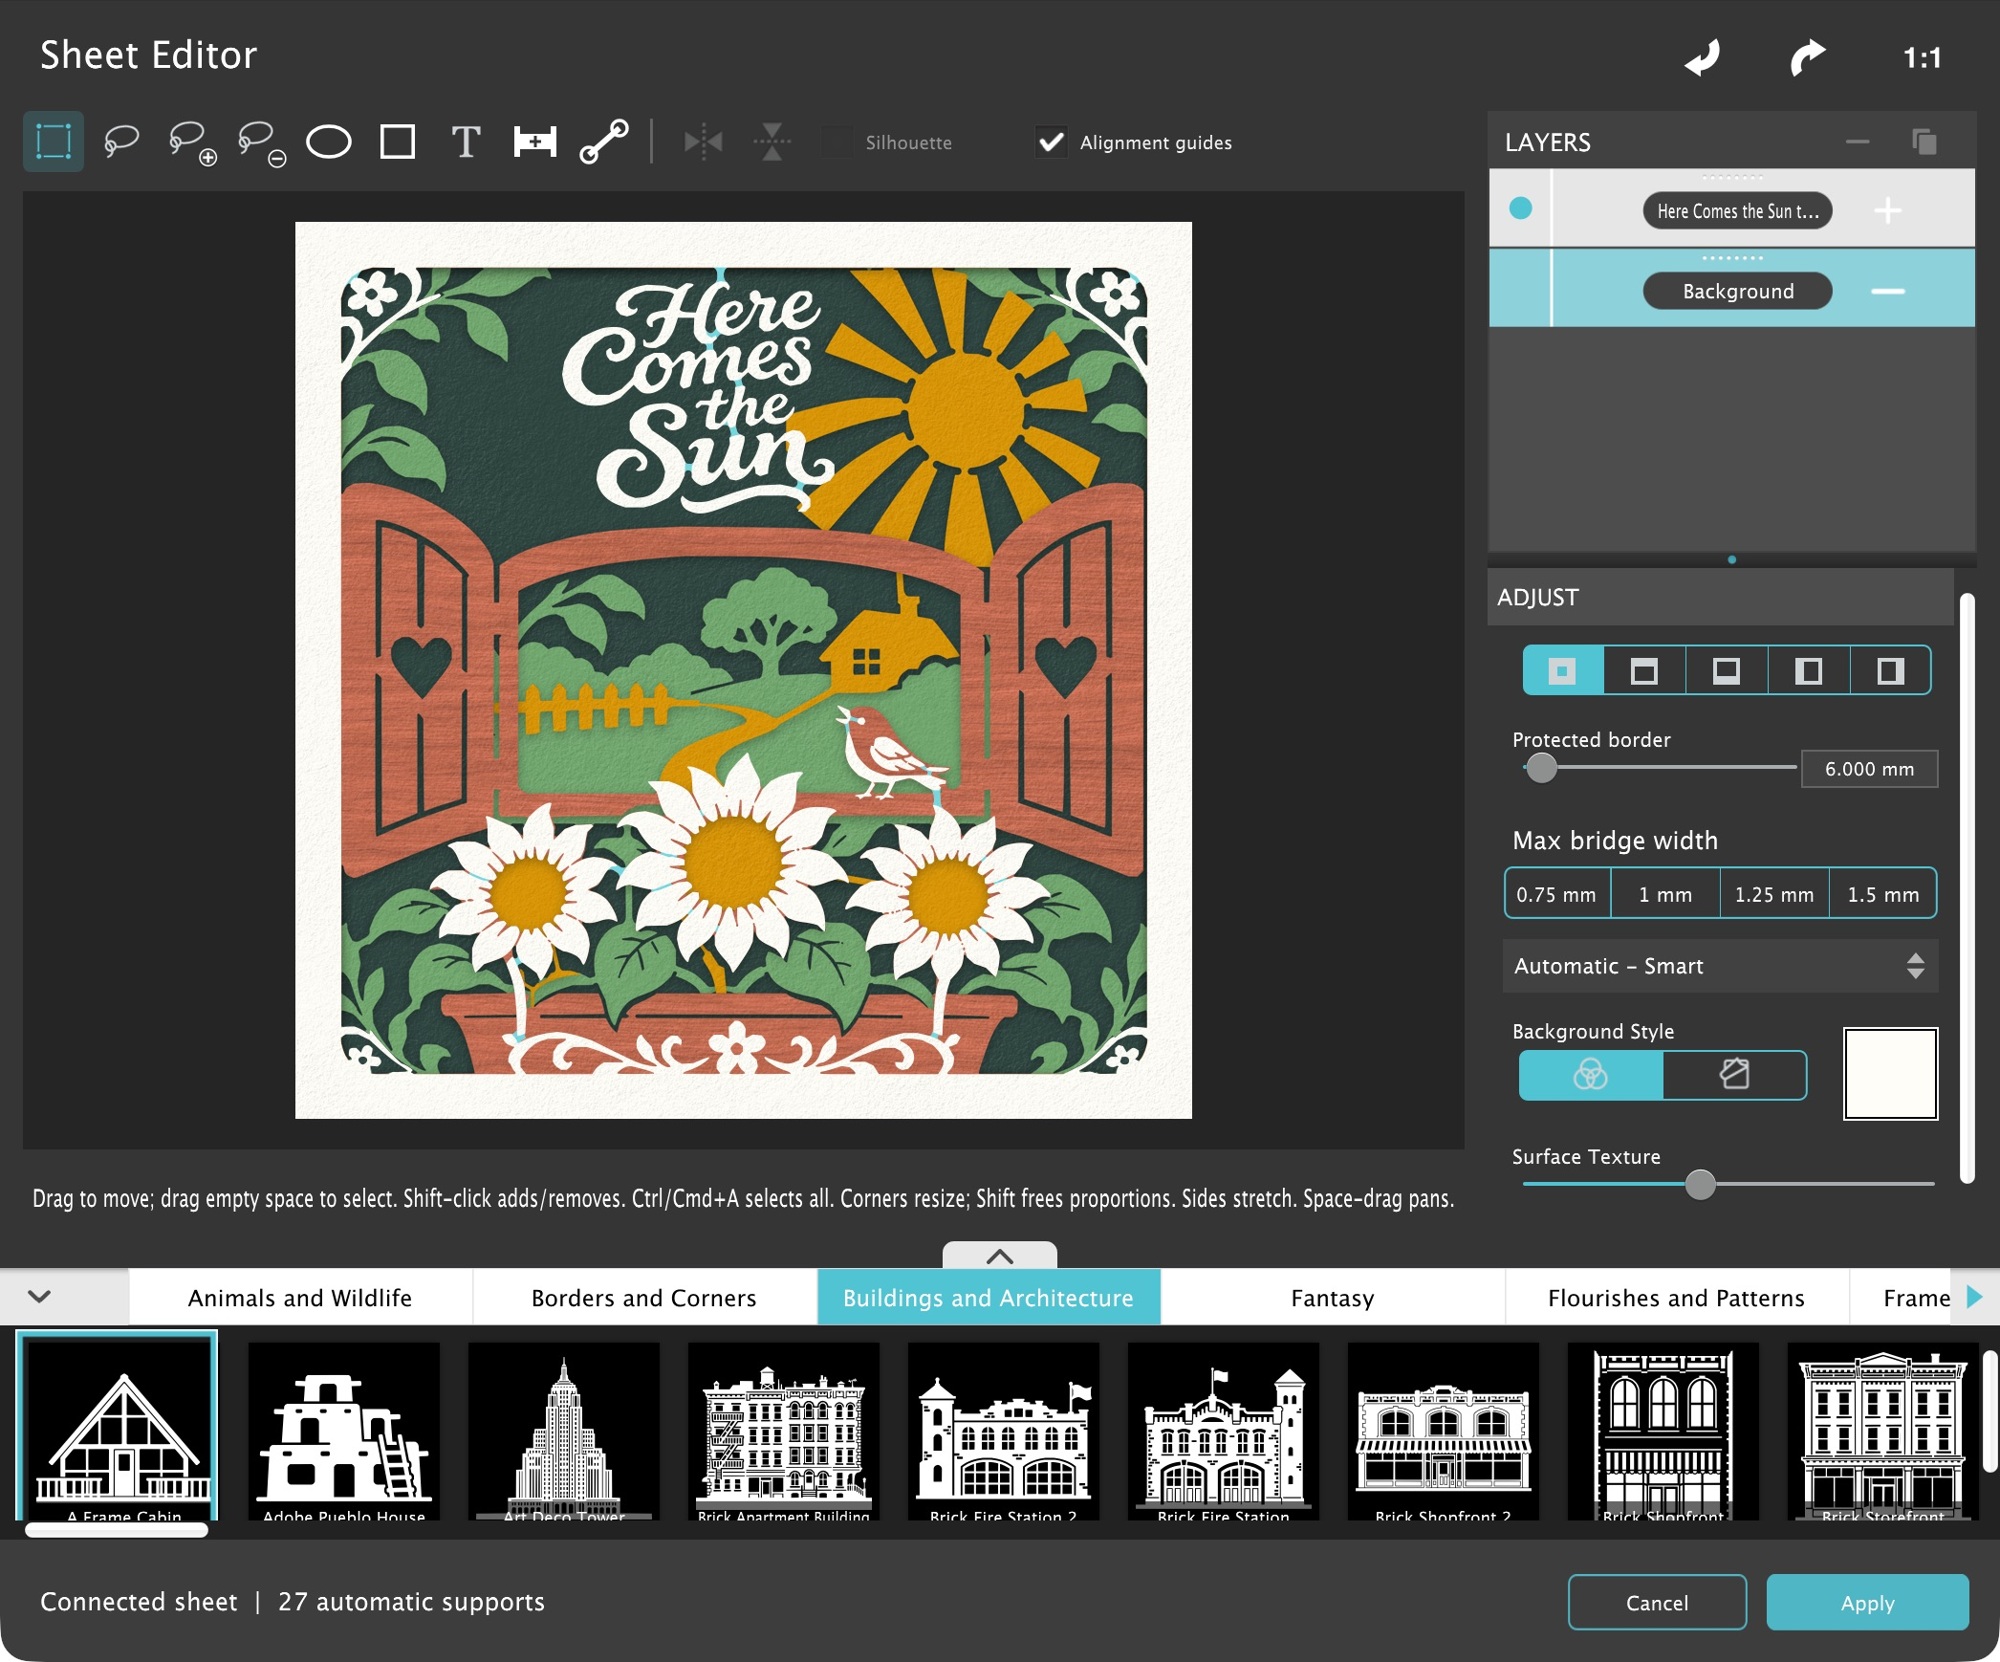
The Sheet Editor combines artwork into one finished sheet. The preview is on the left; Layers and the selected item’s controls are on the right; the shape shelf runs along the bottom.
In the app Arrange one sheet here. Select an artwork row for its own controls, or Background for the sheet’s border, material, and supports. Apply and Cancel are at the bottom. Click to enlarge.
Open Edit Sheet…, or add a new Design from the main Layers + menu.
Select the editor’s Background. Choose a Frame or Full Fill base, material, protected border, and support mode.
Click a shape thumbnail, draw an ellipse or rectangle, use Lasso, or click Add Text and place text.
When automatic bridges are paused, click Generate Bridges. Red pieces indicate material that is still loose.
When sheets sit above this one, use the pinned Layers Above row at the top of Layers. Its visibility dot shows or hides the reference, and its percentage fades the upper sheets. These are viewing controls.
Click Apply to keep the sheet, or Cancel to leave the document unchanged.
Drag the divider between Layers and the controls to give either area more room. Each area scrolls independently. A sheet can contain up to 256 artwork items; keep imports simple enough to edit comfortably.
Select Background inside the Sheet Editor to set the starting material. Use its operation control in the layer row to choose Frame or Full Fill.
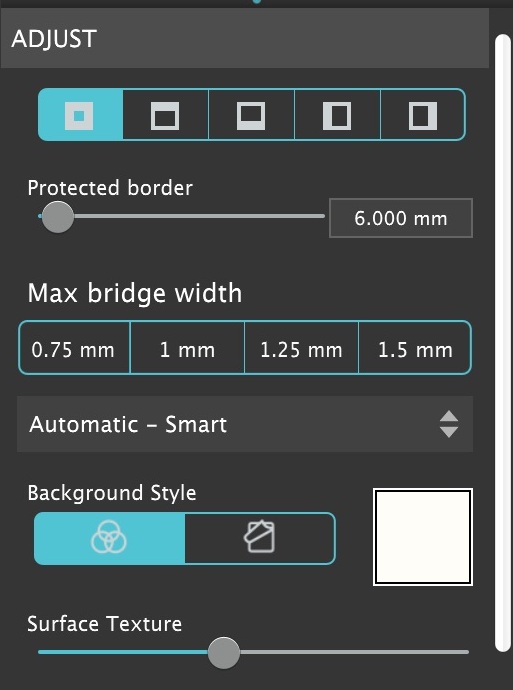
In the app Select Background in the Sheet Editor. Set the protected border, bridge width, and support pattern before checking the finished sheet. Click to enlarge.
Control
What it does / when to use it
Frame
Starts with a border and an open center. Add shapes supply the interior artwork; Cut shapes remove from it. New sheets start here.
Full Fill
Starts with a solid sheet. Use Cut shapes and text to open it up. The protected-border controls are inactive, so cuts can reach the outside edge.
Protected border
For a Frame, reserve the rim around the artwork. A zero border permits a borderless or floating design.
All sides / Top / Bottom / Left / Right
Choose the border side before moving its slider. All sides changes all four together. Merely choosing a side does not change its width.
Material
Color or Wood, Tint, grain direction, and Surface Texture describe the sheet’s rendered surface. See Materials & shadows.
Supports
Choose automatic bridges or Manual for this sheet. The bridge-width sizes are measured on the canvas.
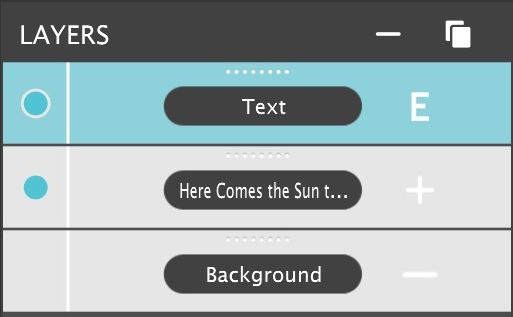
The operation control beside each artwork name determines what the item contributes. The current editor supports Add (+), Cut (−), and Engrave (E). The Cutout Shape editor uses Add and Cut.
Control
What it does / when to use it
Add (+)
Joins the shape to the sheet’s material. Library shapes normally arrive as Add items.
Cut (−)
Removes the shape from the material built so far. New drawn shapes start as Cut; check their operation when building a Frame scene.
Engrave (E)
Places surface marks wherever the sheet has material, without adding material or making a through-hole. Useful for a name, decoration, or detail.
Layer order
Add and Cut evaluate from bottom to top. A later Add can restore material removed earlier. Move rows to change the construction order.
Visibility
Hidden items do not contribute to the finished sheet. Showing a hidden item can change the material and the supports it needs.
In the app The operation is at the far right of each artwork row. Click it to cycle Add, Cut, and Engrave. This Text item shows E; the Background’s minus means Frame. Click to enlarge.
+Add
Keep this material.
−Cut
Open a hole.
EEngrave
Mark the surface.
Example: place a heart as Add on a Frame sheet, then place a smaller heart above it as Cut to make an opening. Use Engrave for initials that should remain on the solid heart. Generate bridges and check whether the heart is attached.
Use Move to select artwork in the preview or Layers. The handles edit placement directly on the sheet.
Control
What it does / when to use it
Move / rotate
Drag inside an item to move it. Drag the handle on the center line to rotate without resizing.
Corner handles
Resize a single item proportionally; hold Shift to change width and height independently.
Side handles
Stretch only width or height while the opposite edge stays fixed. These handles may be hidden for small items and multiple selections.
Multiple selection
Drag across empty canvas, Shift-click items or rows, or press Cmd/Ctrl+A for visible artwork. Shift-drag adds to the selection.
Transform a selection
Move, rotate, resize, duplicate, or delete the selected items together. Group resizing keeps proportions even with Shift, helping aligned traced parts stay registered.
Arrow keys
With Move active and the canvas focused, nudge by one preview pixel; Shift nudges by five. These are preview-pixel steps, independent of zoom.
Flip Horizontal / Vertical
Mirror the selected item using Move’s buttons. The main workspace has separate buttons for the whole sheet.
Silhouette
Fill enclosed openings in the selected shape. Turn it off to restore its original holes.
Alignment guides
Show nearby edge and center alignments while dragging. The cyan guides are visual aids and do not snap the artwork into place.
Escape clears the current selection; when nothing is selected, Escape can close the editor. Click Apply or Cancel explicitly when you want a clear end to an editing session.
Use the toolbar above the preview for simple geometry and freeform drawing. Hover over icons for their names.
In the app From left: Move, Lasso, Capture Shape, Simplify, Ellipse, Square, Add Text, Add Bridge, and Edit Bridges. Tool options appear to the right. Click to enlarge.
Control
What it does / when to use it
Ellipse / Square
Drag to draw an ellipse or rectangle. Hold Shift for a circle or square. On release, Move selects the new item.
Shape frames
Select a rectangle, rounded rectangle, or ellipse and choose Solid, Thin frame, Medium frame, or Thick frame. Opening size changes the hole.
Separate width / height
Adjust the opening’s dimensions independently for an oval opening or unequal borders. Rectangles also offer Corner roundness.
Lasso
Draw around a region and release to close the shape. Choose + or − in the tool options for new shapes; change any item’s operation later.
Simplify tool
Circle a region to remove it from every visible artwork item it reaches in this sheet. Cut items are trimmed too. An emptied item is deleted.
After Simplify
Affected text and built-in/library shapes become plain outlines. They still move, resize, rotate, and change operation, but lose live text, frame, and Silhouette controls.
The shelf has one tab for each packaged shape folder, followed by User Shapes. Click a thumbnail to place that shape at the center of the sheet; it becomes an independent Add item selected in Move.
Choose a category tab. The arrow at the left of the tab row lists the available categories.
Click a shape and allow its preview to finish. Escape cancels a pending shape placement.
Move, resize, or rotate the new item. Use its operation control for Add, Cut, or Engrave.
Keep the original openings, or turn on Silhouette in Move to use its filled outline.
Generate bridges after arranging the artwork, then Apply.
Combine bold shapes and lettering into a scene. Each placed shape remains editable inside its sheet. Click to enlarge.
Some library shapes contain engraving. Those marks stay registered with the shape and appear on its material instead of becoming holes. Re-place a shape from the shelf if its library file has changed; existing placed artwork keeps its saved outline.
Choose the Add Text T icon and click where the lettering should go. Move becomes active and the text controls appear for the selected item.
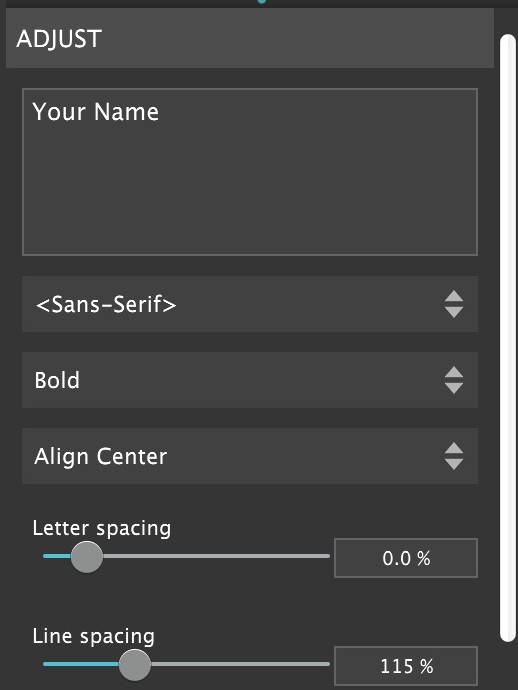
In the app Click Add Text (T), then click the sheet. Type in the large text field in Adjust; choose the font, style, alignment, and spacing underneath. Click to enlarge.
Control
What it does / when to use it
Text
Type your wording. Multiline text is supported; the selection box follows the content.
Font / style
Choose an installed font and available style. The letter outlines update when you edit the typography.
Alignment / spacing
Adjust paragraph alignment, letter spacing, and multiline spacing to suit the composition.
Add / Cut / Engrave
Choose raised material, lettering cut through the sheet, or surface engraving. Engrave requires material beneath the letters.
Placement
Use Move’s handles to position, size, rotate, or flip the text. Inspect small letter counters and narrow strokes.
Bridges
Add lettering can float as separate pieces; Cut lettering can leave loose counters, such as the center of an O. Generate bridges to inspect both.
Use clear lettering at the intended making size, then check the supports around letters and counters. Click to enlarge.Back to contents ↑
Open User Shapes on the shelf and click its first thumbnail, Import Graphic. You can also drop a supported SVG, PNG, JPEG, or GIF into the editor.
In the app Choose User Shapes, then click Import Graphic at the left. A saved shape appears as a library thumbnail; click that thumbnail to place it. Click to enlarge.
Import a vector SVG
An SVG is copied into User Shapes and keeps its vector outline. Click its new thumbnail to place it. Use simple path-based SVGs; convert live text, references, clipping, masks, filters, embedded images, and stylesheet-dependent artwork to paths before importing. The SVG reader accepts paths, basic shapes, groups, gradients, and transforms, with a 2 MB / 10,000-element import limit.
Trace a picture into a reusable shape
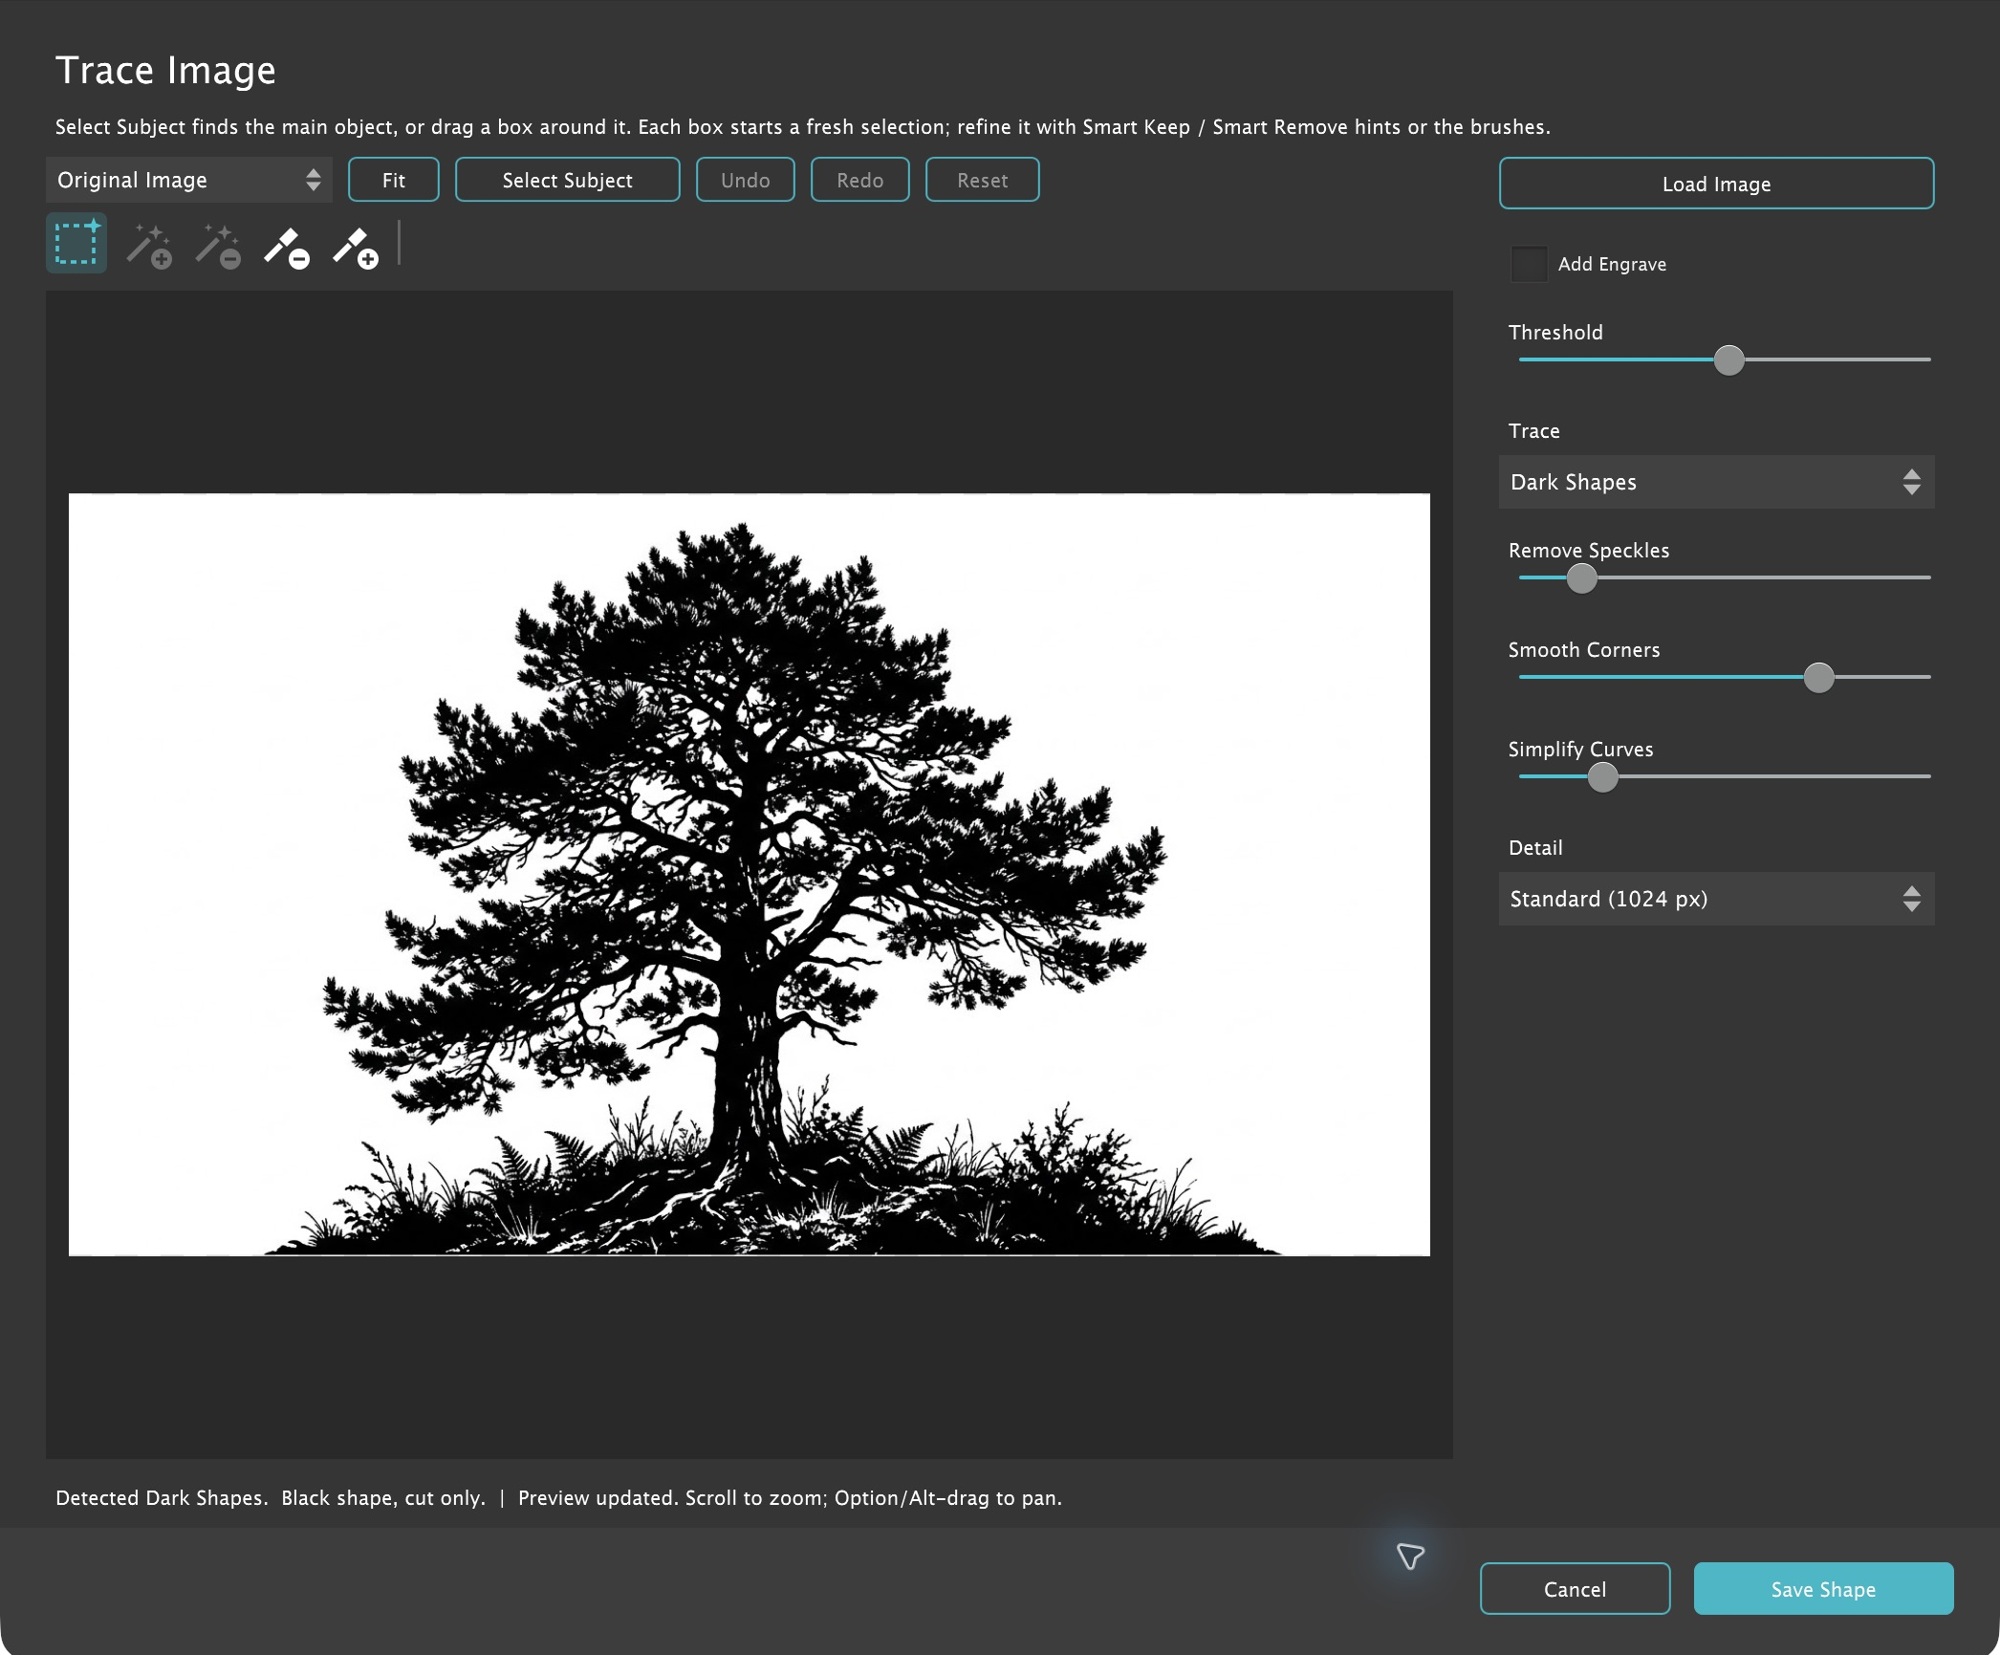
Choose an image through Import Graphic. Trace Image opens for review.
Start with clear black artwork on white, or a simple transparent silhouette. Use Dark / Light Shapes and Threshold to choose the material.
Adjust Remove Speckles, Smooth Corners, Simplify Curves, and Detail. Compare the source and vector preview.
Enable Add Engrave when gray regions should become engraved marks. Black and gray remain solid shape material; white is background.
If background selection needs work, use the selection tools below. Inspect the final outline and openings.
Click Save Shape. This saves an SVG in User Shapes; click the thumbnail afterward to place it on the sheet.
In the app Review the original or Vector Preview. Threshold and the cleanup sliders change the outline; Save Shape adds the result to User Shapes. This example uses the packaged Pine Tree 4 artwork. Click to enlarge.
Control
What it does / when to use it
Original Image / Vector Preview / Compare
Review the input, resulting vector, or both. Red shading on the original marks excluded areas.
Select Subject / Smart Select
Find the subject automatically, or draw a box around a particular object. A new box or Select Subject starts a fresh selection; Undo recovers the previous one.
Smart Keep / Smart Remove
Add green or red hints to refine the selected object. Use hints for the object boundary, then inspect the result.
Remove Brush / Restore Brush
Make direct corrections. Restore respects original transparent holes.
Detail
Fast, Standard, and Fine change analysis detail. Higher detail can retain narrow features but may produce a more complex outline.
Undo / Redo / Reset
Selection history is local to tracing. Loading another image starts fresh. Cancel leaves the sheet draft unchanged.
Capture Shape saves a reusable piece from the artwork already in your sheet. It does not remove or replace the source items.
Choose Capture Shape beside Lasso.
Leave All Layers checked to capture visible artwork, or uncheck it and select the specific items you need.
Draw a loop around the part to keep. The capture is clipped to that loop and respects the selected items’ Add/Cut construction.
Review Save as User Shape. White in this preview represents the cut shape; gray represents engraving.
Enter a name and click Save Shape. The result appears in User Shapes, ready to place on another sheet.
The sheet’s Background and support bridges are not part of the captured shape. If you capture only Cut artwork, its shape outlines can be saved as the reusable piece. Make the loop generous enough to keep the curves you want.
Engraving adds surface detail without cutting through the material. Use an item’s E / Engrave operation, import a shape carrying gray engraving, or merge a sheet as engraving. For a laser-cut lightbox, choose File → Export Project… to set how Engraving is exported.
Control
What it does / when to use it
Engrave item
Marks the existing material underneath the item. It adds no solid material and makes no opening.
Gray marks in library shapes
Gray regions describe engraving on the shape’s retained material. They stay aligned when the shape moves or resizes.
Engraving → Engrave
Keeps marks as gray #808080 paths for an engraving operation in your cutting software.
Engraving → Cut
Turns engraved regions into through-openings. Inspect loose pieces afterward, including letter counters.
Engraving → Skip
Leaves the engraving out of the cutting files and exports the sheet geometry alone.
A bridge is material connecting a piece to the rest of its sheet. It keeps an island—such as a separate leaf or letter counter—from falling out. The bridge itself is included in the cut geometry; the editor’s colored guides are only annotations.
Control
What it does / when to use it
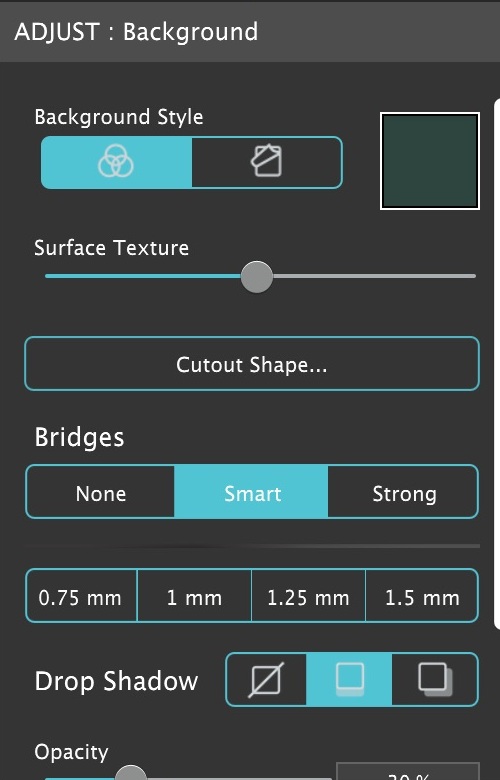
Main Background → None
Removes bridges from every Design sheet, hidden sheets included. Pieces stay separate for transfers or other projects. Per-sheet hand work is set aside and saved.
Main Background → Smart
Applies Automatic - Smart to every Design sheet. It favors fewer, short connections and narrows bridges on small pieces.
Main Background → Strong
Applies Automatic - Strong across the stack, adding more distributed support for larger or weakly connected parts.
Sheet Editor → Supports
Choose Automatic - Smart, Automatic - Strong, Automatic - Stronger, or Manual for just this sheet. Stronger uses closer, full-width supports.
Bridge width
Choose 0.75, 1, 1.25, or 1.5 mm, or the displayed inch equivalents. Main Background changes all Design sheets; Sheet Properties changes one.
Max bridge width
Smart and Strong can narrow bridges for small pieces. The chosen width is their maximum; Stronger retains the full width.
Per sheet / no highlighted segment
The sheets have different bridge choices or widths, or use a value outside the quick choices. Open a sheet to inspect its own settings.
In the app In the main window, select Background. None, Smart, and Strong act on all Design sheets; the width row beneath them changes their bridge widths. Click to enlarge.Concept illustration. Actual bridge placement follows the sheet’s artwork, border, and support settings.
When bridges disappear while editing
Artwork edits pause automatic bridges to keep the editor responsive. The status line says bridges are paused and Generate Bridges appears beside Cancel. Click it to rebuild supports and check connectivity. Choosing a support pattern or entering Add Bridge/Edit Bridges also generates supports. Applying with bridges pending asks to generate them first.
In the app After an artwork edit, use Generate Bridges before reviewing the sheet’s connections. Click to enlarge.
Bridge width is a design choice. Judge fine connections at the final size and use a material test to establish a suitable width for the stock and process you use.
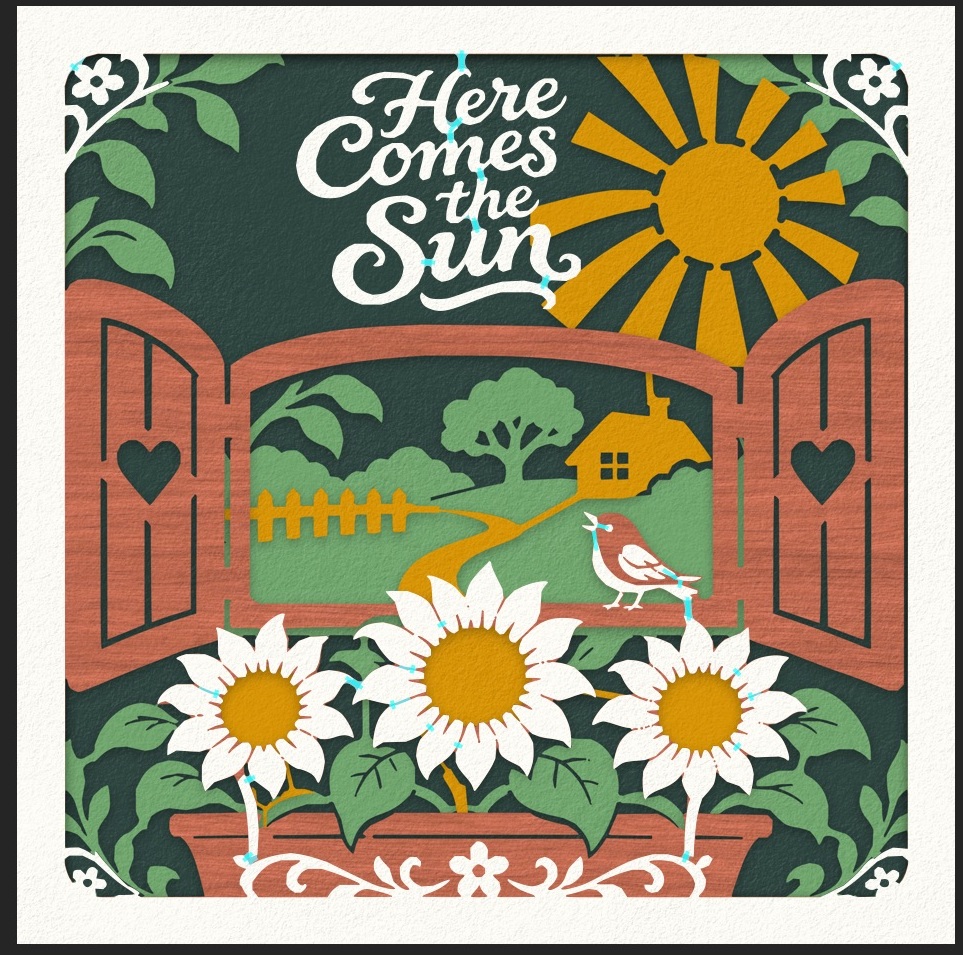
Use manual bridge tools when you want control over where a support lands. Select Background inside the Sheet Editor to inspect its support mode and width.
In the app Edit Bridges reveals the cyan support guides on this sheet. Select a line or endpoint to adjust it. Lower scene colors remain visible as context. Click to enlarge.
Control
What it does / when to use it
Add Bridge
Drag from existing material toward the piece to connect. Inspect both landings after the sheet rebuilds.
Edit Bridges
Select a support. Drag its line to move it, or drag an endpoint to change where it joins.
Editing an automatic bridge
The first edit fixes the current layout as editable bridges and switches the sheet to Manual.
Cyan / violet guides
Automatic bridges show cyan; hand-drawn or edited supports show violet.
Delete
Delete the selected bridge. Another support is not automatically inserted in its place, so check the resulting loose pieces.
Reset Bridges
With Add Bridge or Edit Bridges active, Reset Bridges erases this sheet’s supports and switches to Manual. Undo restores them.
Automatic pattern menu
Choose Smart, Strong, or Stronger to replace the sheet’s support layout with a fresh automatic solve. This clears manual bridges on that sheet.
Set each sheet’s material from Background in its Sheet Editor. The main Background has its own material and controls the shared drop shadow.
Control
What it does / when to use it
Color
Use a solid sheet color. This is also the color used to stain wood when you switch material modes.
Wood / Wood Choice
Choose Wood, then click the thumbnail button to browse woods. Grain repeats at a physical scale rather than stretching across the canvas.
Vertical / Horizontal
Choose the wood-grain direction for the current sheet.
Tint
Stain the selected wood toward the sheet color while keeping its grain visible. Tint strength is available in Wood mode.
Surface Texture
Add surface relief with one strength slider. Each sheet has its own saved pattern; this changes the rendered surface.
Main Background → Drop Shadow
Choose None, Down, or Down-right for the whole Design stack. Set Softness, Distance, and Opacity to show the layers’ depth.
Digital Box lighting
Save As Digital Box has separate studio, lighting, and shadow controls for its presentation render.
Contrasting material colors make the depth easier to read. Click to enlarge.
Material and shadow choices describe the artwork’s appearance. They do not choose a cutter’s speed or power. SVG export can use sheet identity colors or sheet material colors for cut groups; set operations in the receiving software.
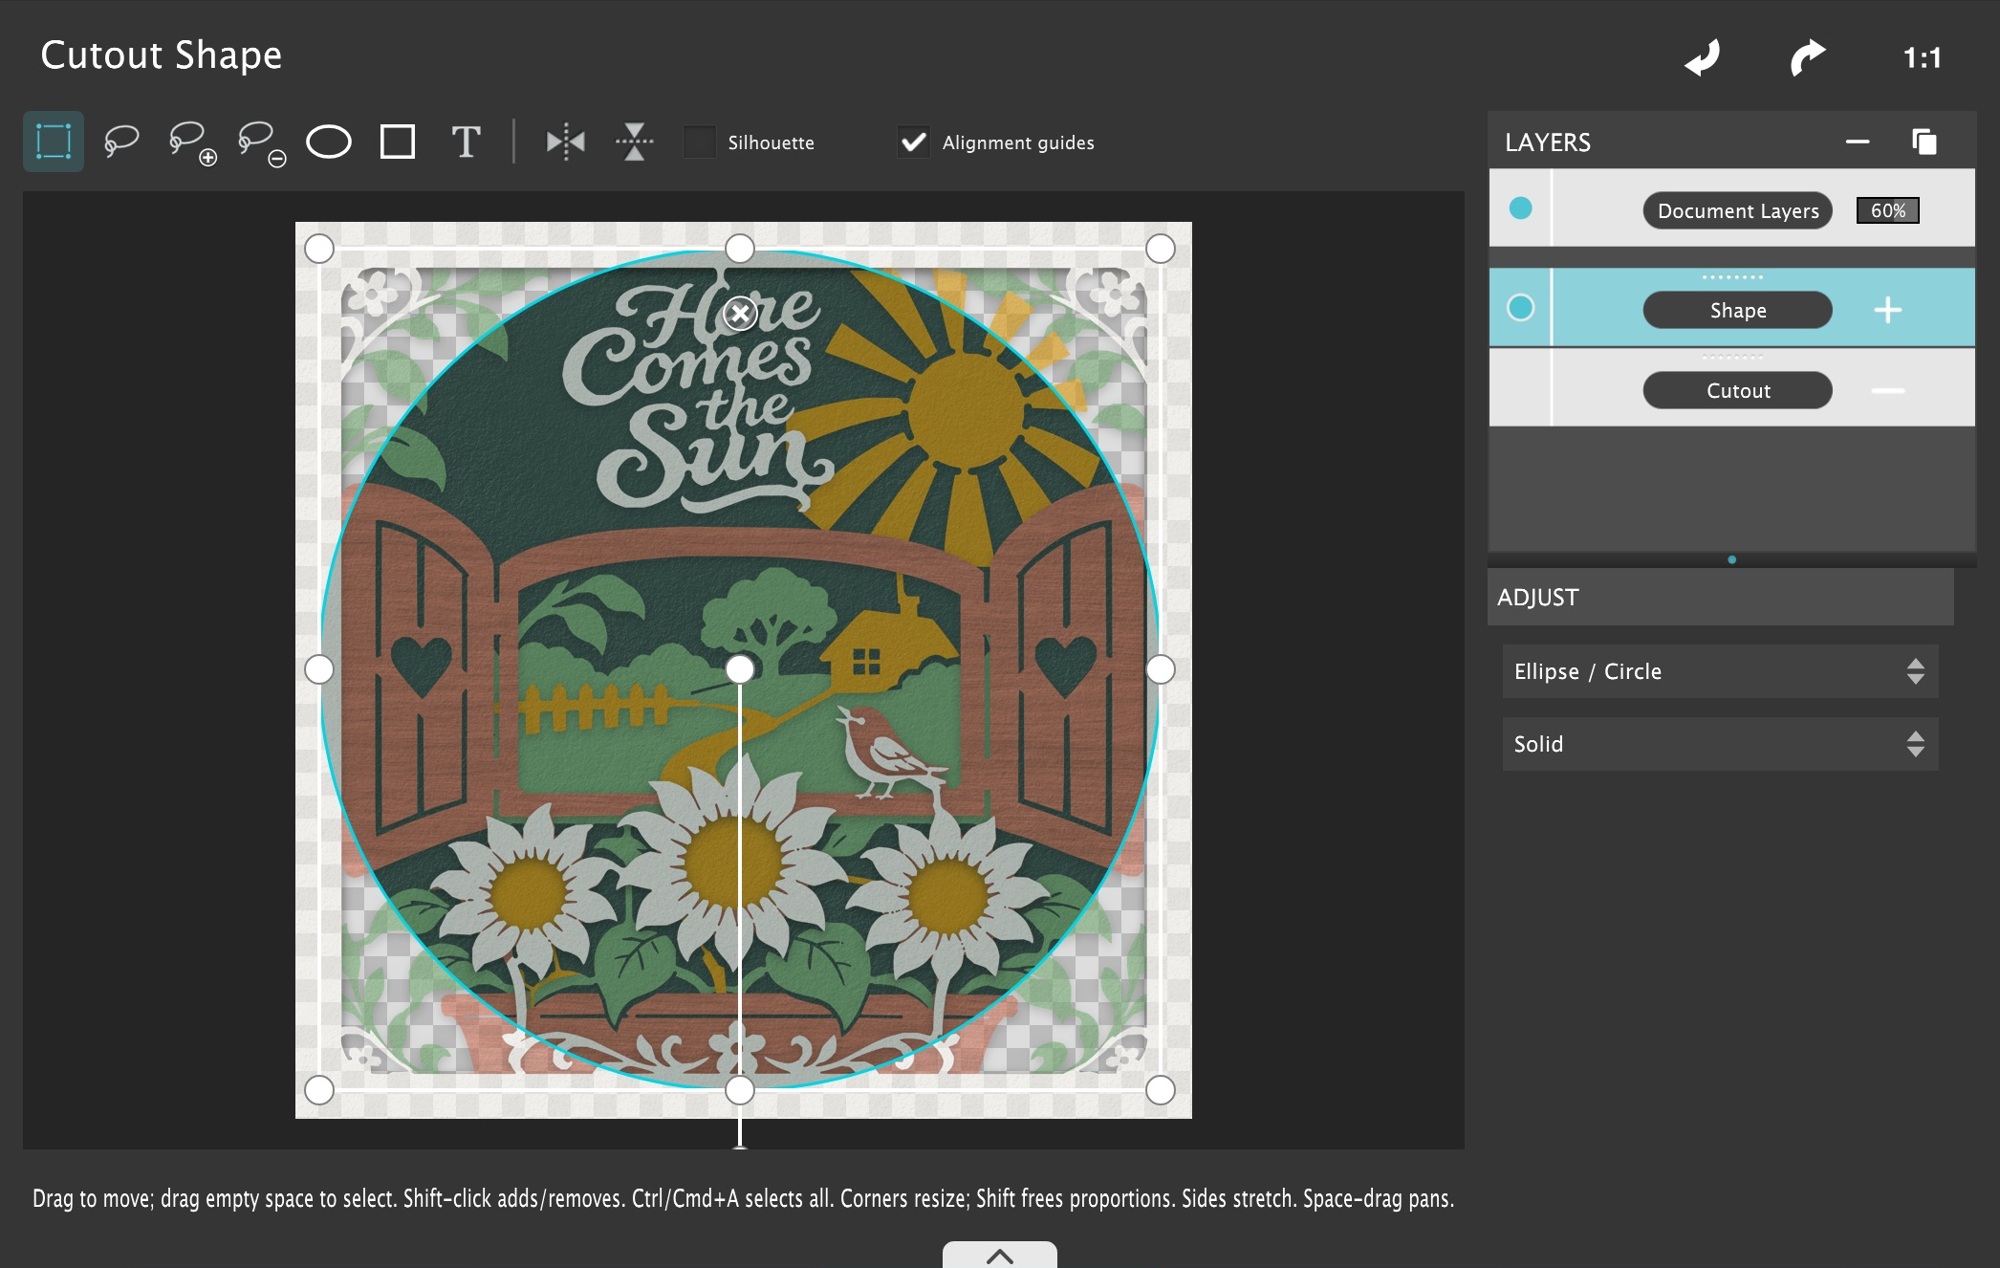
To make an ornament or shaped project, select the main Background and click Cutout Shape… beneath its material controls.
In the cutout editor, draw or place Add shapes to define the outside silhouette.
Add Cut shapes for holes that should pass through the entire stack, such as a hanging hole.
Use the pinned Document Layers row to show the faded scene over the outline. Its visibility dot and percentage let you check the placement while keeping the cutout visible.
Library shapes arrive with Silhouette on here, so their filled outer shape defines the project edge. Turn it off per item if you want the interior openings.
Click Apply. Every Design sheet and the backdrop clip to the same outline; cutting exports use the shaped edges.
In the app Draw the outside outline as Add. The Document Layers row shows the faded scene for placement; its visibility dot and percentage control that reference view. This circular example is an editor draft. Click to enlarge.
The cutout is stored with the main Background and saved in the project and scene preset. New sheets follow it. Canvas resizing scales it along with the design. To return to the full rectangle, reopen Cutout Shape, remove its shapes, and Apply.
Open the main Layers menu with exactly one Design sheet selected. The selected sheet and the Design sheet immediately below it both need to be visible.
Control
What it does / when to use it
Merge Down
Combines the selected sheet’s artwork with the sheet below. The lower sheet retains its name, material, border, and support settings; the upper sheet is removed.
Editable items or combined outline
When the two constructions are compatible, items remain separately editable. Other arrangements transfer as one combined Add outline, retaining their engraving.
Merge as Engraving
Turns the upper sheet’s artwork into engraved marks on the lower sheet’s material. It adds no material, removes no material, and keeps the lower sheet’s bridges.
Undo
Each merge is one document undo step. Save a project copy when you want to keep the separate-sheet version too.
Merging items inside one sheet
The Sheet Editor’s layer menu also provides Merge Down and Merge All. These combine artwork items inside the current sheet, following their operations. Combined shapes become plain artwork, so keep an editable project copy if you may want to change live text or shape settings later.
Every Woodcut Studio scene can become a digital display. Save straight-on artwork from the canvas or render the scene in a box or papercut frame with lighting and shadows. Create the entire display in Woodcut Studio and share it in a digital card, slideshow, or social post.
In the app Click the Save button in the upper-left toolbar to see these options. Click to enlarge.
For straight-on artwork, choose File → Save Photo…, then select a format and location in the save dialog. For a box or papercut rendering, adjust the preview, click Save, and name the PNG.
If your edition asks for activation before output, complete registration with your license and retry. If a project cannot be saved, choose a writable folder and check available disk space.
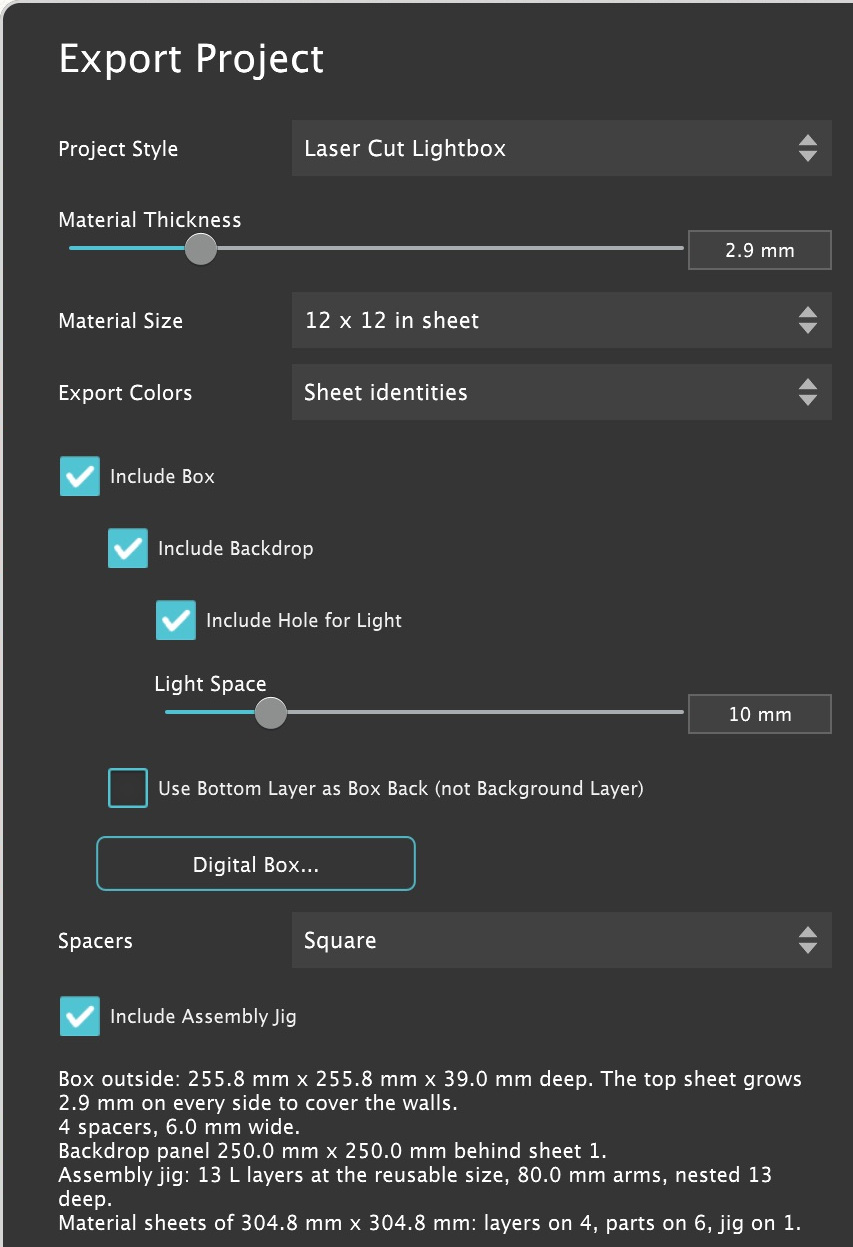
Choose File → Export Project… or click the save button and choose Export Project. Select a Project Style to see its controls and preview. Each export includes a Name Preview.png reference image and Name Assembly Instructions.txt with instructions for the selected style. Cutting and engraving SVGs are in SVG Files/.
Project Style
What Woodcut Studio prepares
Laser Cut Lightbox
Cutting and engraving layouts for the sheets, with optional box parts, spacers, and jig files. Follow the steps below to set up the material and parts.
Papercut Layers (Cricut)
Name Papercut.svg and individual cardstock layers for a 3D papercut. A Pieces photo shows the laid-out layers, and Name Photo.jpg shows the framed result. Use Papercut Lightbox… in the export dialog to adjust the framed preview, then click Done.
Sticker
A 300 DPI Name Print.png and a matching Name Cut Line.svg. Use Border to set the width of the white edge around the print.
Magnet
A 300 DPI Name Print.png and matching Name Cut Line.svg for printable magnet material or a print mounted on a magnet sheet.
Window Cling
A 300 DPI Name Print.png and matching Name Cut Line.svg. Use Mirror for the Inside of a Window if the design should read from outside the glass.
Image Transfer (Iron-on / Sublimation)
Mirrored Name Iron-on Layers.svg for heat-transfer vinyl and a mirrored Name Sublimation Print.png. Cut Only What Shows reduces overlaps in the iron-on layers.
Edge-Lit Acrylic Sign
Name Panels.svg for tabbed acrylic panels with mirrored engravings for the back side. Choose Cut a Wooden LED Base to add Name LED Base.svg.
Set up a laser-cut lightbox
Check the project’s physical canvas size, sheet visibility, supports, and cutout shape.
Select Laser Cut Lightbox and set Material Thickness and Material Size to match your stock.
Under Export Colors, choose Sheet identities for distinct cut colors or Sheet material colors for the previewed sheet tones. When a visible sheet has engraving, choose Engrave, Cut, or Skip under Engraving.
Set the box, spacer, and jig options you need. With Include Box enabled, choose Digital Box… to adjust the finished-box JPG for this export, then click Done.
Inspect the Layers preview from front to back. Check each sheet’s size and engraving, and resolve material fit warnings before cutting.
Click Export, choose a folder, and open its Name Assembly Instructions.txt. Load a Layers layout or a file from Single Layers/ into your cutting software. Verify the physical dimensions and assign the cut or engrave operations there.
Lightbox export file
What it contains
Name.svg
All visible sheets aligned in their scene positions. The gray engraving group combines the marks from the whole stack.
Name Layers.svg
Sheets arranged on the chosen stock. Multiple layouts are numbered when the design needs more than one piece of stock.
Single Layers/
One aligned SVG per visible sheet. A filename ending in - Engraving identifies a file with engraved marks and a cut outline.
Name Parts 1 of 1.svg
Numbered layouts for any box walls, back, spacers, or backdrop. Each file covers one piece of stock.
Name Assembled.png and Pieces photos
Assembly reference and photos of the laid-out layers. A box export also includes Name Digital Box.jpg and photos of the box parts.
In File → Export Project…, choose Laser Cut Lightbox to add parts around the scene. The dialog shows dimensions, and Name Assembly Instructions.txt explains the assembly order.
In the app This Laser Cut Lightbox export includes the box, backdrop, light cord slot, square spacers, and reusable assembly jig. Click to enlarge.
Control
What it does / when to use it
Material Thickness
Choose 1–10 mm. The box geometry assumes the scene sheets and generated parts use that one thickness.
Include Box
Adds butt-jointed walls and a back. The front sheet grows by the material thickness on every side to cover the wall edges.
Include Backdrop
Adds a panel behind the scene, following the document’s outline and cutout holes. Enabling it also makes the light-space controls available.
Include Hole for Light / Light Space
Add the 18 × 10 mm cord slot and reserve 0–50 mm of depth for lighting. Without a backdrop, the exported box has no cord slot or light space.
Use Bottom Layer as Box Back (not Background Layer)
Use the backdrop, or otherwise the bottom visible sheet, to close the box instead of cutting a separate back. This cap is enlarged and carries the cord slot when applicable.
Spacers
None stacks sheets directly. Square adds full frames; Top/Bottom or Left/Right adds pairs of edge strips. Each spacer is one material thickness deep.
Include Assembly Jig
For projects with square corners, adds a reusable L-shaped jig with 80 mm arms and 13 layers. The export puts its cut layouts and 3D-printable model in the Assembly Jig/ folder. Push the sheets and spacers into the jig’s corner as you glue them.
If lights sit behind a separate backdrop, use a translucent backdrop so the light can pass through it. When the backdrop itself closes the box, the lights sit in front of it. The export instructions explain the selected arrangement.
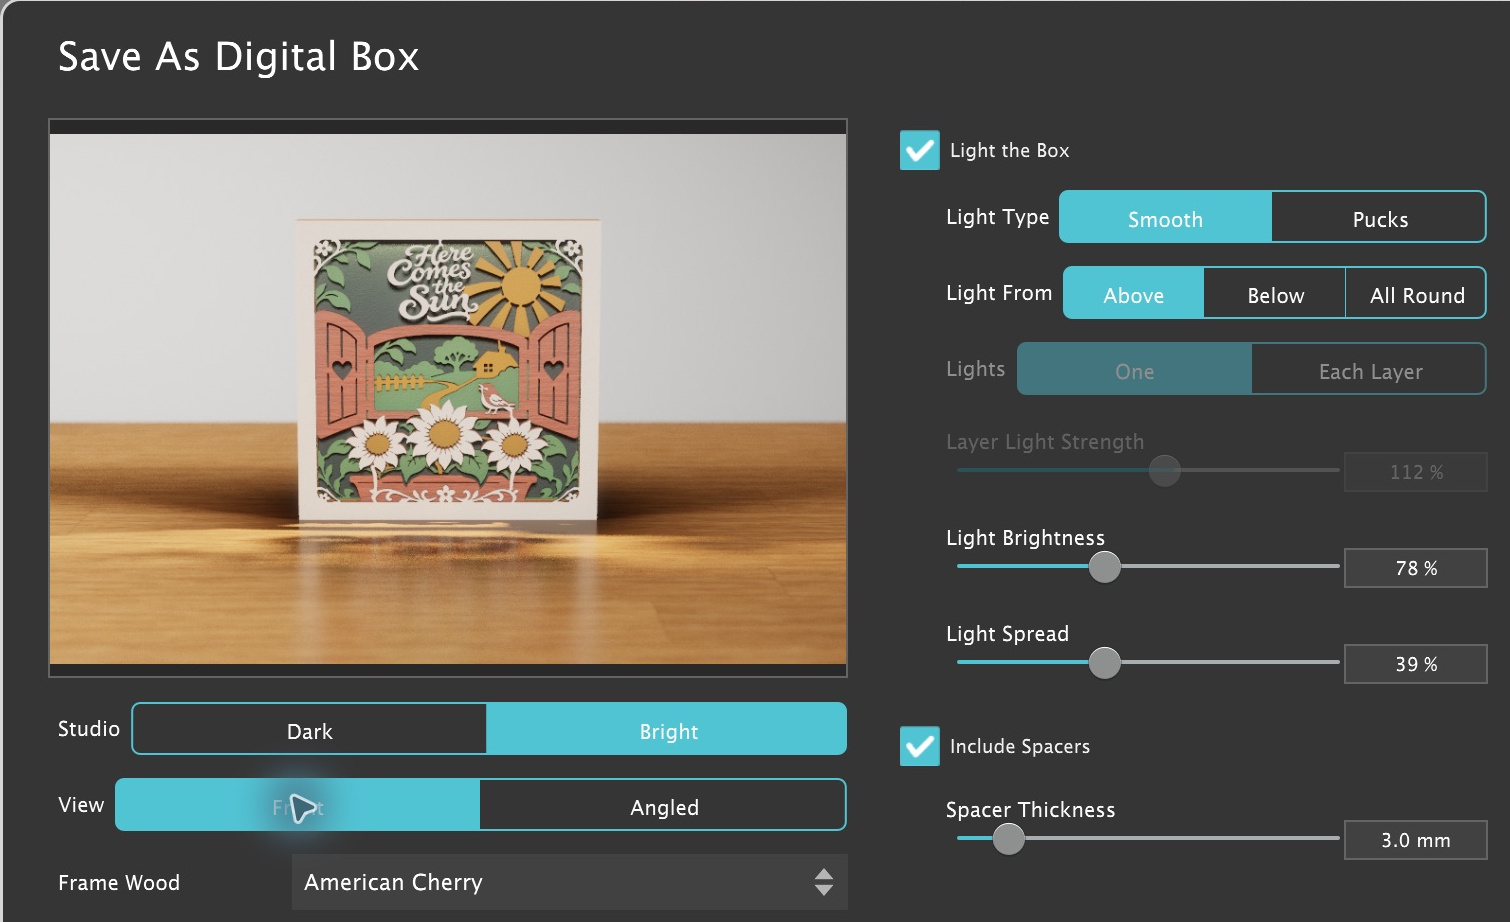
Choose File → Save As Digital Box… or click the save button and choose Save As Digital Box. Woodcut Studio renders your scene as a wooden box with realistic lighting, layered depth, and shadows. Choose Front for a straight-on view of the box or Angled to show the sides. The preview uses the material thickness and light space from Export Project.
In the app Here Comes the Sun in Front view with Smooth lighting from Above. Include Spacers gives the layers room between them. Click to enlarge.
Control
What it does / when to use it
Light the Box
Turn on the box’s interior lights. They shine through openings in the stack; a solid full-coverage layer can hide them.
Light Type
Smooth gives an even glow. Pucks show separate pools of light.
Light From
Choose Above, Below, or All Round.
Lights → One / Each Layer
One lights from the space in front of the backdrop. For Each Layer, use Below and Include Spacers, leaving room between the sheets.
Include Spacers / Spacer Thickness
Separate the sheets in the picture. You can set the spacing for this image independently of the physical spacers in Export Project.
Studio / View
Choose Dark or Bright studio and a Front or Angled view. An unlit box is shown in the bright studio.
Frame Wood / Table Wood
Choose the walls/spacers and table appearance. The front retains the top sheet’s material; the main Background forms the back.
Light Brightness / Spread
Adjust light strength and how far the glow carries. Layer Light Strength adjusts Each Layer lighting.
Shadows in the Box
Set Shadow Softness, Strength, and Distance to control the depth shown between sheets.
In Front of the Box
Control Table Glow, Table Shadow Strength/Softness, and Table Reflection.
Save
Choose the filename and destination for the final PNG. This image is separate from the editable .jwc project.
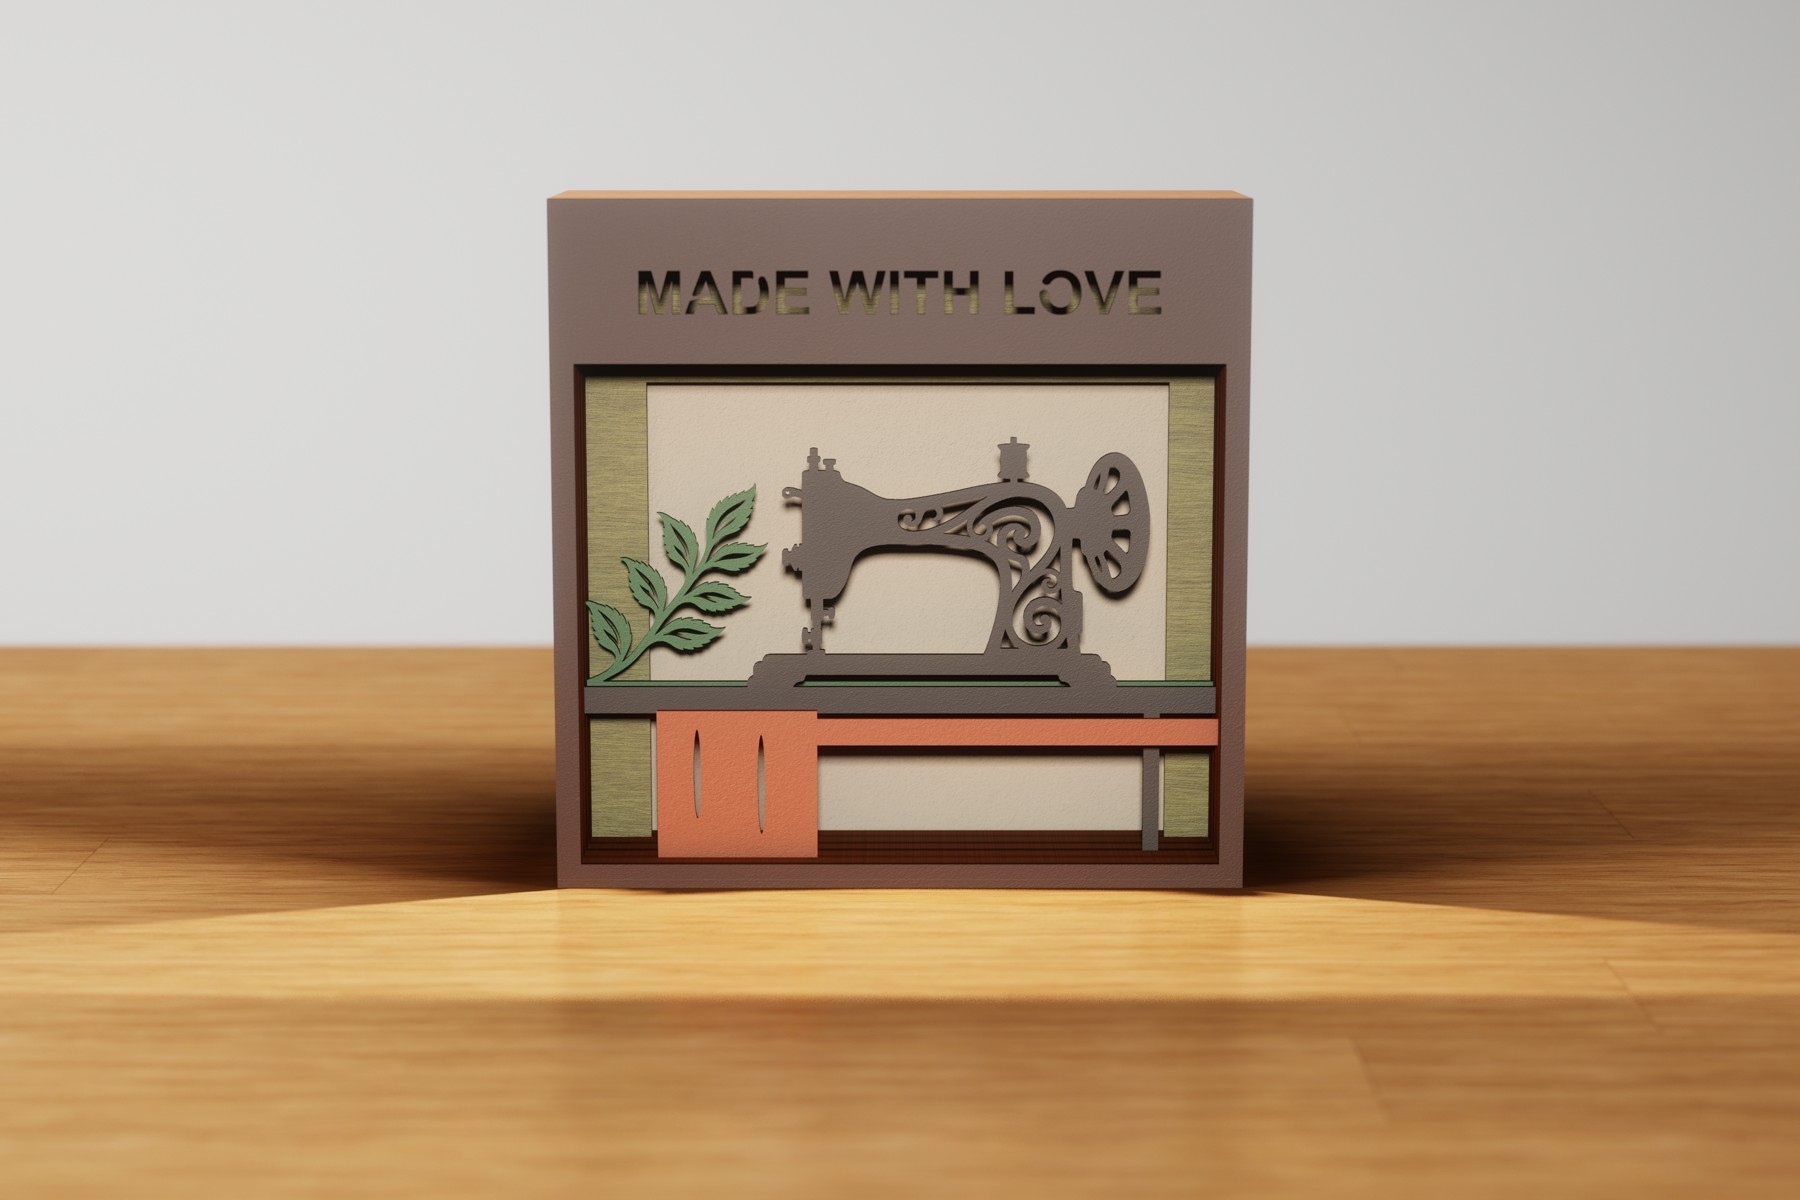
Sewing Studio in Front view. Saved directly from the app’s Digital Box dialog; this is a digital rendering. Click to enlarge.
For stronger visible lighting, start with an open scene, turn on Include Spacers, and compare Below with Above. Adjust the box’s interior lighting before increasing Table Glow; the table controls affect the area in front of the box.
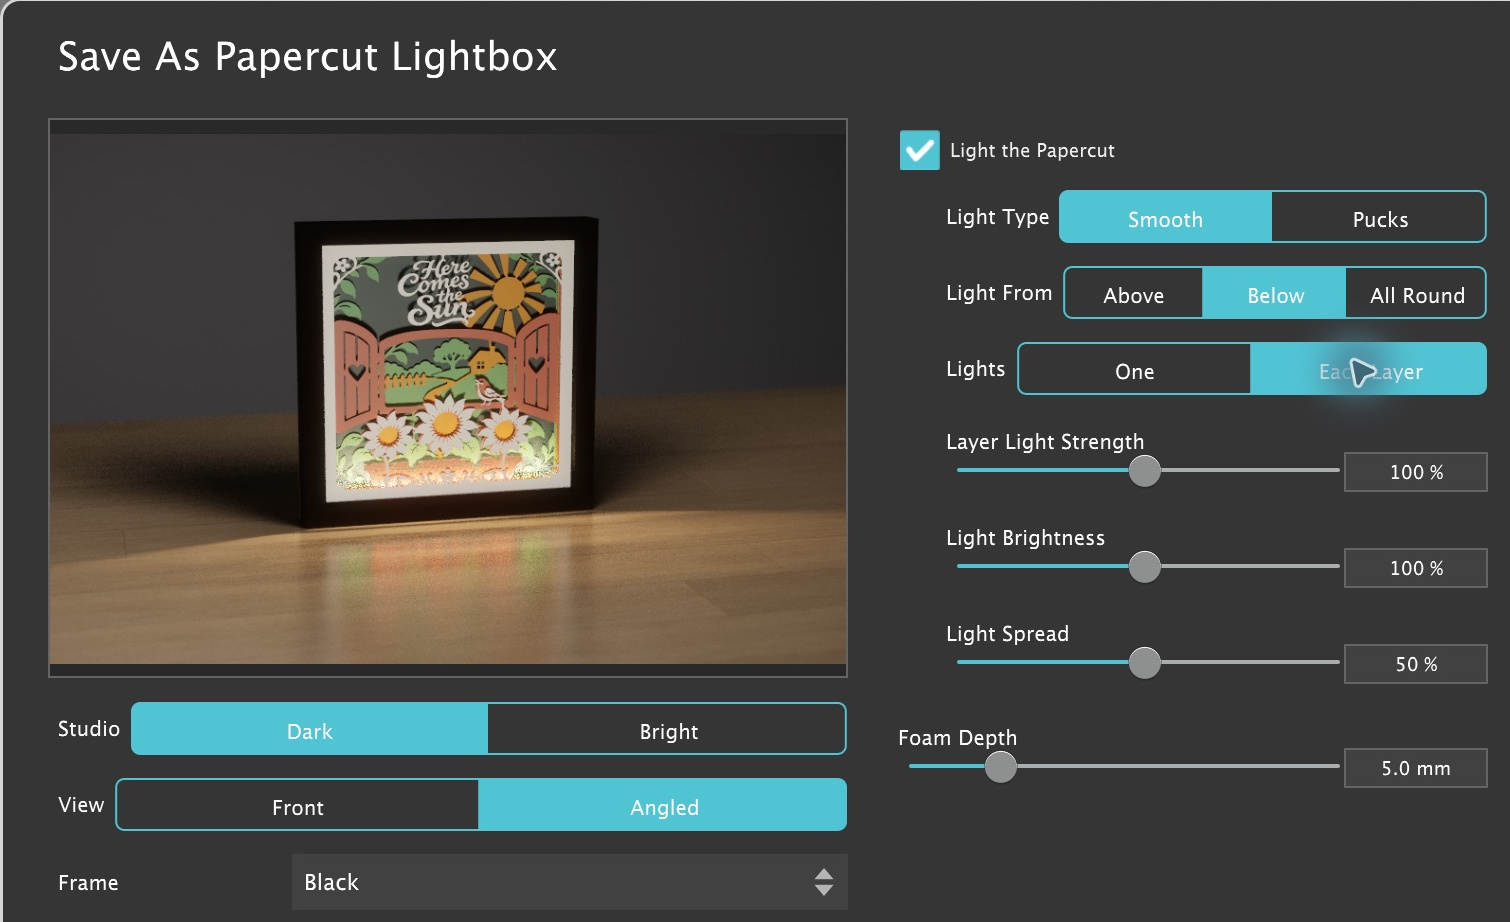
Choose File → Save As Papercut Lightbox… or click the save button and choose Save As Papercut Lightbox. Woodcut Studio renders the scene as cardstock layers in a shadow-box frame.
In the app The black frame is shown in Angled view. Below enables Each Layer lighting, and Foam Depth sets the gap between cardstock layers. Click to enlarge.
Under Frame, choose Black, White, or a wood finish. Adjust Foam Depth to change the space between layers.
Choose Front or Angled under View. Turn on Light the Papercut for an interior glow. To light every gap, set Light From to Below, then choose Each Layer under Lights.
Adjust Shadows in the Frame for the depth between layers. Use In Front of the Frame to adjust the glow, shadows, or reflection on the table.
Click Save and choose a location for the PNG.
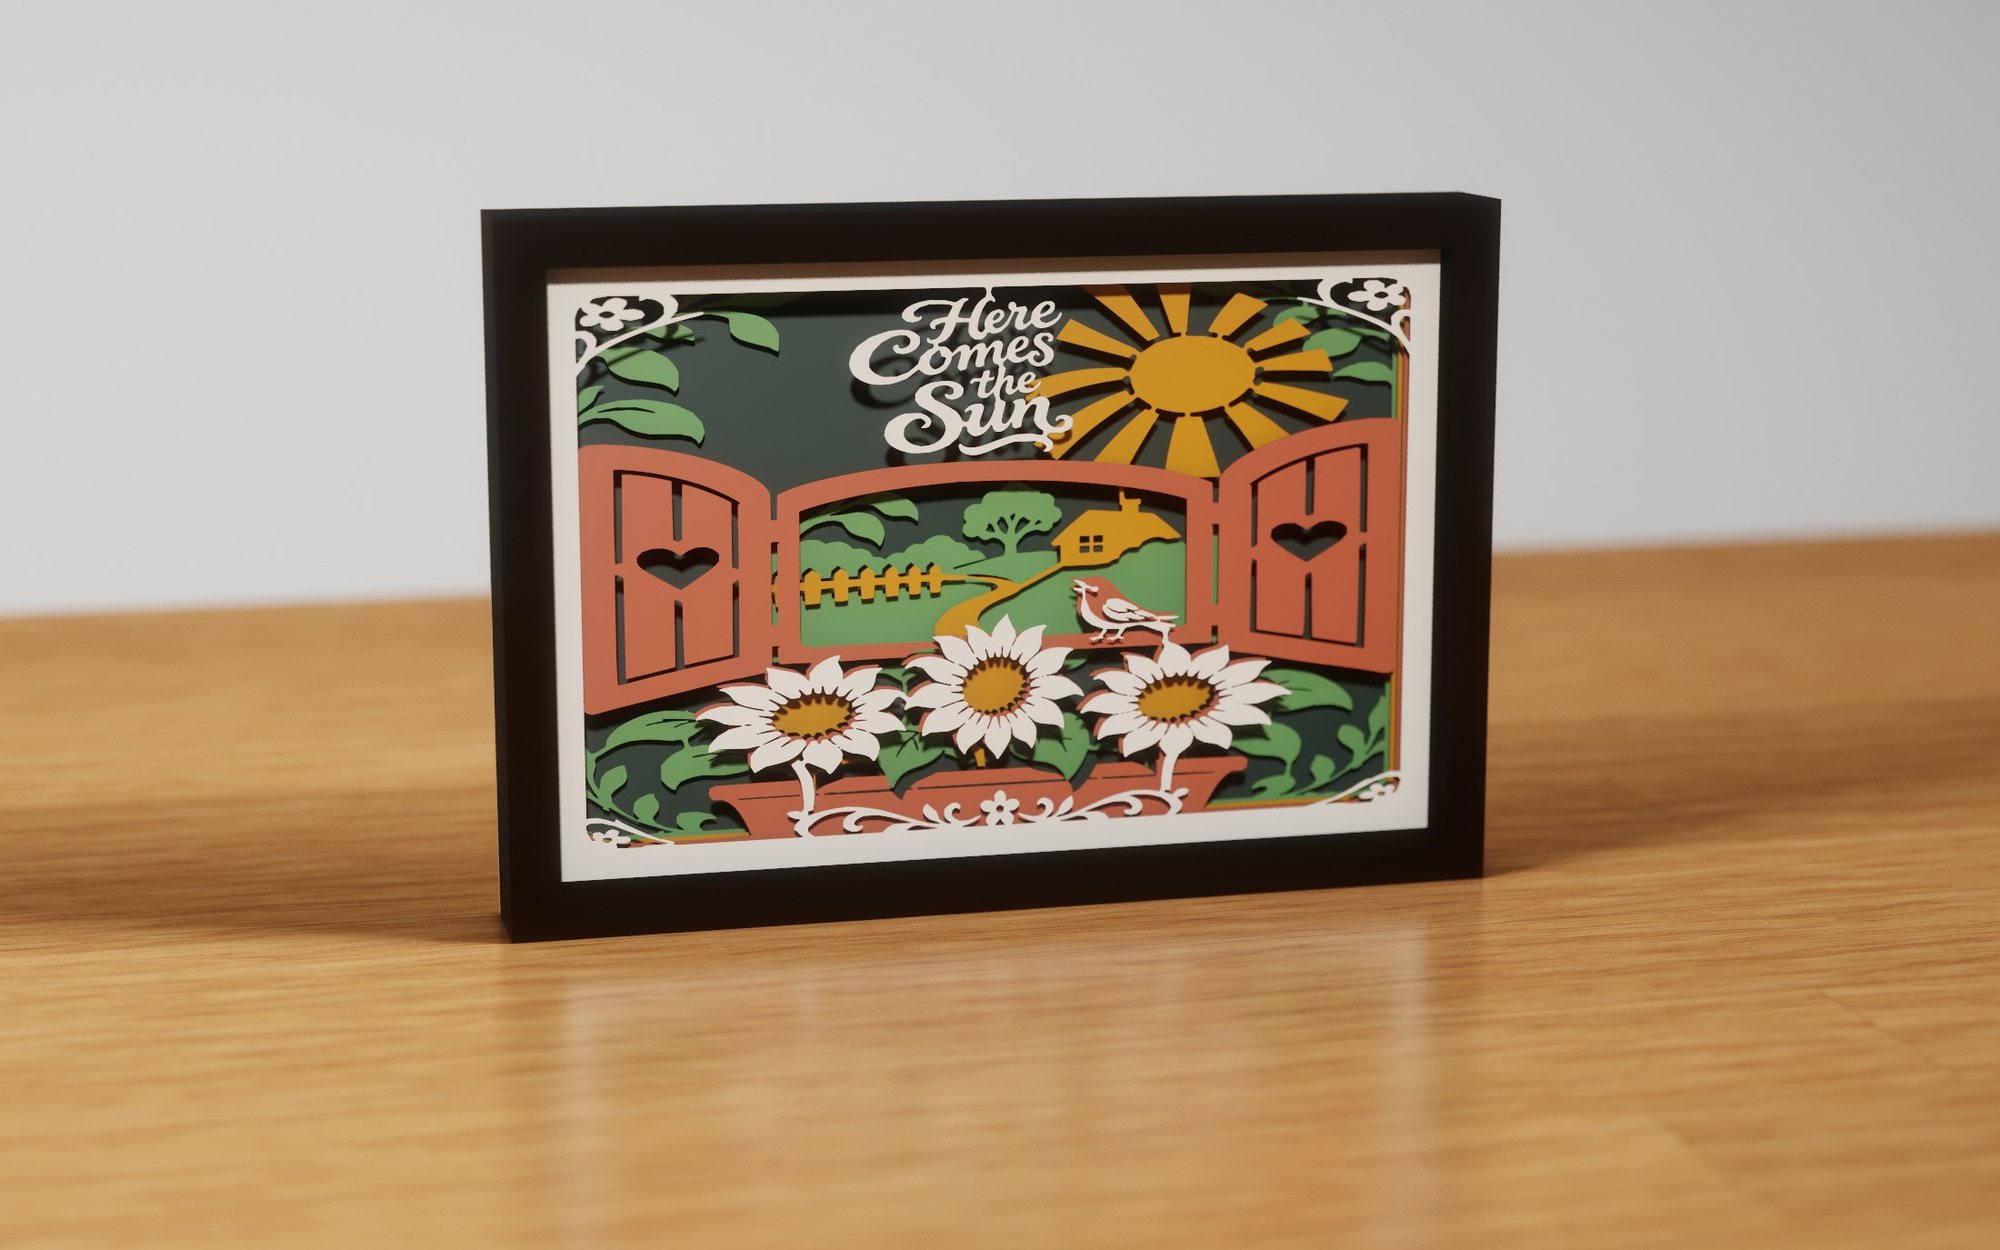
Here Comes the Sun rendered as a framed papercut. Click to enlarge.
To cut the design from cardstock, choose File → Export Project… and select Papercut Layers (Cricut). See Export physical projects for the files this style creates.
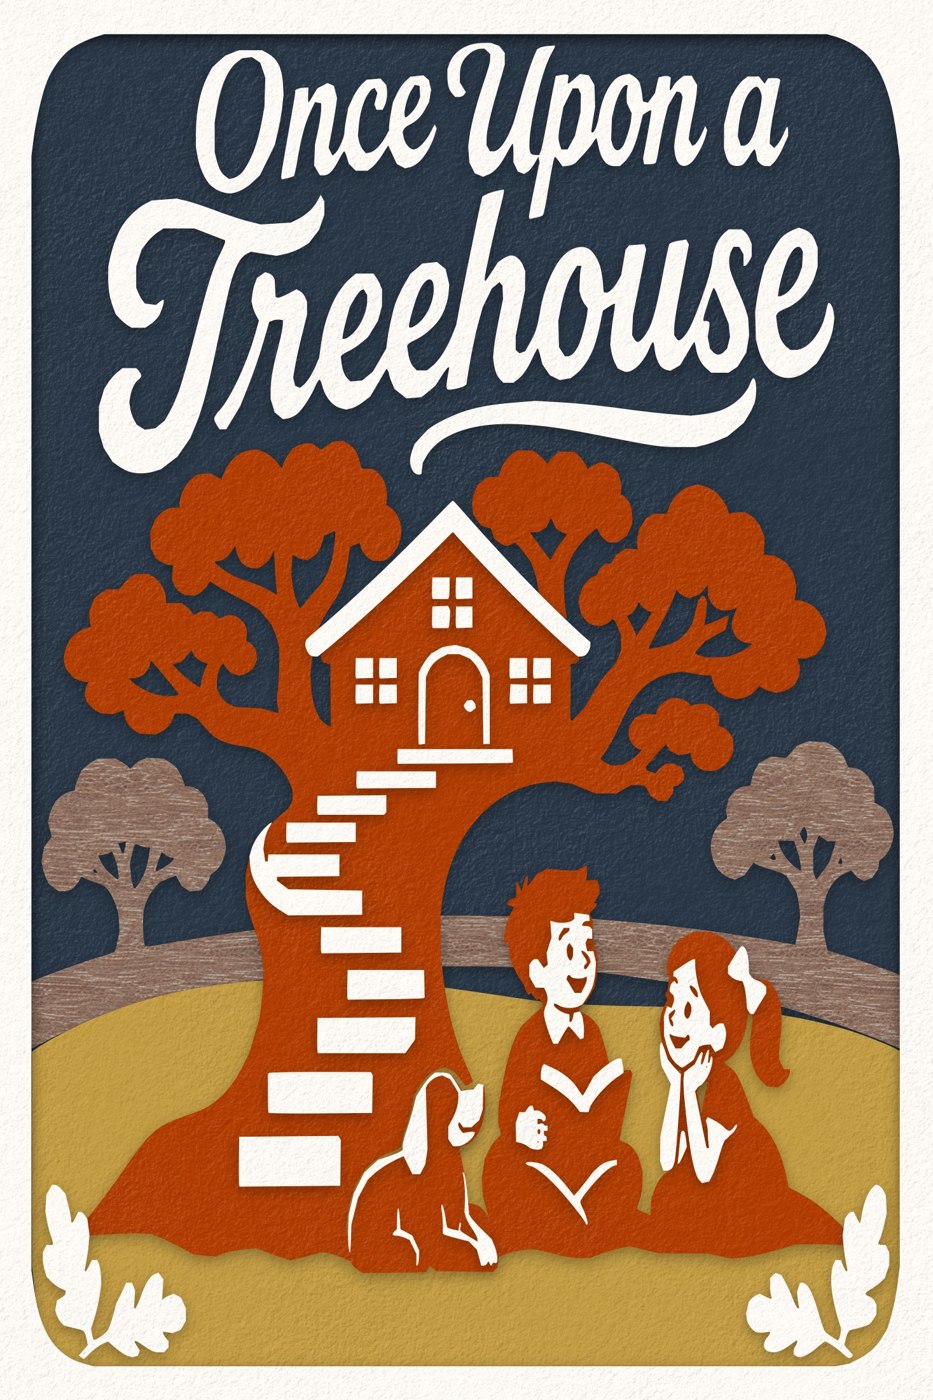
Start with a scene preset and save a new .jwc project.
Open a sheet and replace artwork lettering or add editable text.
Use Smart or Strong bridges, then inspect letters and small pieces in each sheet.
Choose File → Export Project… and select Laser Cut Lightbox. Set the material, box, backdrop, and spacers, then read the exported assembly instructions before building.
A transfer or separate-piece design
Use a bold scene or create a sheet with simple shapes.
Select the main Background and choose Bridges → None.
Inspect the separate components; loose-piece warnings are expected when you intend separate pieces.
Choose File → Export Project…, select Image Transfer (Iron-on / Sublimation), and follow the exported instructions for iron-on or sublimation.
A digital display
Choose colors or stained woods that separate the depths clearly.
Choose File → Save As Digital Box… and set Studio and View.
Try Smooth lighting from Below with spacers; adjust brightness and shadows.
Save the PNG and keep the .jwc project for future versions.
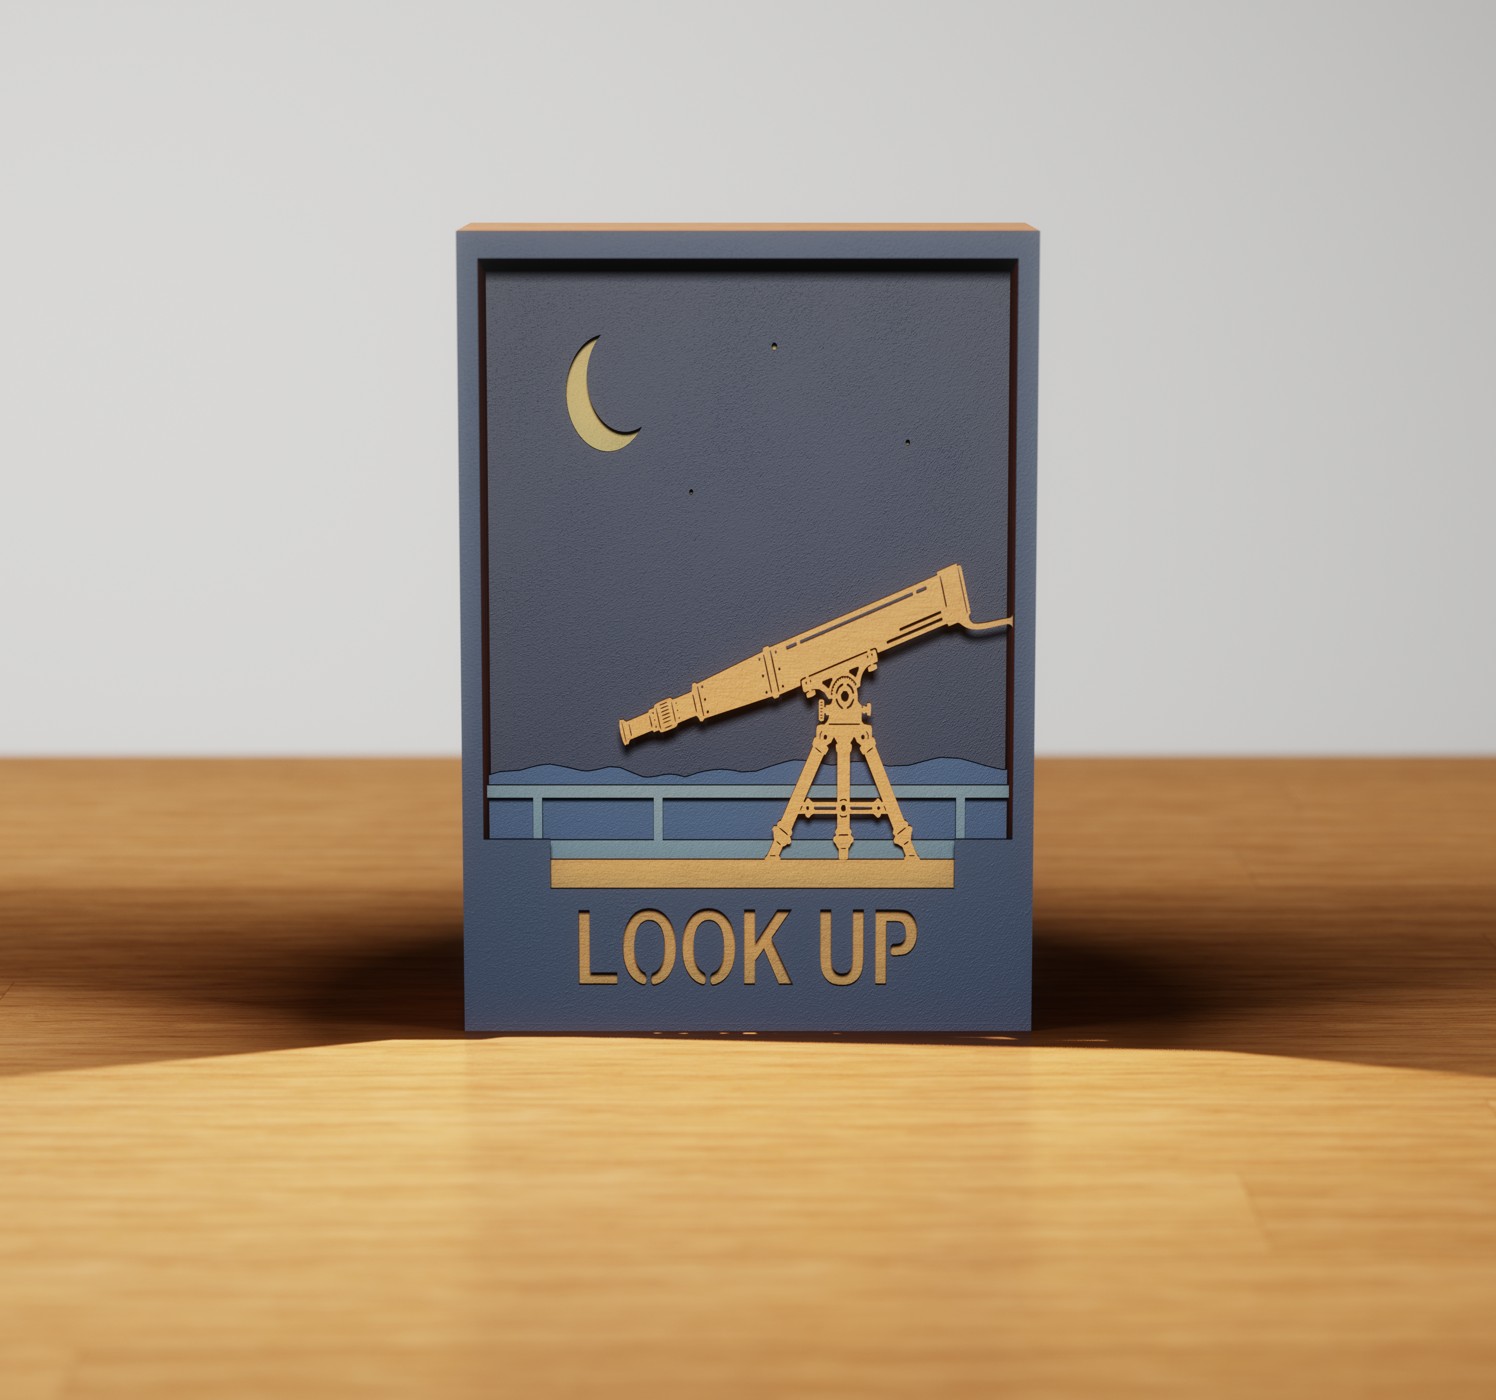
Stargazing in Front view. Simple shapes and clear contrast can be effective with a quieter scene. Click to enlarge.Back to contents ↑
Select the appropriate layer first. Main Background has scene-wide controls; Background inside the Sheet Editor has sheet properties. Select an artwork item for its text or shape controls. Scroll the controls panel or drag the Layers/controls divider for more room.
Why did a new shape make a hole?
Drawn ellipses and rectangles start as Cut. Use the item’s operation control to change it to Add. A Frame base needs Add artwork to build its open center.
Why is an Add shape invisible?
Check visibility, the sheet base, and the construction order. On a solid Full Fill base, an Add of the same material may not change the outline. A Cut above it can remove it, and an upper sheet in the main scene can hide it.
Why are bridges missing while I work?
Artwork edits pause automatic supports. Click Generate Bridges to rebuild them. If the support mode is Manual or the main Background is set to None, choose an automatic mode when you want generated bridges.
Why are pieces red, and can I still Apply?
Red material indicates loose pieces. Apply and export still accept it. For a connected sheet, add or change supports and check it again. For transfers or separate parts, those pieces may be intentional.
Why did a bridge move or disappear?
Changing artwork, automatic mode, canvas size, or bridge width can cause a fresh solve. Editing an automatic bridge freezes the layout as Manual. The Sheet Editor support menu resets hand-drawn bridges; Main Background Smart/Strong preserves hand-drawn work.
Why does the width row have no selected size?
Sheets may have different widths or a saved width outside the quick choices. The row is disabled when Bridges is None. Inspect Sheet Properties for a particular sheet.
How do I restore an older bridge setting?
Use Undo after the change. Older projects retain supported saved patterns and widths even when those choices are no longer listed in the current menu; choosing a new pattern generates a fresh layout.
Why can’t I change the words in a title?
The title may be a drawing or imported outline. Replace that artwork with a new Add Text item or another lettering shape. Live text exposes text/font controls when selected.
Why did Simplify remove the text controls?
The Sheet Editor Simplify tool converts any trimmed text or special shape to plain artwork. Undo restores its earlier editable form.
Why are there no alignment snaps?
Alignment guides show nearby edges and centers visually. They do not snap. Position the item with Move and fine-tune using arrow keys.
Why does an imported SVG fail?
Check the 2 MB limit and supported SVG features. Convert live text and unsupported references, clipping, masks, filters, embedded images, or stylesheet styling to simple paths in your vector editor, then retry. The app reports oversized or overly complex artwork.
Why can’t I see the shape I just imported?
Import Graphic saves into User Shapes; it does not place the shape automatically. Click its new thumbnail to add it. If it is already placed, inspect its Add/Cut operation, size, placement, and visibility.
Why did my image trace lose detail?
Compare Original Image and Vector Preview. Try Fine detail, adjust Threshold, and reduce cleanup if small features disappear. Use the selection hints or Restore Brush for omitted areas. Texture-heavy photos may need a simpler source image.
Why is engraving missing?
An Engrave item needs sheet material beneath it. Check item visibility and placement, then choose File → Export Project… and set Engraving to Engrave for Laser Cut Lightbox. Skip omits the marks; Cut turns them into openings.
Why did gray engraving import as one operation?
Gray #808080 intentionally identifies engraving. In the combined registered file, it groups marks from the whole stack. Use the Layers layout or a Single Layers file for the actual material being processed.
Why does my cutting layout have the wrong size?
Check Canvas dimensions, the SVG import’s units, Material Size, and whether Include Box enlarged the front/back caps. Verify the imported physical width and height in the receiving software before processing.
Why is a sheet missing from the export?
Hidden sheets are omitted. An active cutout can also leave a sheet with no material. Check visibility, cutout placement, and the Layers preview in Export Project.
Which files from Export Project should I use?
Start with Name Assembly Instructions.txt. It lists the files for your Project Style and explains how to use them. For a lightbox, choose the Layers layout for your stock or a sheet from SVG Files/Single Layers/. For a sticker, magnet, or window cling, look for Name Print.png and the matching cut-line SVG.
How do I save a scene as a digital display?
Use File → Save Photo… for the straight-on artwork as shown on the canvas. Use File → Save As Digital Box… or File → Save As Papercut Lightbox… to render the scene in a frame with lighting and shadows. Share the result in a digital card, slideshow, or social post. See the saving guide for the matching toolbar commands.
Why can’t I see light in my digital box?
Turn on Light the Box and inspect the openings. A solid sheet across the full scene blocks light behind it. Try Include Spacers, a suitable Light From direction, and Each Layer where available.
How do I send my design to a laser cutter or Cricut?
Choose File → Export Project… and select the matching Project Style. Open the exported SVG or print artwork in your cutter’s software and use the accompanying assembly instructions to choose the right files and sizes.
Can I edit a picture as the original layered project?
A saved JPEG or PNG is a finished rendering. Open the .jwc project to recover its editable sheet stack. Save that project separately from images, presets, and cutting exports.
How do I remove a project cutout?
Select main Background → Cutout Shape, remove all its shape items, and Apply. The full rectangular outline returns.
Where do I go for more help?
Visit JixiPix support. Include your app version, operating system, the command involved, and the steps that reproduce the problem. A small example project or screenshot can help explain a geometry issue.
Use Cmd on Mac and Ctrl on Windows. Click the canvas or leave a text/number field before using editing keys. Shortcuts that refer to artwork below are for the Sheet Editor.
Key / gesture
Action
Cmd/Ctrl+S
Save the Woodcut .jwc project from the main workspace.
Cmd/Ctrl+Z / Shift+Cmd/Ctrl+Z
Undo / Redo. Works locally on the draft while the Sheet Editor is open.
Cmd/Ctrl+= / Cmd/Ctrl+−
Zoom in / out. Routes to the open Sheet Editor when one is active.
Cmd/Ctrl+0
Fit the view in the window.
Cmd/Ctrl+A
Select visible artwork, excluding Background and blank placeholders.
Cmd/Ctrl+D
Duplicate selected artwork in the Sheet Editor.
Delete / Backspace
Delete selected artwork, or a selected bridge when editing bridges.
Arrow / Shift+Arrow
Move selected artwork by 1 / 5 preview pixels with Move active.
Shift-click / Shift-drag
Toggle items in a selection / add to the selected group.
Shift while drawing
Make a circle with Ellipse or a square with Square.
Shift + corner drag
Stretch a single item independently in width and height. A group in the Sheet Editor keeps its proportions.
Space + drag
Pan the Sheet Editor view. Option/Alt-drag and middle-button drag also pan.
Escape
Cancel pending shape placement or a current gesture, clear selection, or close the editor when no selection remains. In an open subdialog, Escape cancels that dialog.
Keep projects and personal libraries backed up together. Placed shapes store their outlines in the project, so a later library-file rename does not change existing placed artwork.
Control
What it does / when to use it
User Shapes on Mac
Normally ~/Library/Application Support/Jixi Woodcut Studio/User Shapes. Supported files in subfolders appear on the same User Shapes tab; the browser refreshes while open.
EffectPresets on Mac
Normally ~/Library/Application Support/Jixi Woodcut Studio/EffectPresets. Custom saved looks live under User Presets.
Save location preference
Save Project and Export Project follow the configured save location and remember a successful destination. Open/import actions remember the last opened folder.
Older projects
Older layers may expose legacy controls. Opening Edit Sheet and applying converts supported older text sheets into the current Design workflow. Save a separate copy before continuing an older project.
Fonts
Saved outlines preserve the existing appearance. Typography edits regenerate text using installed fonts, so keep the needed fonts available when moving projects between computers.
Support
Use JixiPix Contact. Report the platform/version, what you expected, what happened, and the smallest sequence of steps that reproduces it.
For a first review before cutting, check each visible sheet, loose pieces, lettering at the final size, the Layers preview in Export Project, and the sizes and order in the exported instructions.