This creative tutorial shows you how to take clip art and turn it into a handcrafted Halloween Invitation with Curled, Ripped and Layered paper objects. At the end of the tutorial you will have an invitation to email your friends, or to create an event on your favorite social media site.
If a printed invitation is desired, Rip Studio generates realistic High Resolution Rips, Curls, Texture and Shadows in full print resolution—all with control over every element create inside the app. We guarantee every creation you make will be unique and one-of-a-kind!
First download the Demo of Rip Studio (choose platform): Mac | Win
Then download the Project Halloween Invitation 1 (click link): Start Download
The folder contains: Orange RickRack, Ribbon-Band, Ribbon Tails and Halloween Objects. It also has an image of the finished invitation and a Project. This project will help you understand how the invitation was set up inside Rip Studio that you can refer to it at the end of the tutorial and compare.
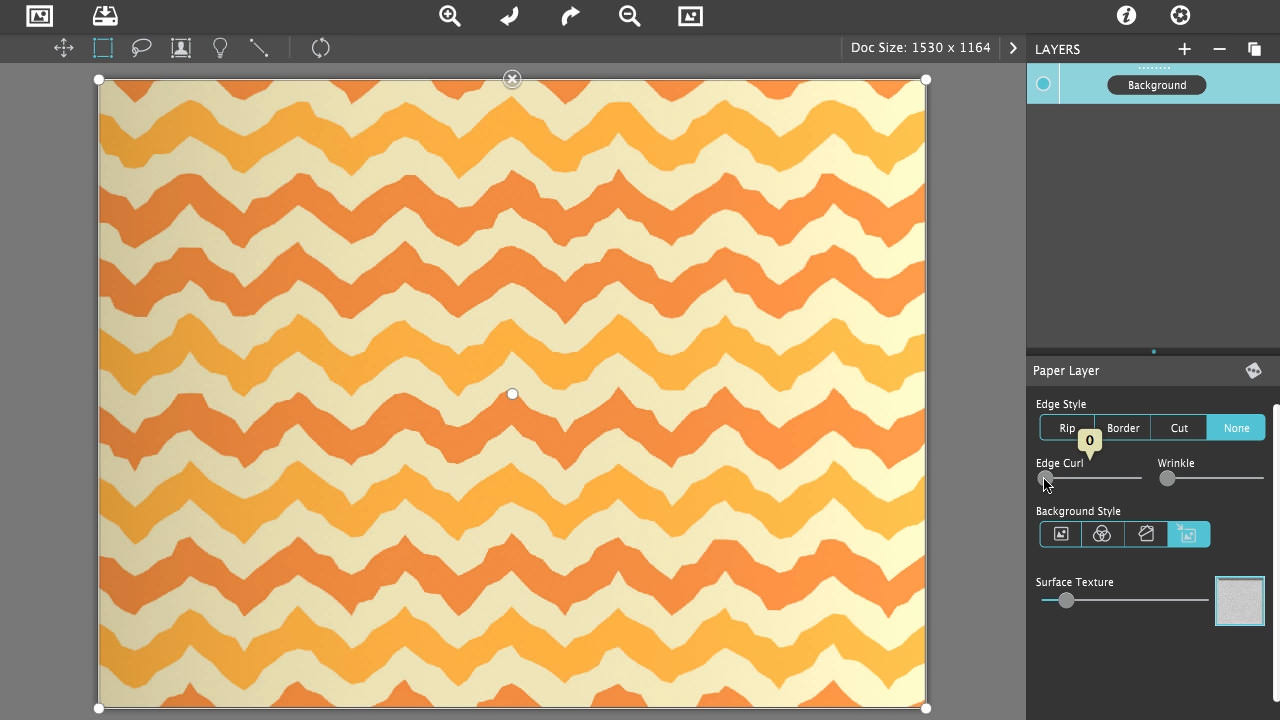
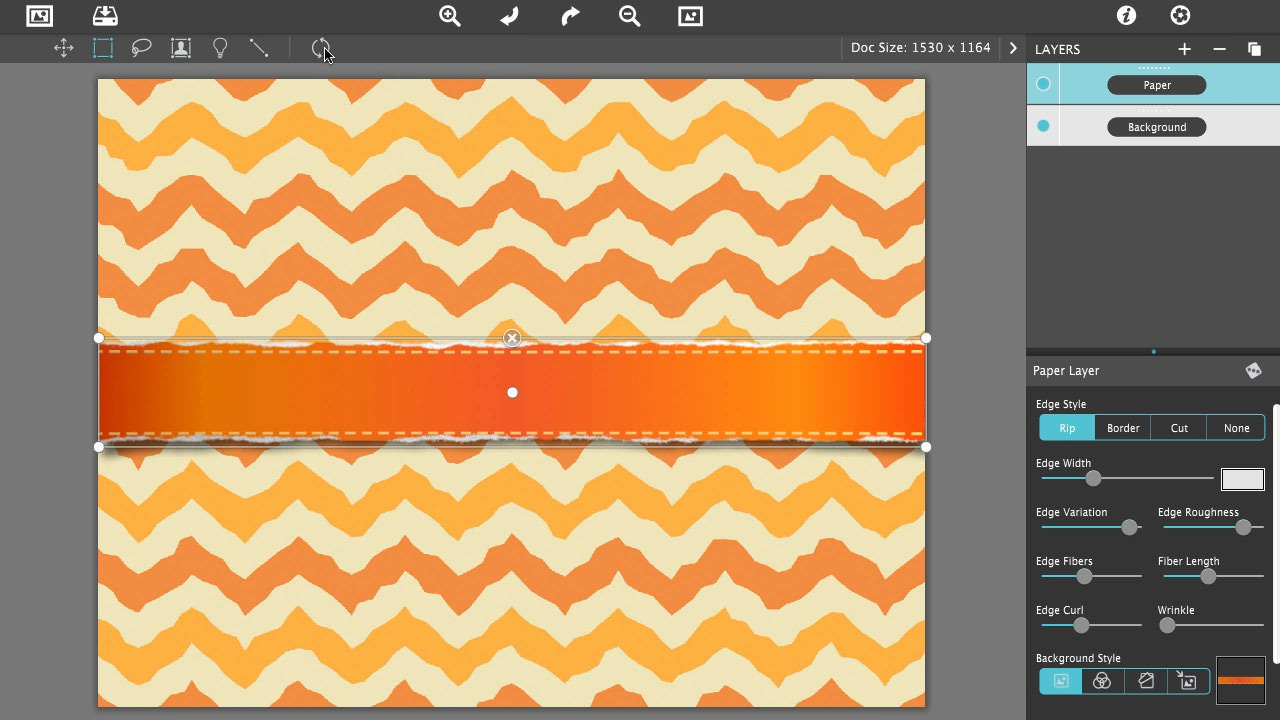
Choose the Selection Tool on the tool bar above the image then go to the Paper layer control panel on the right side and find the Edge Curl slider and move it all the way to 0.
Check Edge Style to make sure it’s on None.
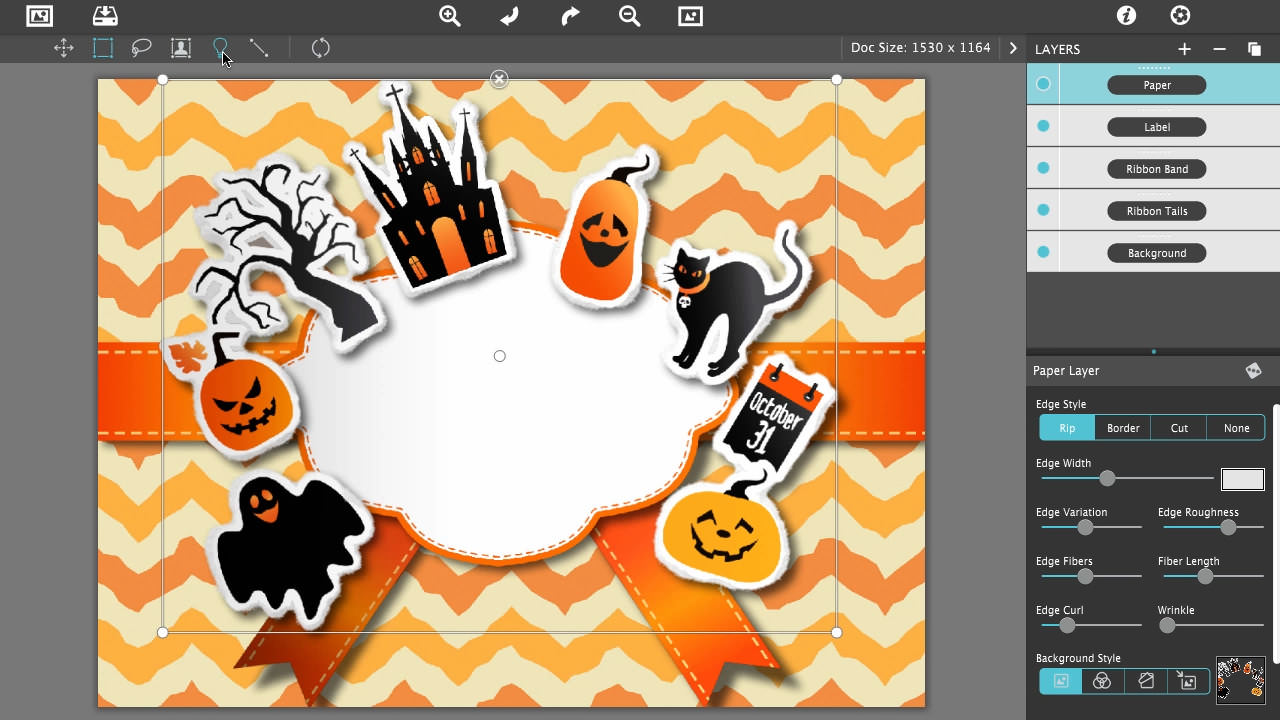
Add Ribbon Band:
Go to the Halloween Invitation 1 folder, find the Ribbon-Band.png, drag and drop it on the open application.
Remove Auto Settings from the Ribbon:
Reset the size by going up to the tool bar to find Reset right of the Selection Tool.
Then, go to the Paper layer and change Edge Style to None.
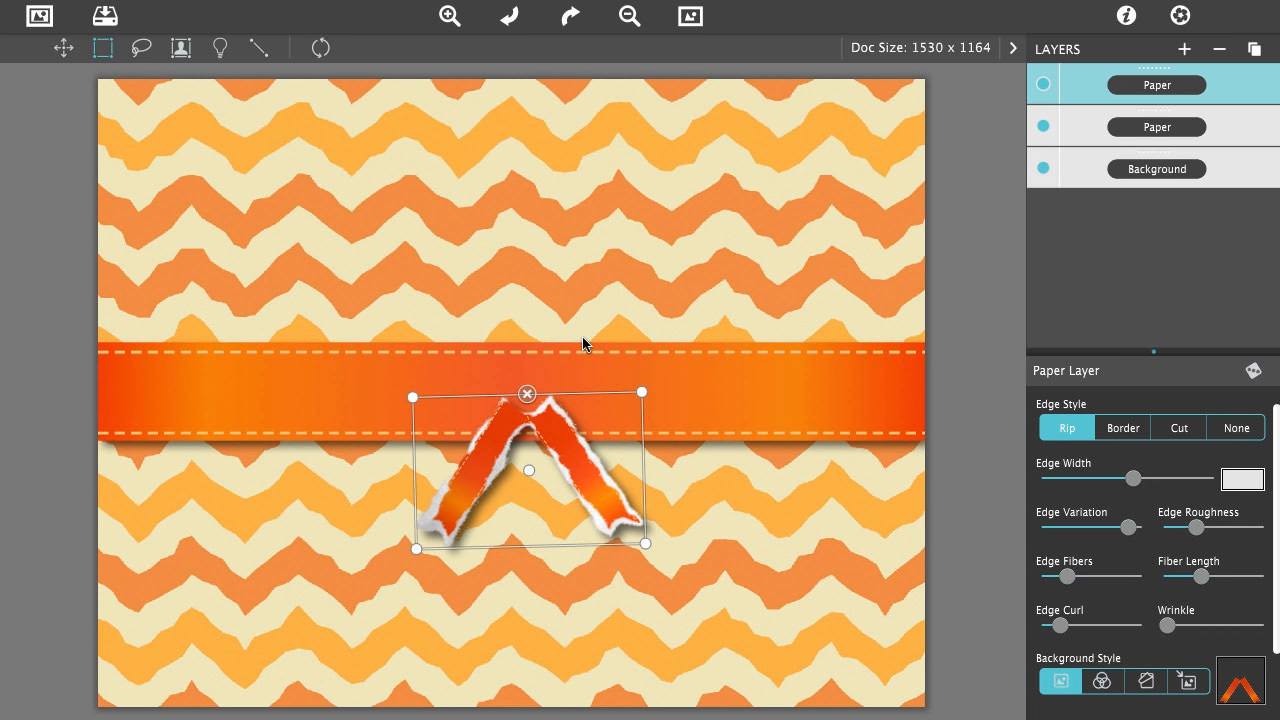
Go to the Halloween Invitation 1 folder, find the Ribbon-Tails.png, drag and drop it on the open application.
Remove Auto Settings from the Ribbon Tails:
Reset the size by going up to the tool bar to find the Reset right of the Selection Tool. NOTE: If you don’t see the icon click once on the on-document graphic to reveal it.
Then, go to the Paper layer and change Edge Style to None.
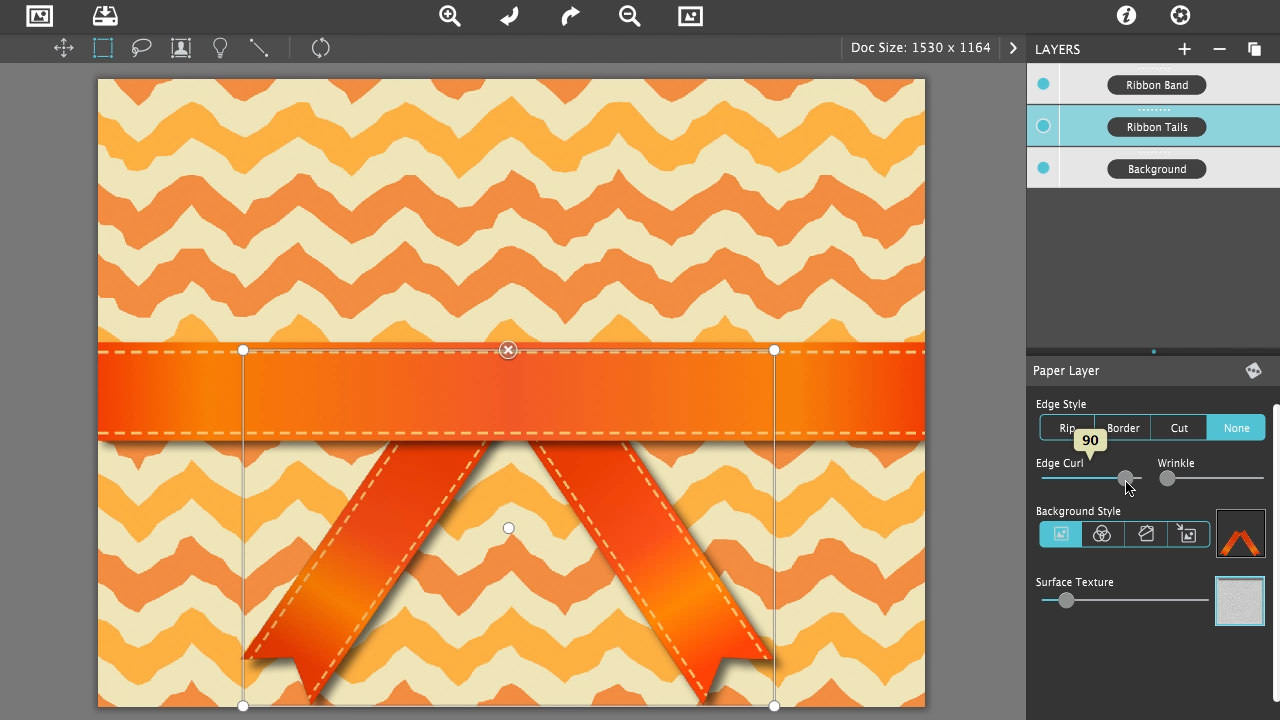
Reorder the Ribbon by going to the Layers, select the top Paper layer then drag it under the second Paper layer.
Name these layers ‘Ribbon Band and Ribbon Tail’ by clicking once/or twice on the black text field to type in the name.
Add Curl to the Ribbon Tails by clicking on the layer you named ‘Ribbon Tails’ then below on the Paper layer control panel move the Edge Curl slider right to a value of 90.
Add the Label
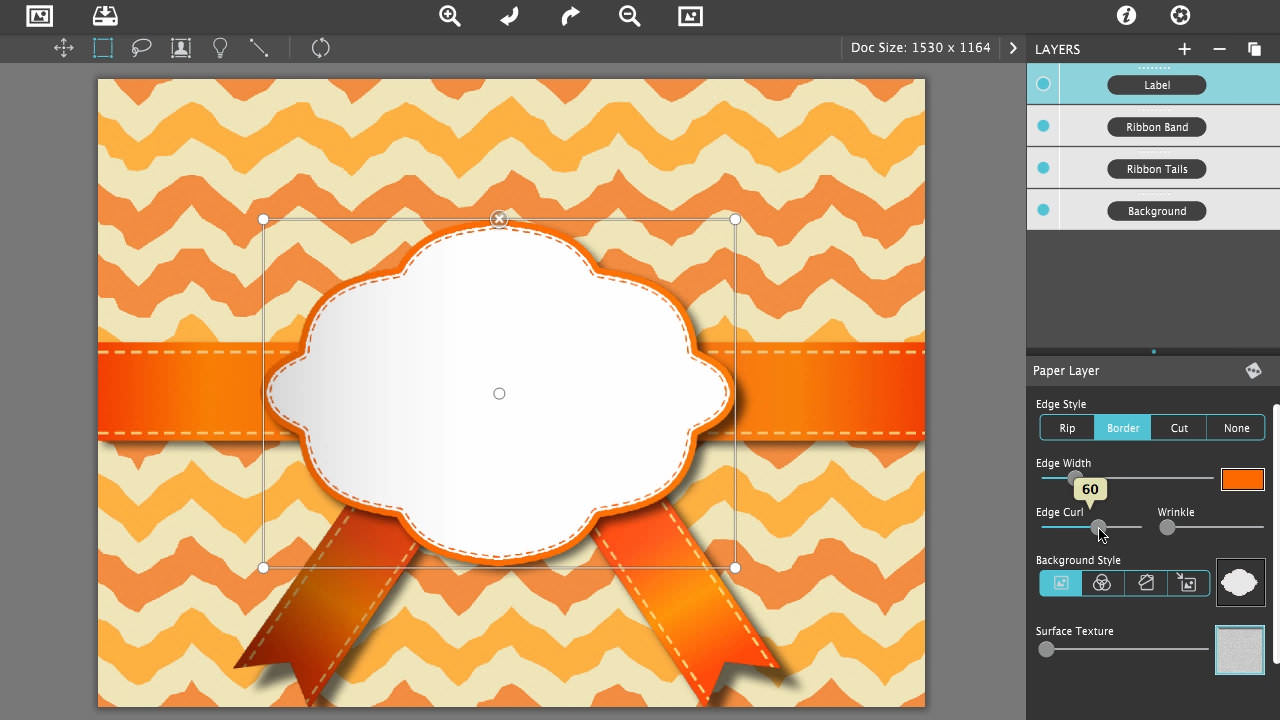
Go to the Halloween Invitation 1 folder, find the Label.png, drag and drop it on the open application.
Reset the size
If the label is under the ribbon, go to the Layers Palette and move the item to the top of the list.
Choose the Edge Style, change it to the one you like Rip, Cut, Border or None. This is your creation so any edge style will work. If you choose Border change the Edge Width slider to 20 and change the color to orange using the color box at the end. Click on the color box to bring up the color picker, slide the double arrows down to the orange hue area, and move the circle on the left to the upper right hand corner for a richer color.
Add Curl to the label using the Edge Curl slider set to 60.
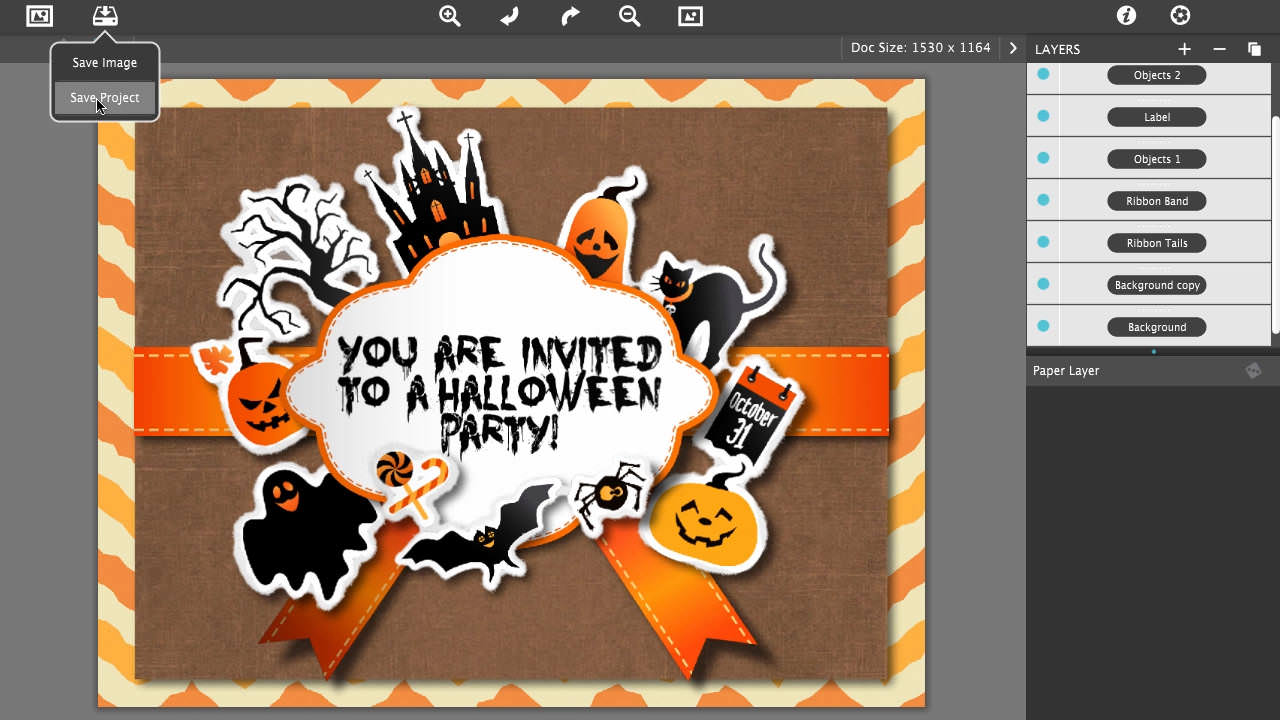
Step 4 - Save Project
This is a good time to save the project. To do this:
Go to the upper left corner of the app to find the Save Button, click then choose Save Project from the menu.
Use the standard dialog to navigate to Halloween Invitation 1 folder and save it as ‘My Halloween Invitation’. NOTE: Projects allow you to save everything in tact so you can close and resume at any time. Projects can be organized and moved into other folders, or given to other artists, however they can only be opened with the Rip Studio application.
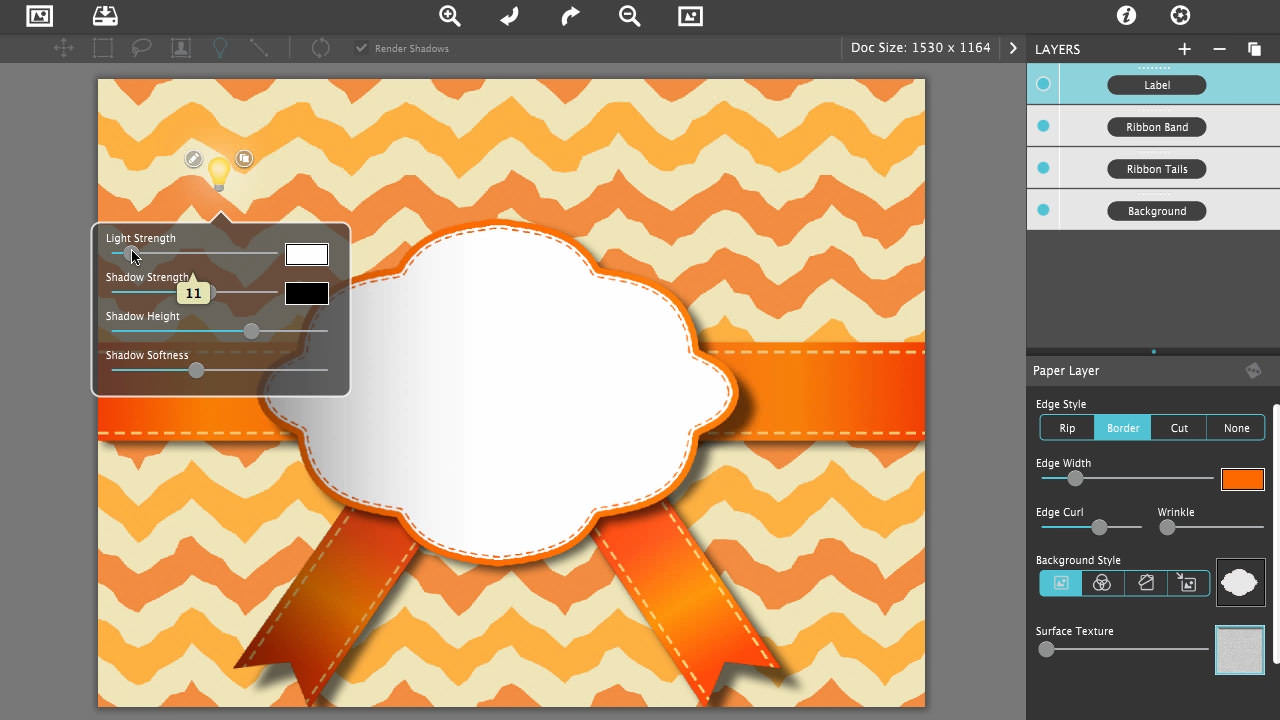
Step 5 - Lighting
Before we continue this is a good time to teach you about the lighting and a couple reasons to use it. Sometimes surface shadows can be too strong on a photo or in this case our label, see the shadow on the left side of the label. To lighten it:
Click on the label
Go to the tool bar above to find the Light icon then click on it to reveal the on-document light bulb.
Click on the Edit button (pencil) on the left side of the light bulb to open settings.
Turn the Light Strength slider down to 10. NOTE: You don’t want to go to 0 but stay in the lower numbers, otherwise it will affect any crease effects applied to the project, however in this case there is no crease effect used.
Click off to the side to close the edit box
Also, you can exaggerate the curl effect by moving the light bulb towards the upper left hand corner. At any time you can reset the light to its default location using the Reset icon on the tool bar above (found next to the Render Shadows checkbox).
Multiple Shadows
You can also cast a double shadow. To do this:
Click the Light icon on the tool bar to reveal the on-document light bulb. On the right of it click the Duplicate icon . This will duplicate the light and its settings, move it directly to the right opposite of the other one and notice the extra shadow. Use the Delete icon to remove it.
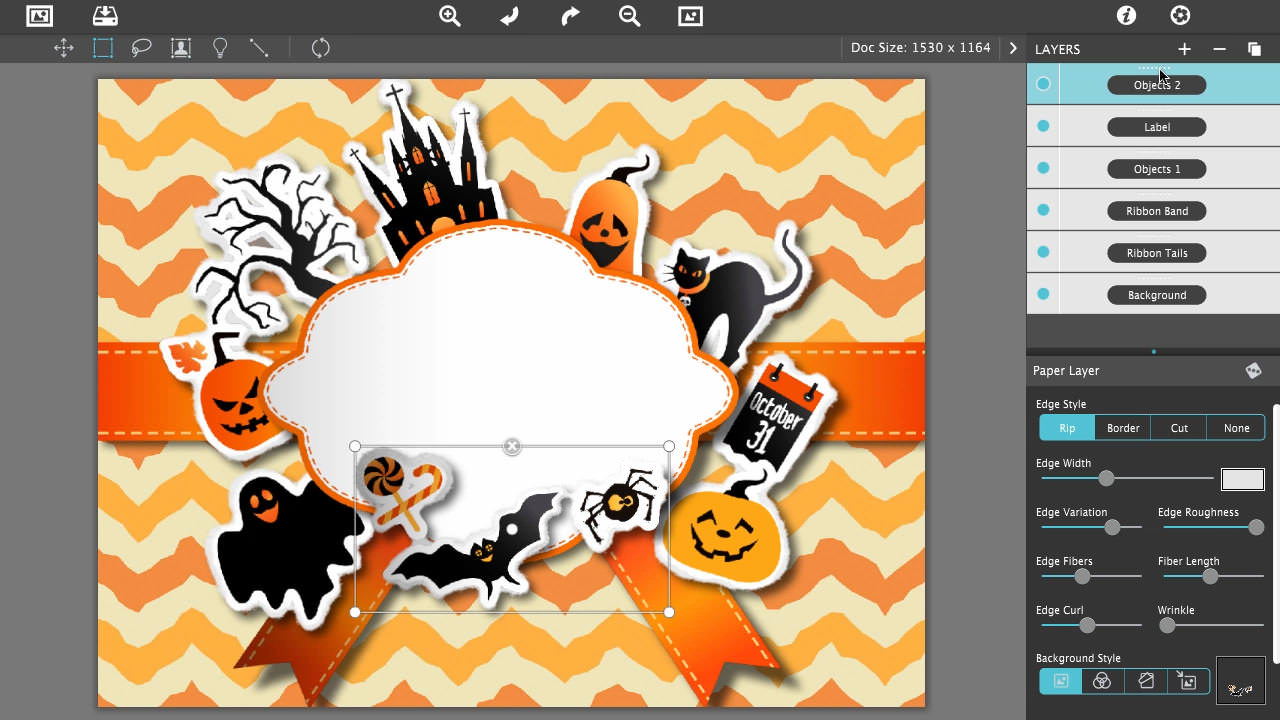
Step 6 - Add Halloween Objects
Add Halloween Objects-1
Clip art with transparent backgrounds work the best. Just dropped them on the open application one at a time, or in this case the Halloween objects came together so I left them that way for ease of use.
Go to the Halloween Invitation 1 folder, find the Objects-1.png, drag and drop it on the open application.
Reset the size
Reorder the layers. Move objects below the label
Adjust surface lighting. In edit move Surface Strength slider to 5
Add Halloween Objects-2
Go to the Halloween Invitation 1 folder, find the Objects-2.png, drag and drop it on the open application.
Reorder the layers. Move the objects to the top above the label
Reset the size
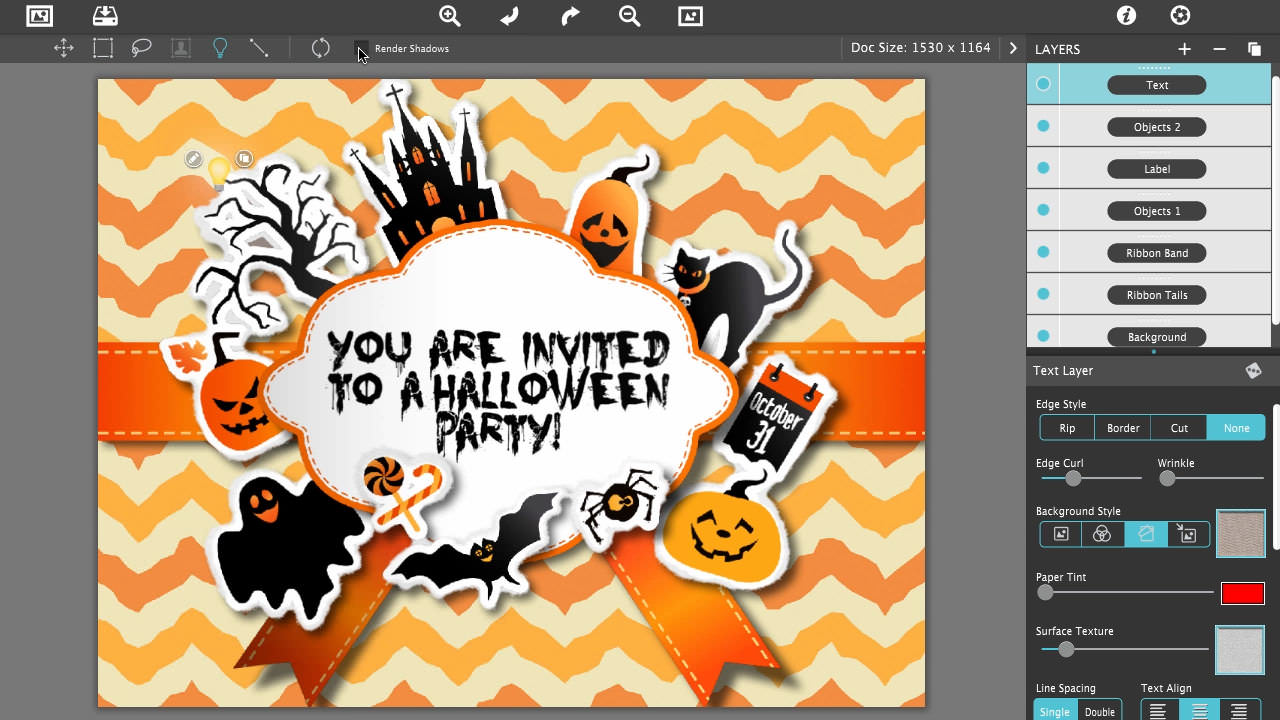
Step 7 - Add Text
Go to the top of the Layers Palette, click on the ‘ + ‘ sign, choose Text off the menu.
Reorder the layers. Move the text to the top.
Move the text to the center of the label
Go to the Text layer control panel, scroll down to the white text box, choose Center for Text Align, highlight the word in the box to type over it, type in ‘You are Invited (return) to a Halloween (return) Party!’.
Use the Apply Text button to update the on-document text.
Resize the text on-document with the selection box. Use the white corner dots to enlarge the box and the text will go with it.
If you want to remove the rip effect and shadow you can do this by scrolling up to the Edge Style on top of the control panel, and click None. To remove the shadow, select the Light Tool and check off the ’Render Shadows’ box.
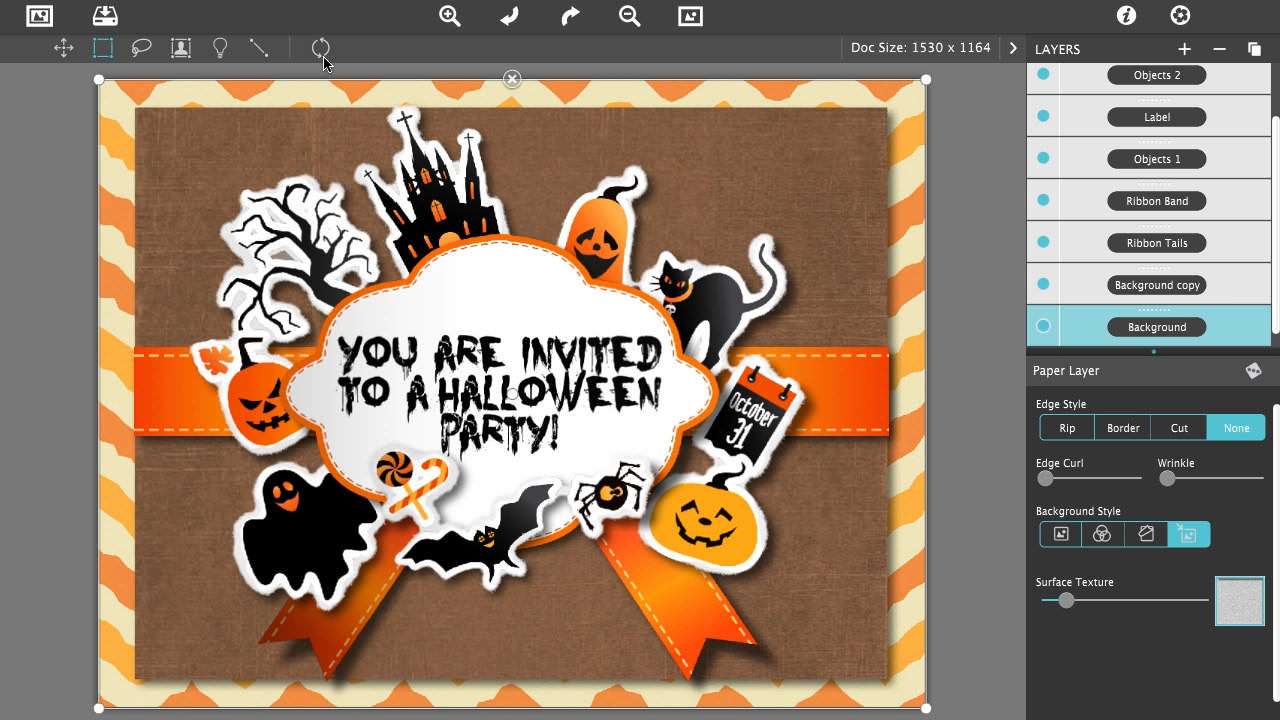
Step 8 - Select and Resize Multiple Layers
Select all the layers by selecting each one at the same time holding the Ctrl or Cmd key…OR…use the select all keyboard command, Ctrl or Cmd + A. Note: You know all layers are selected if they are all blue.
Use the Selection Box corners to resize all the elements smaller. Only enough to add a small margin around the invitations.
Click off to the side to deselect the layers
Step 9 - Duplicate Layers and Background Paper
Select the Background layer at the bottom of the Layers Palette
Go down to Background Style, choose the Paper icon click the box and change paper to #34 (Brown), close.
Select the Background layer again and duplicate it using the Duplicate icon way on top , choose Duplicate off the list. This will make a Background copy layer
Go back and select the Background layer, then reset the size in the tool bar on top. If you don’t see the Reset, just click on the graphic once to make it appear. Now, go back to Background Style to Choose the Embed Image icon , this will turn the background back to the Orange RickRack.
Step 10 - Saving
Save Project
Go to the upper left corner of the app to find the Save button , click then choose Save Project from the menu.
Use the standard dialog to navigate to Halloween Invitation 1 folder and save it as ‘My Halloween Invitation’, go ahead and replace the other project.
Save Preset
You can also save a preset, this works similar to a project.
To do this go to the top of your monitor to the ‘File’ menu, Save Preset as Halloween Invite 1. You can find this preset below and can access it from inside the app, however by doing this you won’t be able to share the project, but you can save your work as you go by simply replacing the preset. This will allow you to continue with the project or allow you to create variations of the project.
Save Photo
Go to the upper left corner of the app to find the Save button , click then choose Save Image in the menu.
Use the standard dialog to navigate to Halloween Invitation 1 folder and save it as My Halloween Invitation.jpg
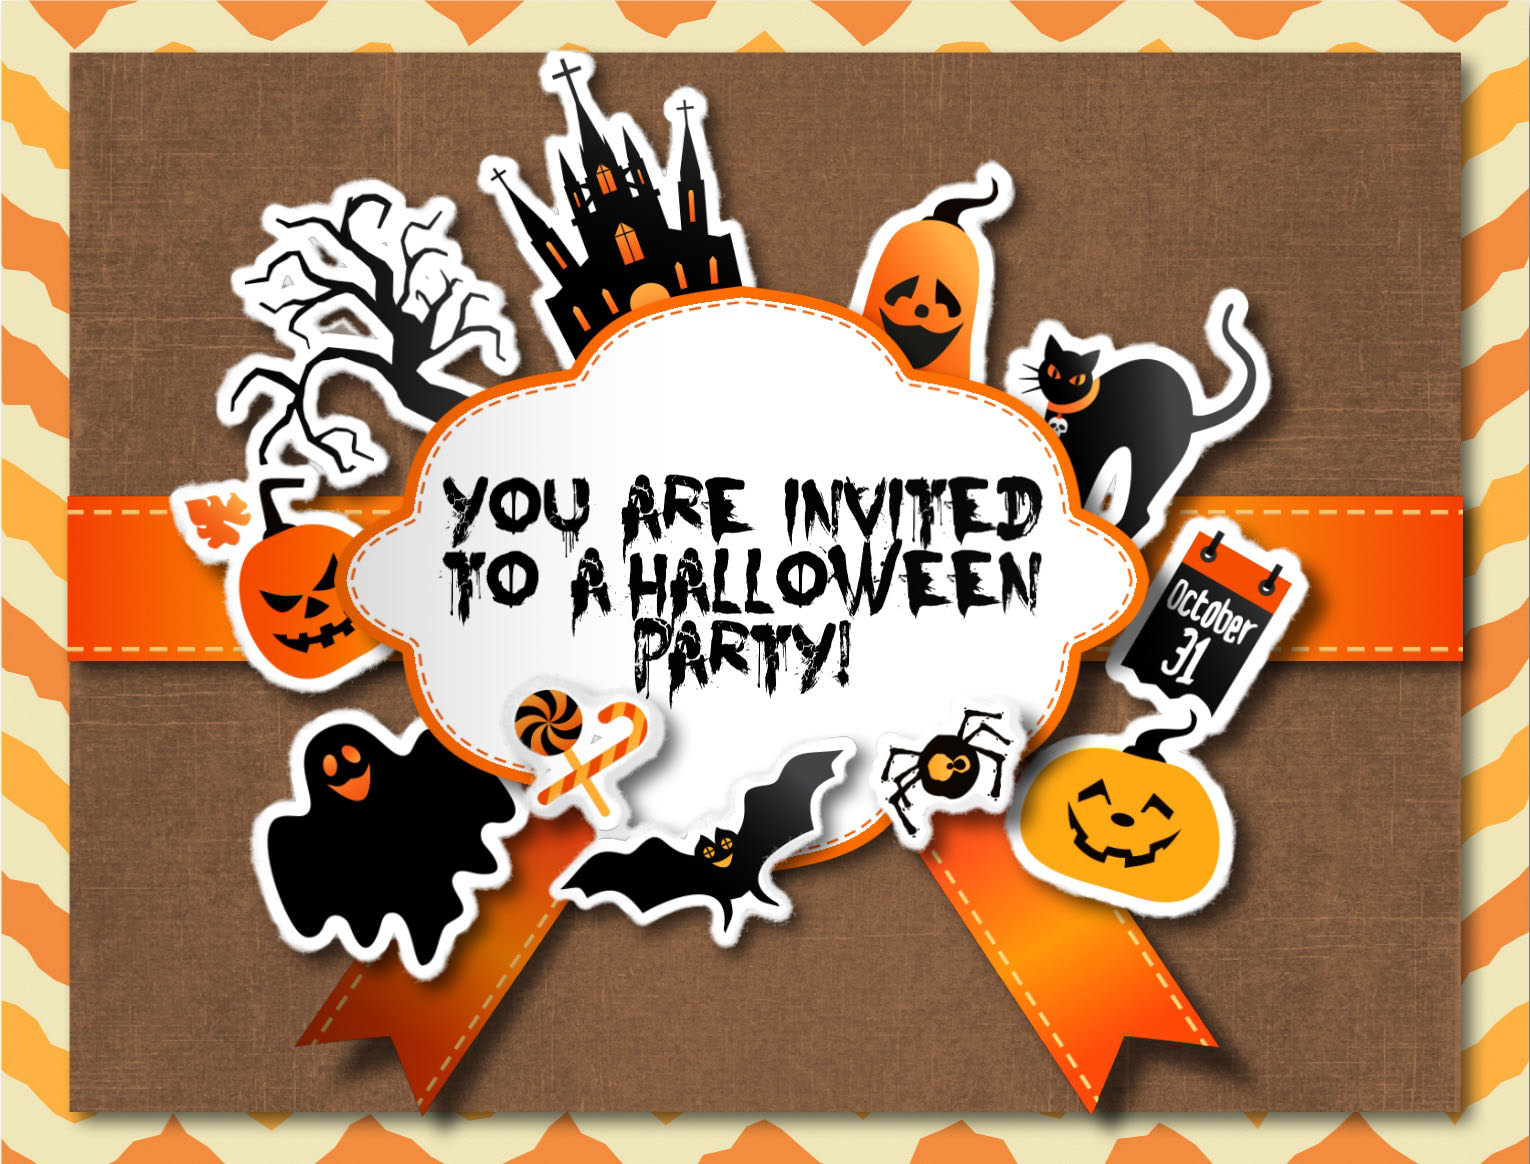
You have made a digital handmade invitation with all the qualities of a traditional one. Email it to your friends, or create an event and post it.
If you desire a printed version go ahead and do it!
The file is a full 266 resolution image. The invitation size is a 5.752 x 4.376 inches and fits in a standard A2 envelope.
Nightmare Font‘Nightmare’ FONT courtesy of DaFont.com: http://www.dafont.com/nightmare-5.font
Special Thanks to Artist Artist: Olga Milagros for creating Halloween Frame with Fun Stickers at Freepik.com Tutorial Music
Doll Dancing Artist: Puddle of Infinity


 , click then choose Save Project from the menu.
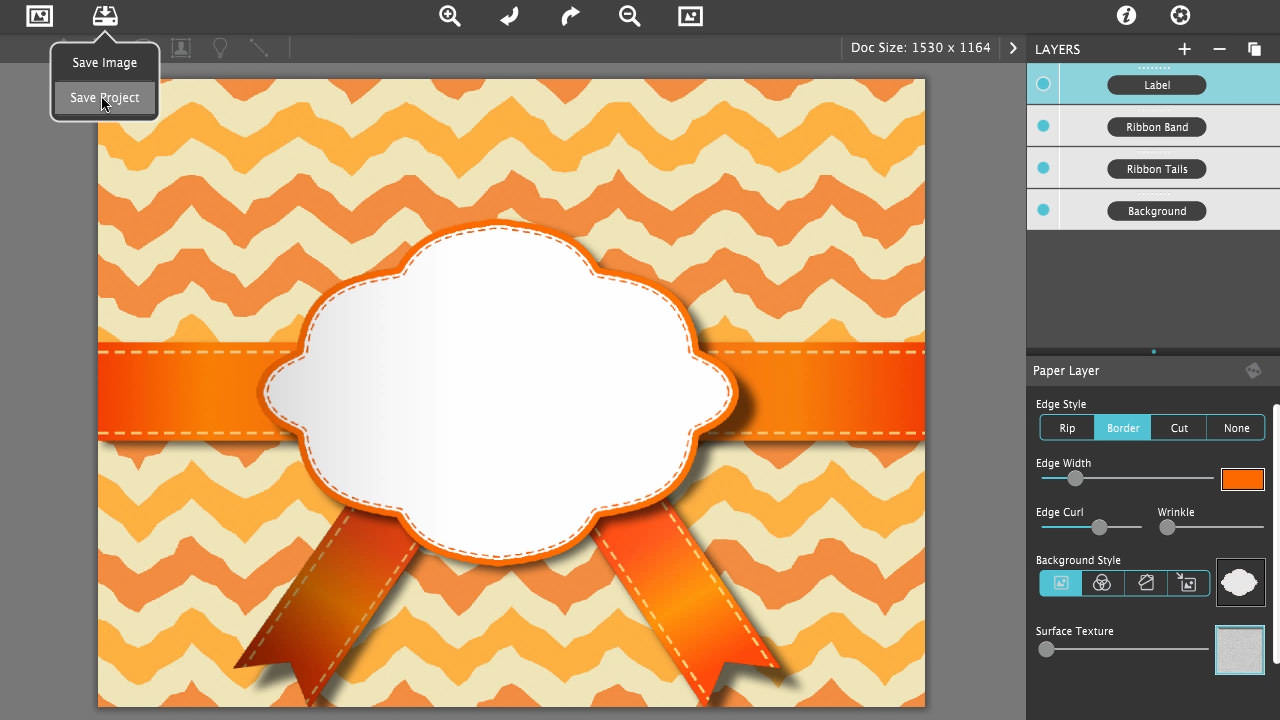
 . This will duplicate the light and its settings, move it directly to the right opposite of the other one and notice the extra shadow. Use the Delete icon
  to remove it.