Create a Paper Flower

Tutorial - Create a Paper Flower with Rip Studio

Detailed instructions below will explain everything happening in this video. Download a demo version of Rip Studio: Mac | Windows

Intro  |  Step 1  |  Step 2  |  Step 3  |  Step 4  |  Step 5  |  Video  |  Keyboard Shortcuts

Introduction

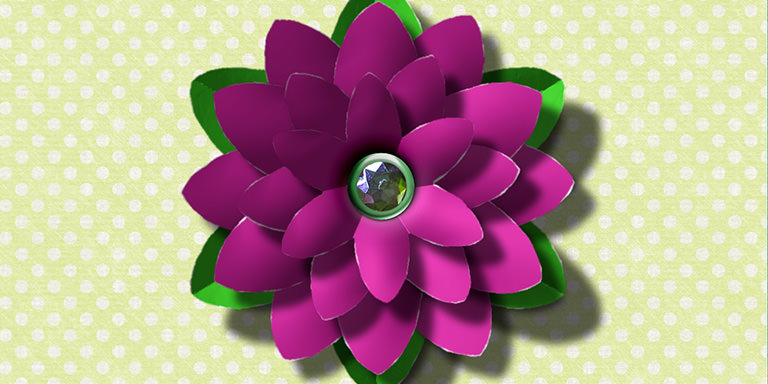
This creative tutorial shows you the power of Rip Studio by creating a 3D paper flower with leaves and petals that lift off the page. Create and arsenal of digital elements for scrapbooks, cards, ads and more.

Rip Studio generates super realistic rips and cuts, tape, objects, creases and folds with a powerful 3D light engine—all with control over every element you create inside the app. We guarantee every creation you make will be unique and one-of-a-kind!

In this tutorial you will learn about:

  • Shape Layers
  • Shapes
  • Edge Styles
  • Edge Curl
  • Crease Tool
  • Duplicating Layers
  • Objects
  • Layer Presets
  • Appending a Layer Preset

Getting Started

First download the Demo of Rip Studio (choose platform): Mac | Win
Then download the Project Paper Flower (click link): Start Download

How to Use the Project

Follow these steps:

  • Uncompress the downloaded file labeled ‘Project Paper Flower.zip”. You can do this by double clicking on the file.
  • When it uncompresses, look for a folder labeled ‘Project Paper Flower’
  • Open the file labeled ‘Project Paper Flower.jrp’ (the .jrp files are projects saved from inside the app).
  • When the project opens in Rip Studio you will see the completed flower. Go ahead and look at the how the flower is made so you get an understanding. You can look by clicking through the layers to view the settings below. When you are ready to start the tutorial, delete all the layers except the Background one so you can start fresh. You can delete the layers by selecting one, then using the – (minus icon) on top of the LAYERS palette to remove.

Step 1 - Start the Flower

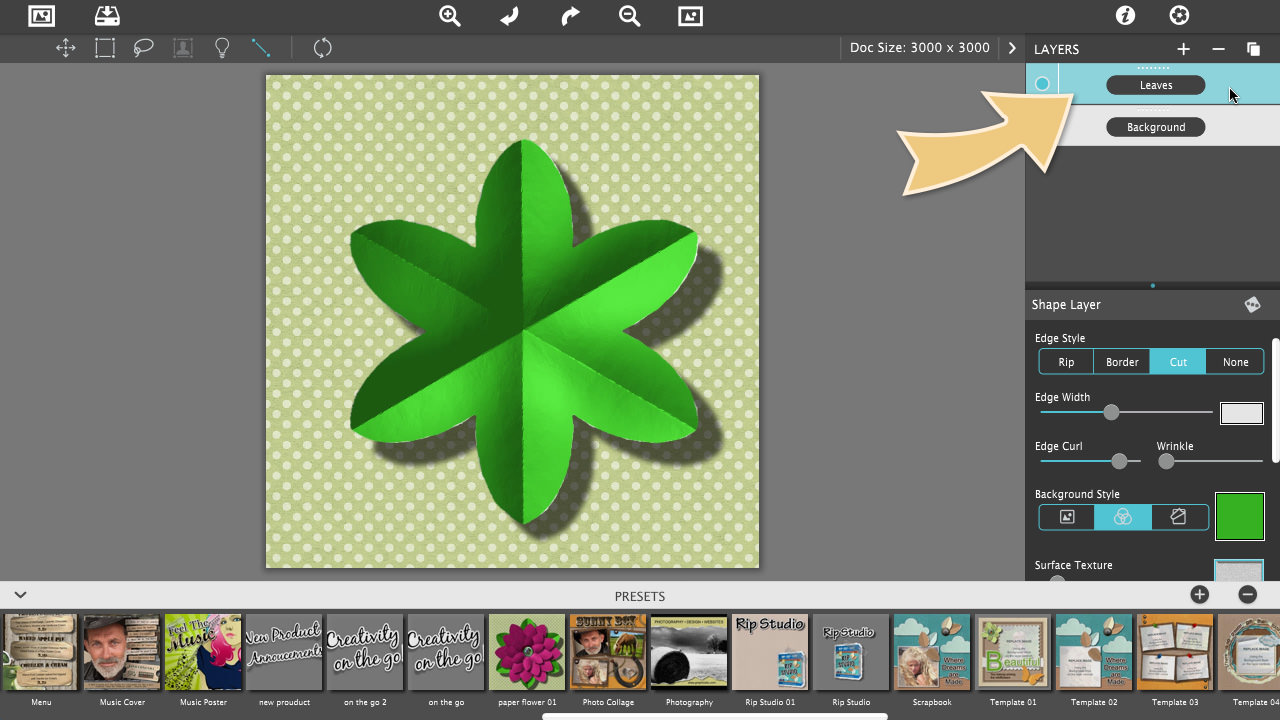
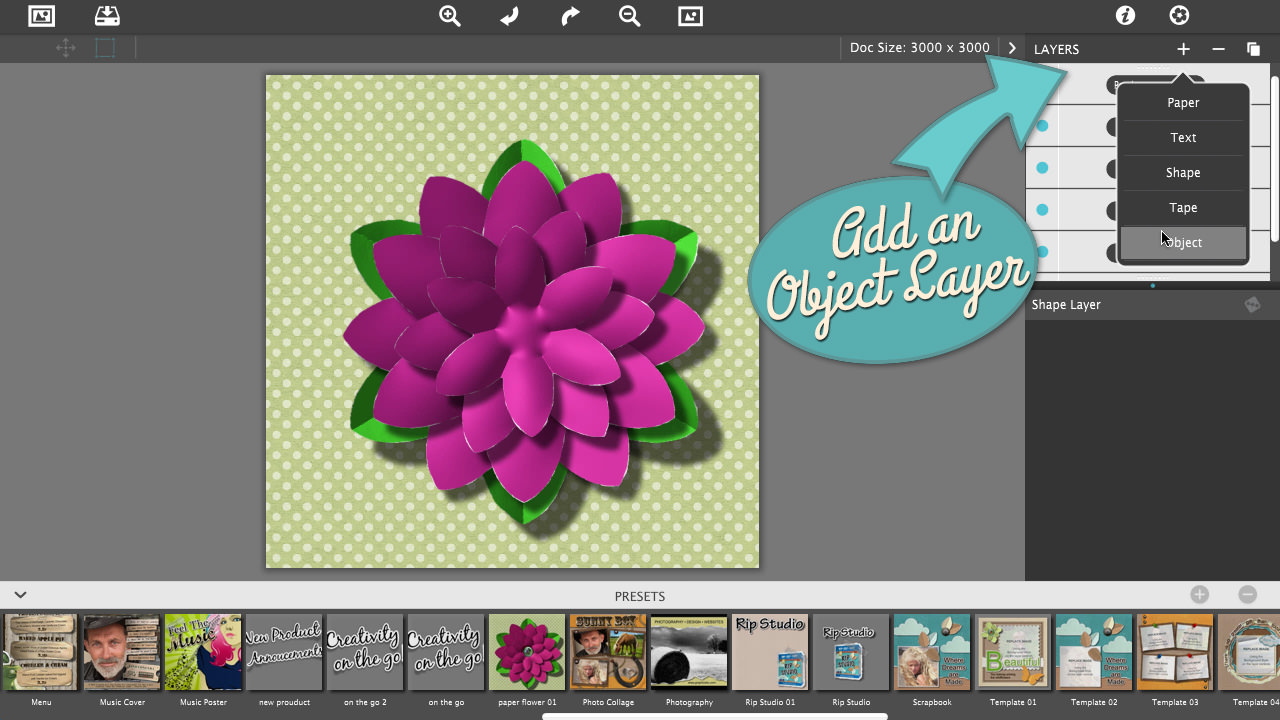
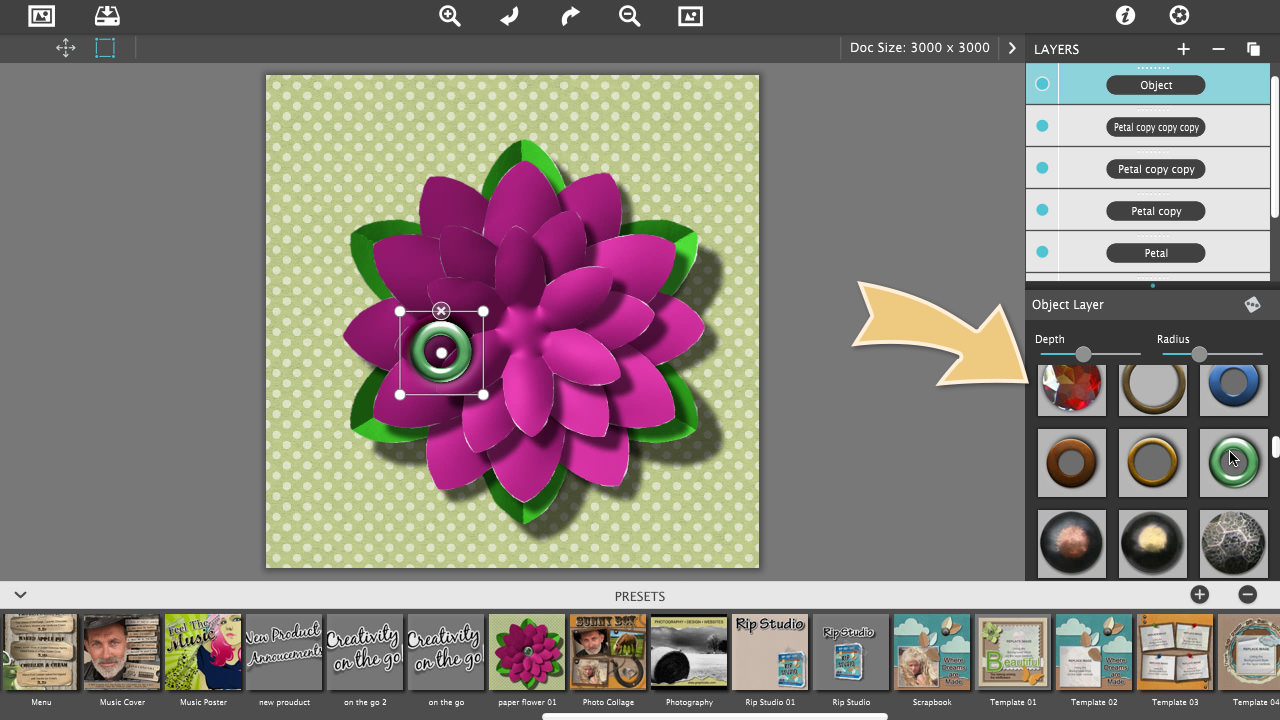
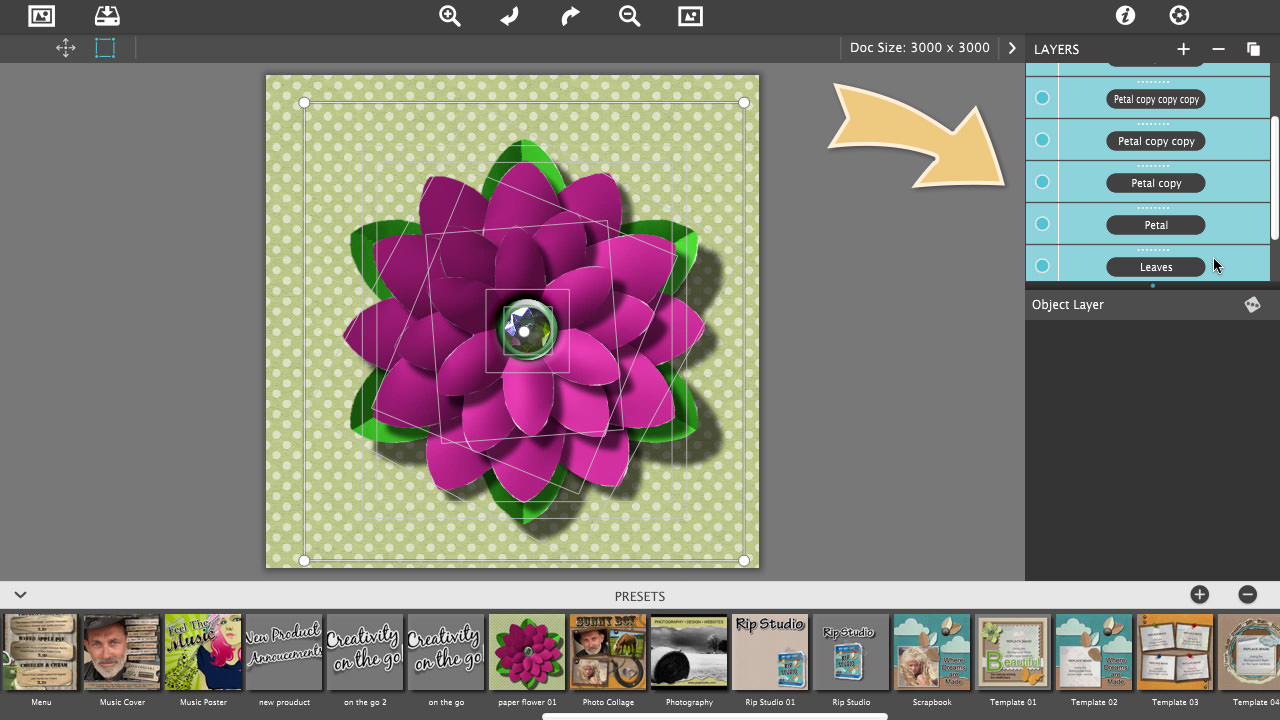
To start, add a Shape Layer by going to the top of the LAYERS palette and using the + (plus icon), choose shape off the menu. When you add a shape layer a random one will be placed on the background.

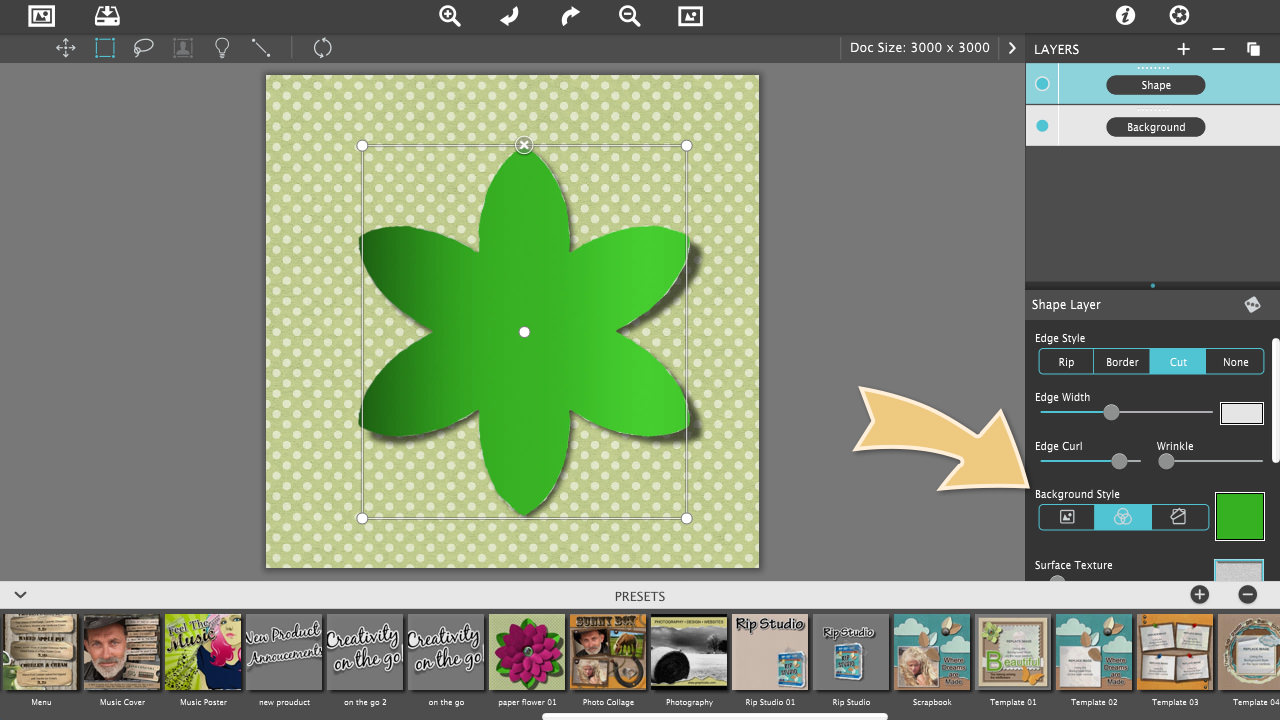
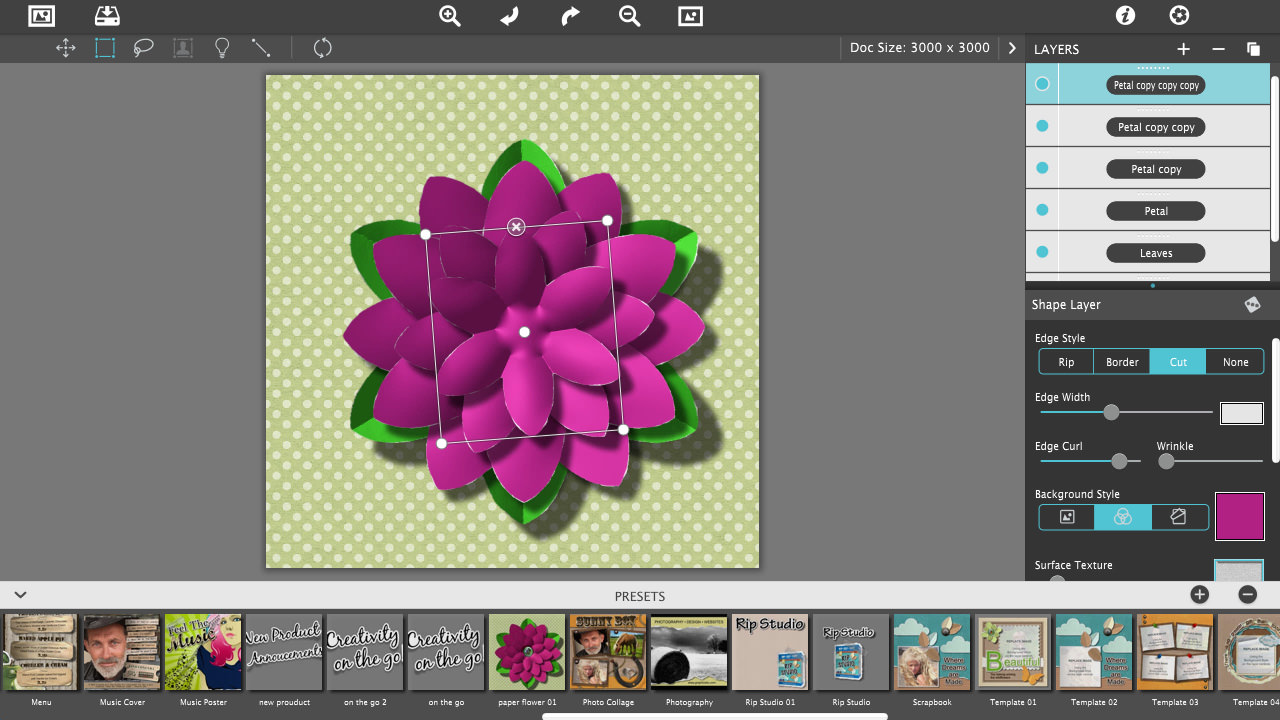
Change the Shape by going to the control panel below to find the Shape box, click on it to open the shape library, and choose flower shape #19.
Note: You can use your own shapes if they are saved with transparent backgrounds. To use them, drag and drop the shape on to the open application. Once inside the app you can apply edges and other settings to the shape.

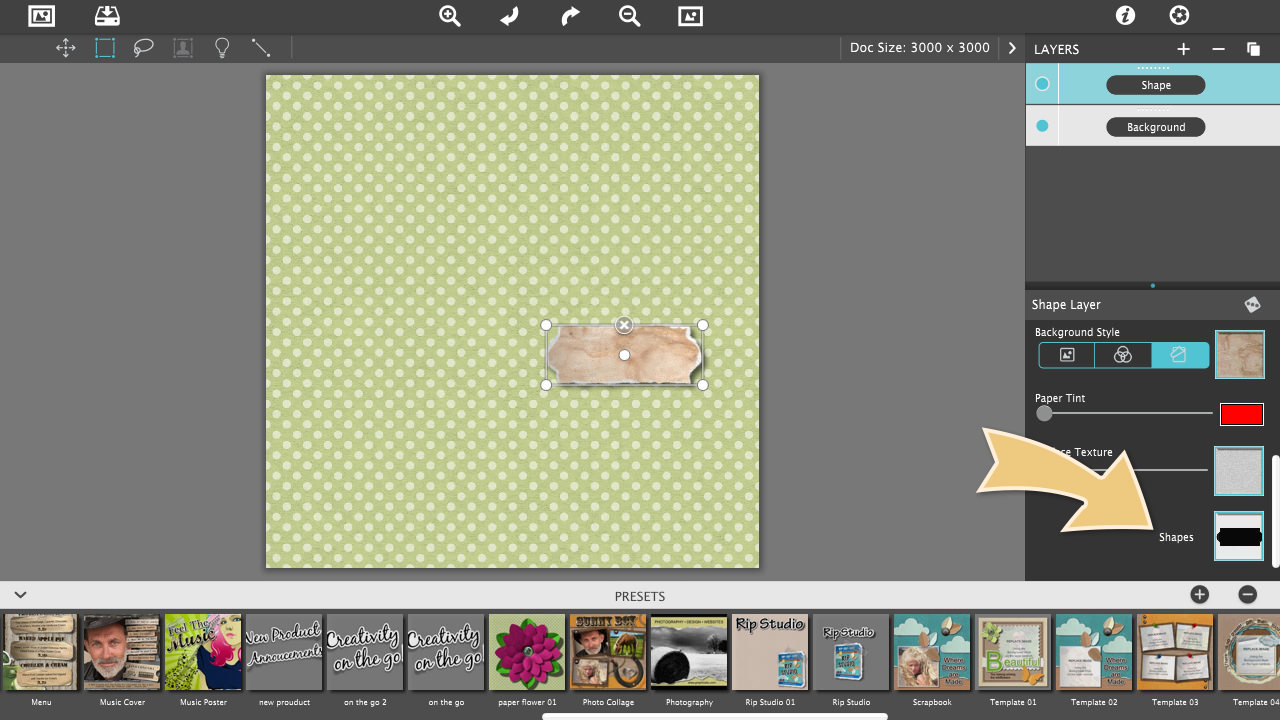
Resize the flower shape using the selection handles on the box around it, then move the shape to the center of the background.

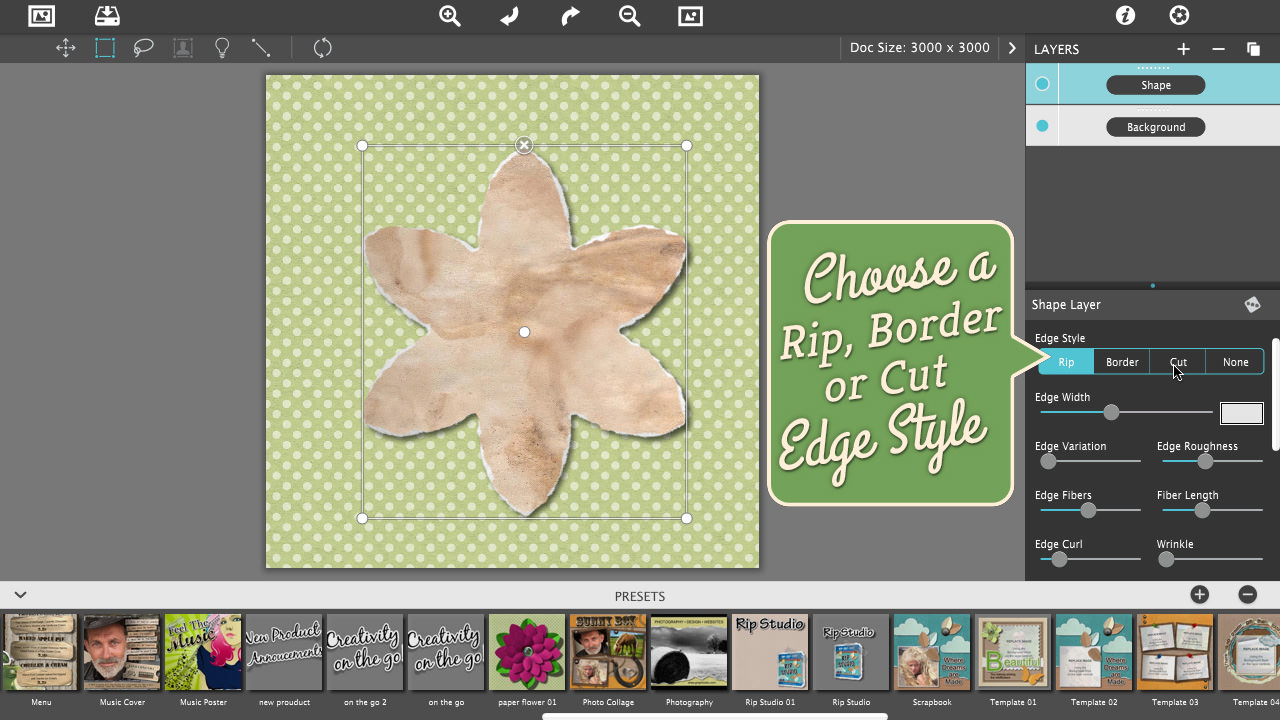
On the Shape Layer control panel located on the right, go to Edge Style and choose Cut.
Note: Edge Styles can be easily changed, but when duplicating the layers it is best to determine the edge style before to avoid having to change each one later, if you change your mind. Edge Styles can only be changed per selection and not globally.

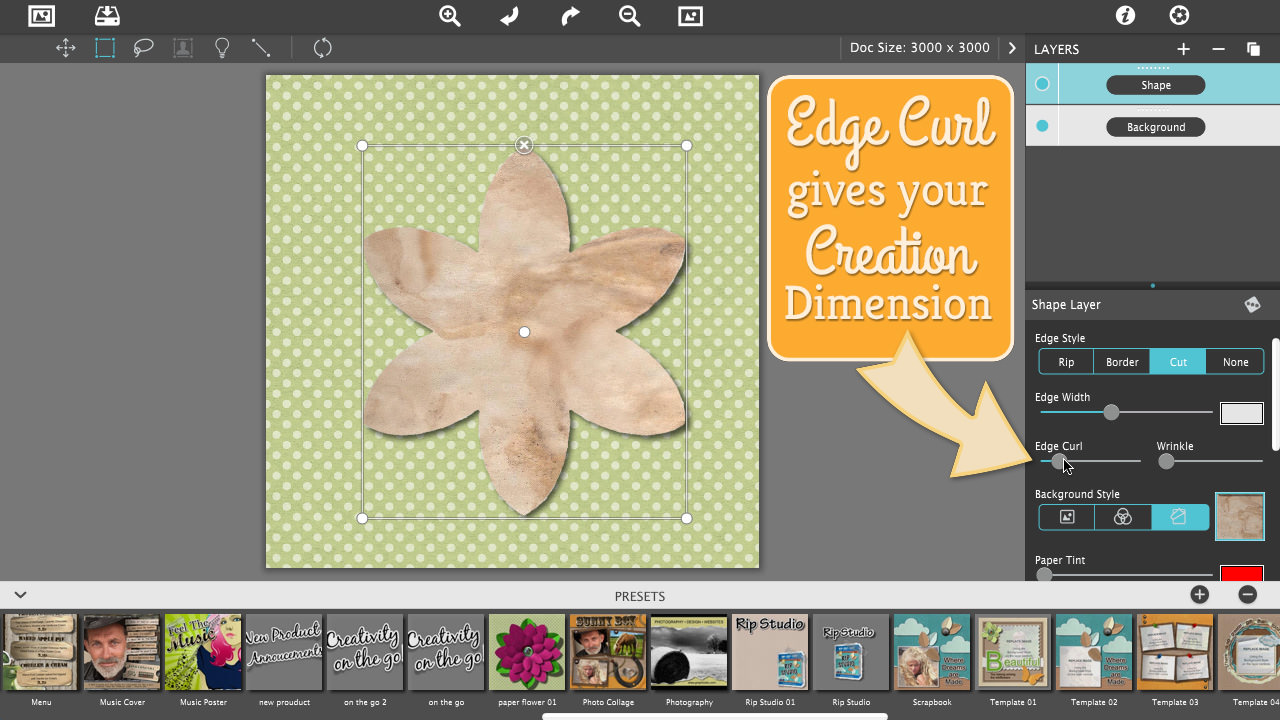
Now scroll down to Edge Curl and increase the slider to 85.
Note: Edge Curl gives the shape dimension by lifting it off the background. This is done using a powerful 3D light engine that gives rips, cuts, tape, creases and curled edges their realistic appearance—and the cool shadows that pop off the page.

Next, change the color of the shape to green. To do this, change the Background Style to Color (circles icon) and use the color box to bring up the color picker. Click outside the color picker to close it.

Step 2 - Make the Flower Leaves

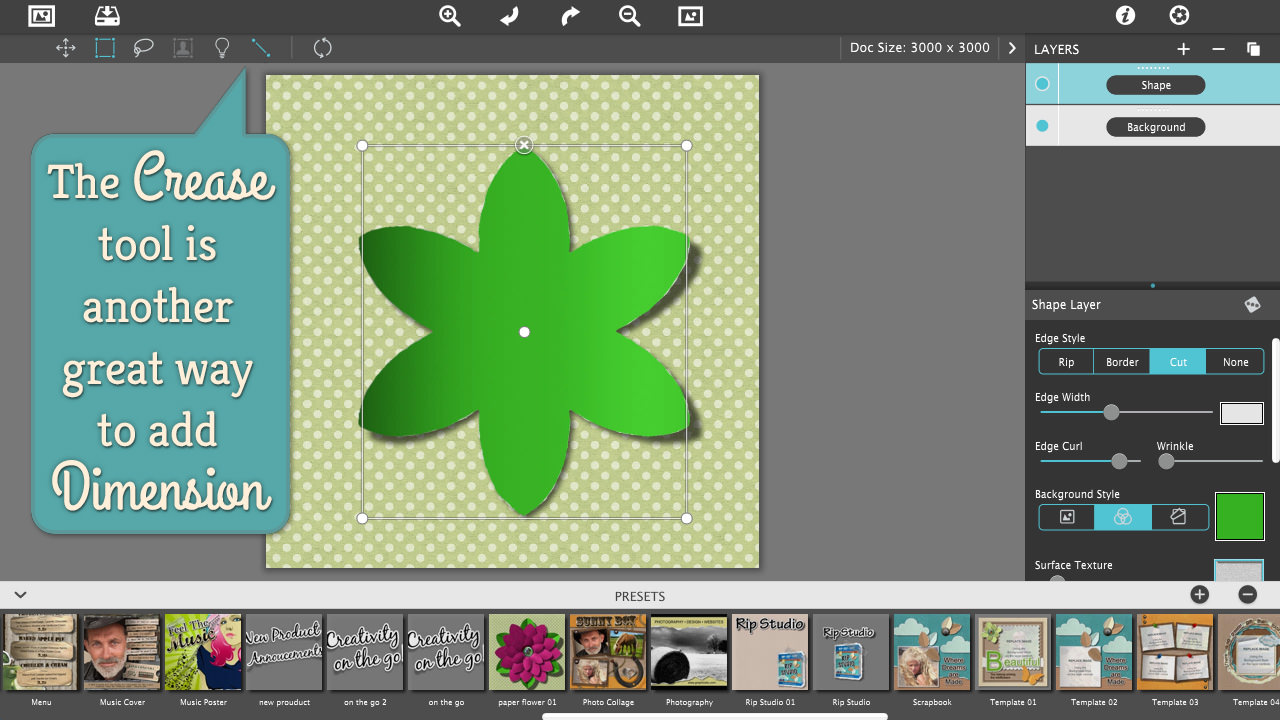
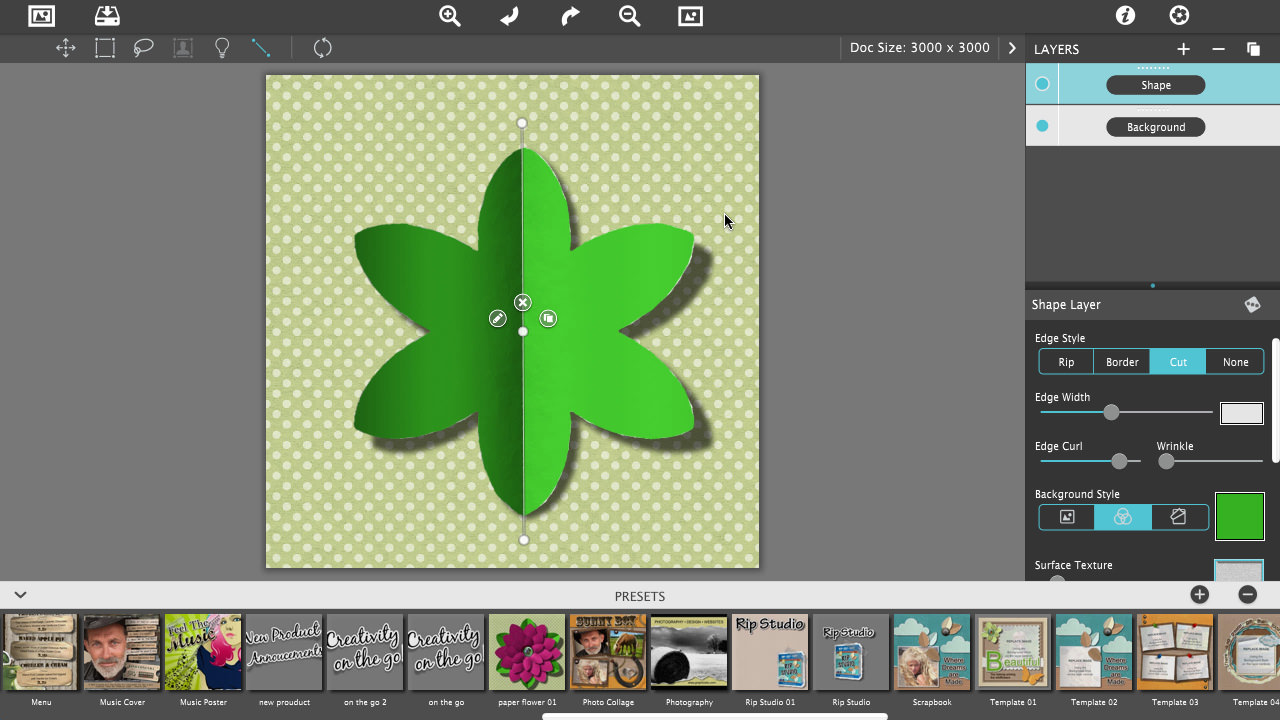
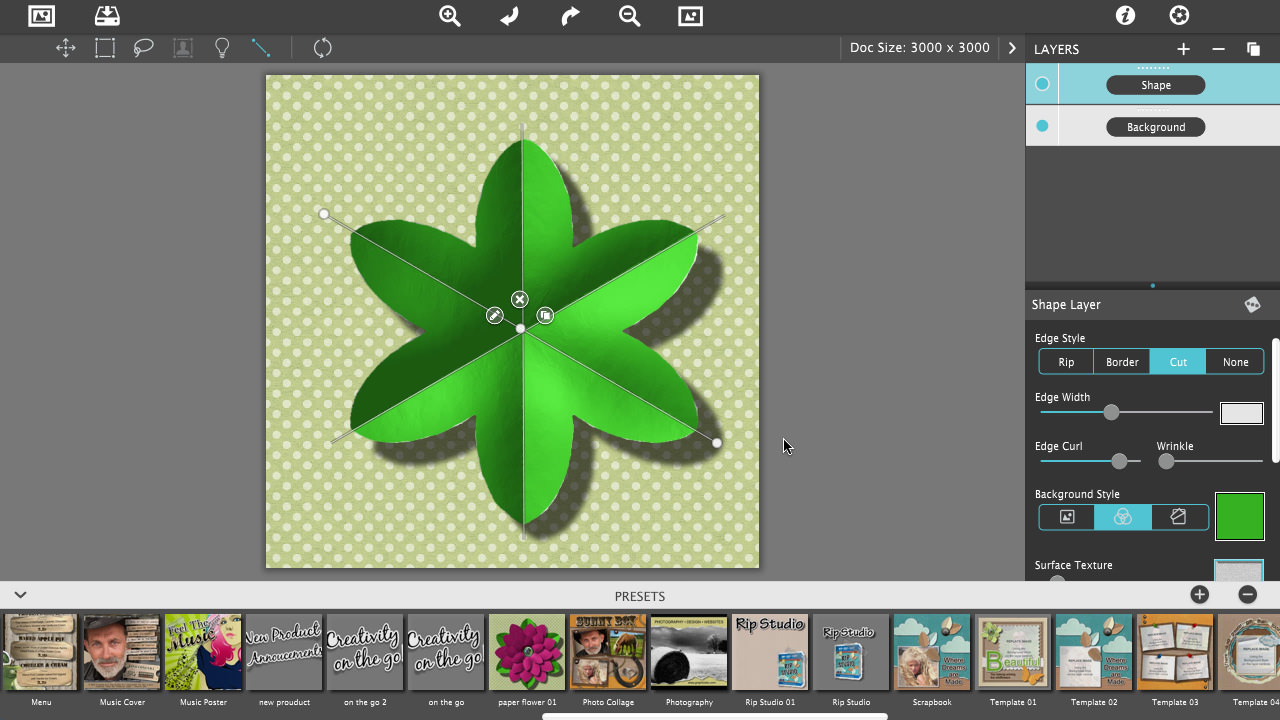
Use the Crease Tool located on the tool bar above the document to make the leaves for the flower.

Follow these steps:

  • Select the Crease Tool.
  • Draw a vertical line across the shape from top to bottom.
  • Click on the Edit button found on the vertical line.
  • In the edit box choose these settings—Crease Style: Fold, Direction: Down, Depth slider: Increase to 80, Crinkle slider: Decrease to 30, Width: Increase to 80. Note: If you set the crease tool on the first one you draw it retains the values as you continue to use it.
  • Click outside the edit box to close it.
  • Draw the center areas of the leaves by drawing two more crease lines across the pointy areas on the shape.
  • Name the layer ‘Leaves’.

Step 3 - Make the Flower Petals

  • Select the layer ‘Leaves’.
  • Duplicate the layer, using the Layers icon (two box icon) on the top right of the Layers Palette.
    Note: The layers are smart and will retain all the crease settings set for the leaves. If you adjust the lighting it keeps those settings, too.
  • Name this layer ‘Petals’.
  • Change the leaf colr by going back to Background Style. Click the green color box to bring up the color picker.
  • Change the color to pink then click outside the color picker to close it.
  • Select the Crease Tool again to activate the crease lines then delete them using the X (delete icon).
  • Now draw six small lines around the inside of the petal. Remember to set the crease values first (use the same values as on the leaves). By doing this it will give the petals dimension and lift and at the same time create an area for the center of the flower.
  • Rotate the flower so the green leaves show between the pink petals.
  • Duplicate the petal layer again and rotate it but this time scale it smaller.
  • Repeat the duplicate and scale process two more times.

Step 4 - Make the Flower Center

  • Add an Object Layer with the + (plus icon) on the top of the layers palette.
  • Change the object to a green grommet by scrolling through the object library below.
  • Move the green grommet to the center of the flower.
  • Then add another Object Layer this time choosing the green crystal and place it in the center of the grommet. You may need to scale it down to fit. Use the nudge keys (arrows) to move the crystal minutely into place.
    Note: You can use your own objects if they are saved with a transparent background. Add an object by clicking on the camera icon which is the first box on the object panel. This works differently then shapes, because objects that come into the app are given adjustable depth. Objects in general don’t allow ripped edges, only adjustments to Depth and Radius.

Step 5 - Make a Layer Preset

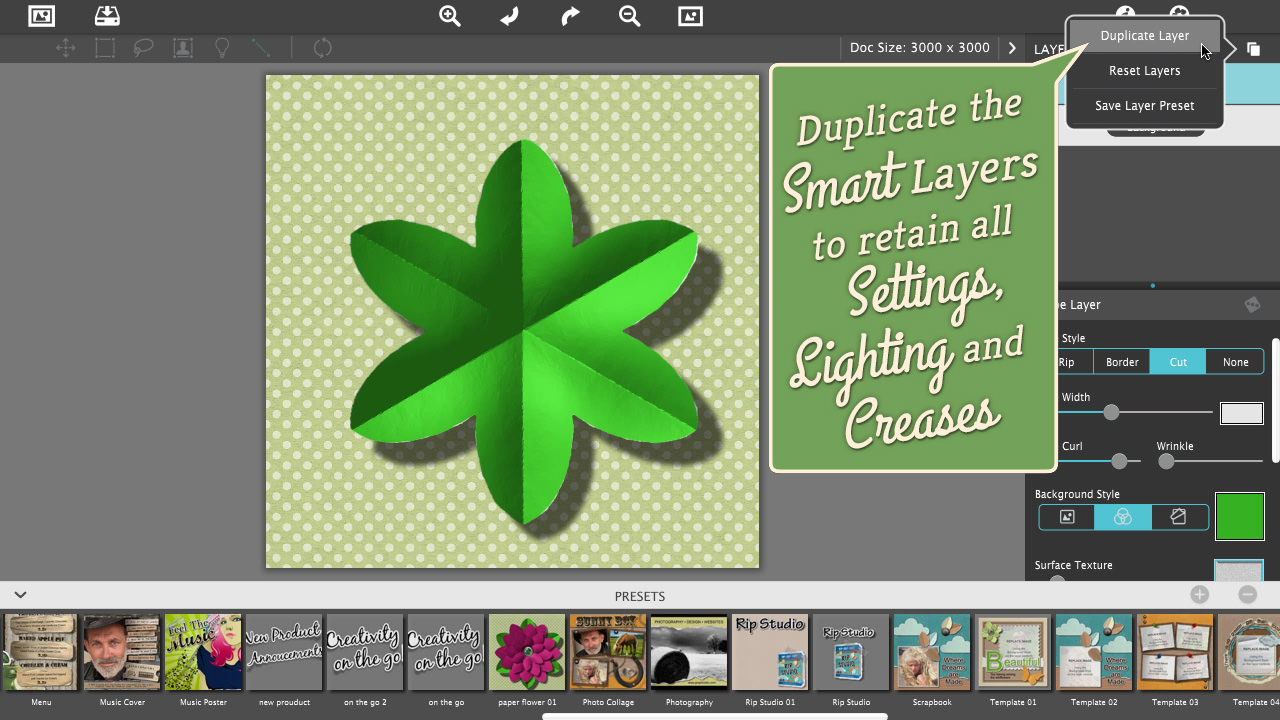
Once your flower is created save it as a Layer Preset. This great new feature allows you to make creations and add them to your compositions later. Use it to create an arsenal of cool elements so they are available when you need them.

To Save Layer Preset:

  • Select only the layers you want to save. These are the leaves, petals, and objects (not the background).
  • Go to the Layers icon (two box icon) on the top right of the Layers Palette. Choose Save Layer Preset off the menu and give it a name.
  • In the Preset Browser below, scroll to find the Layer Preset. You will know it is a layer preset if it has the blue layers icons on the top right of the thumbnail.
  • To demonstrate how it works, choose the Template 01 preset and wait for it to load.
  • Then, choose the flower you saved as a Layer Preset and watch as it is adds on to the preset.
    Note: A Layer Preset is different then a Preset. Presets load whole compositions, where Layer Presets add-on to the composition.
  • Resize the flower by clicking all the layers needed to create it, then scale it down using the corners of the selection box.
  • Here is the template with your newly made paper-flower.

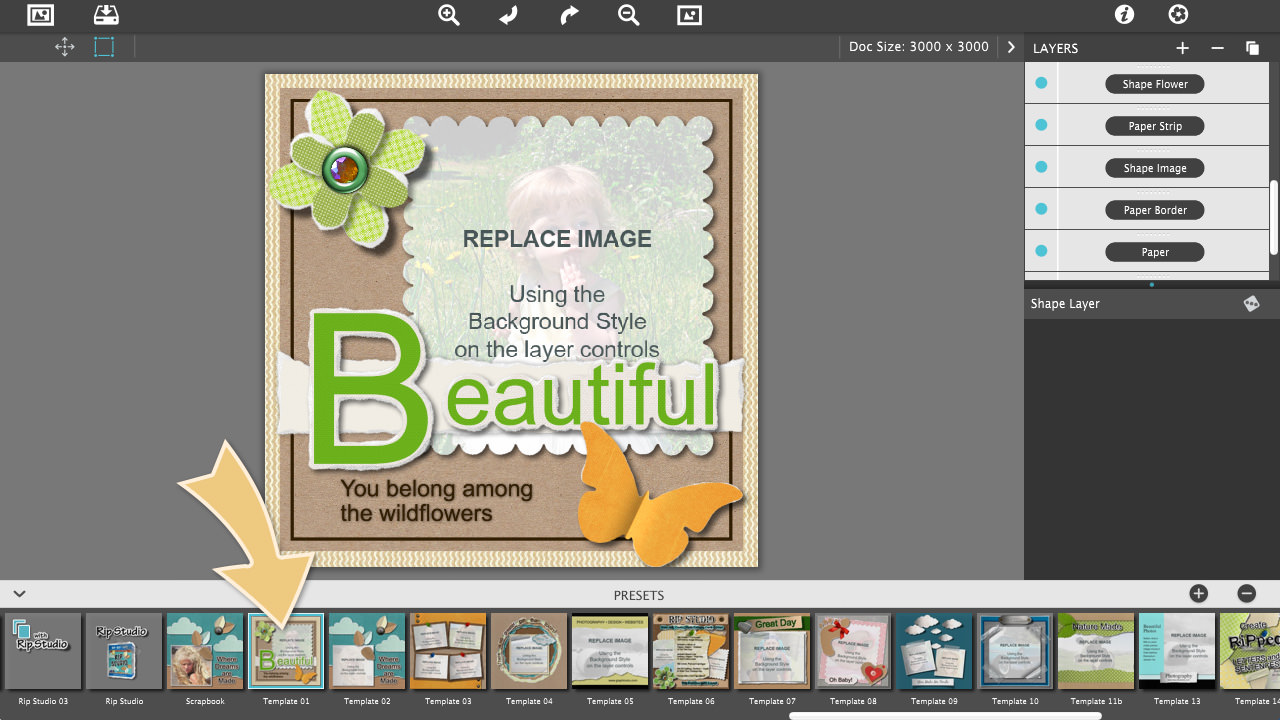
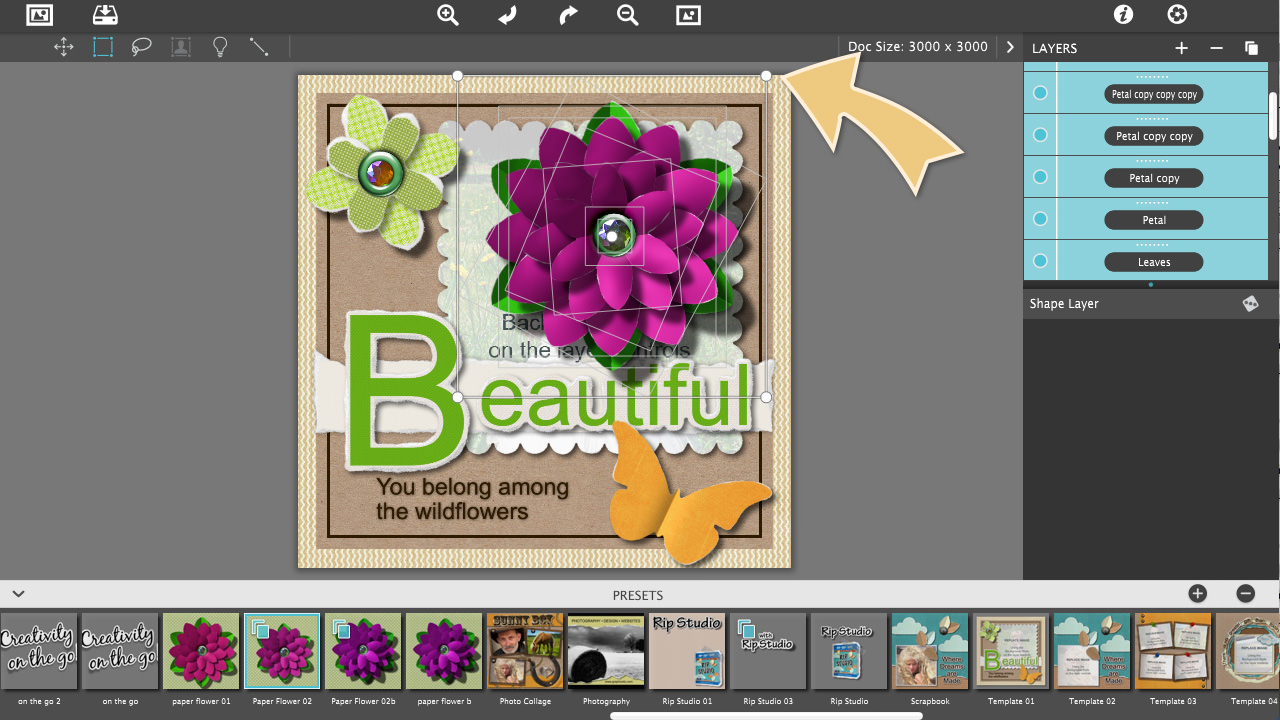
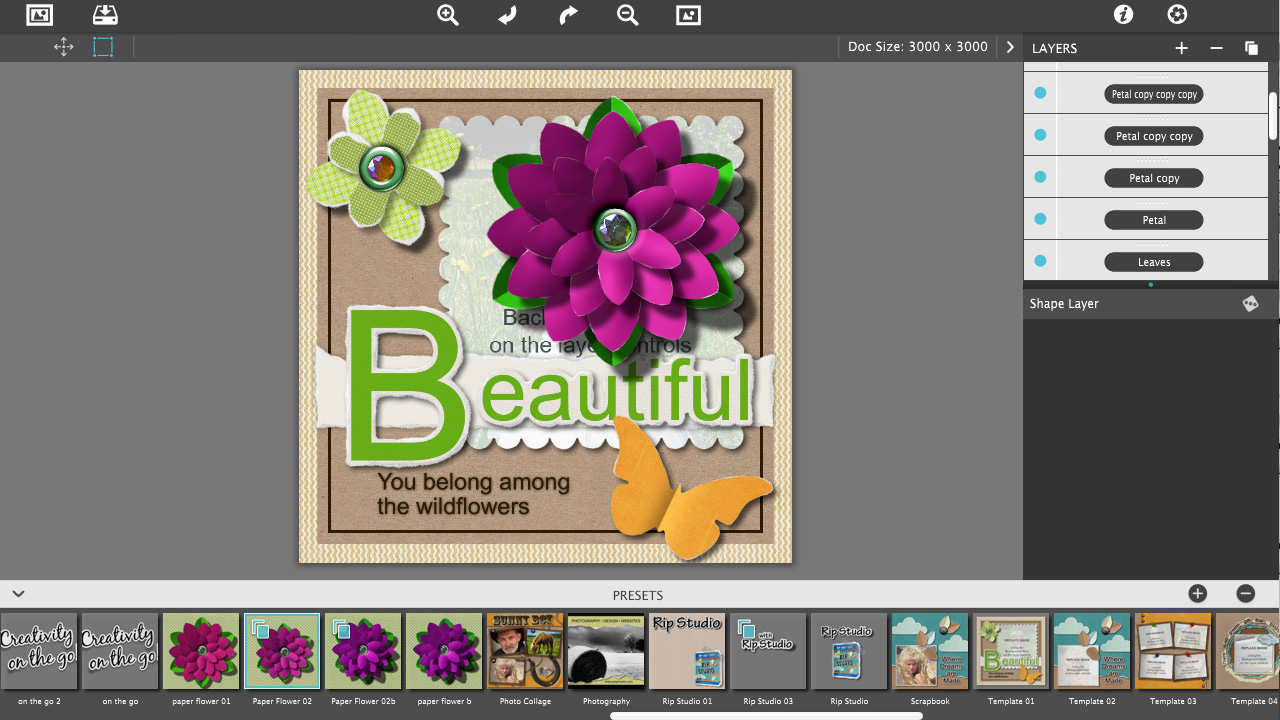
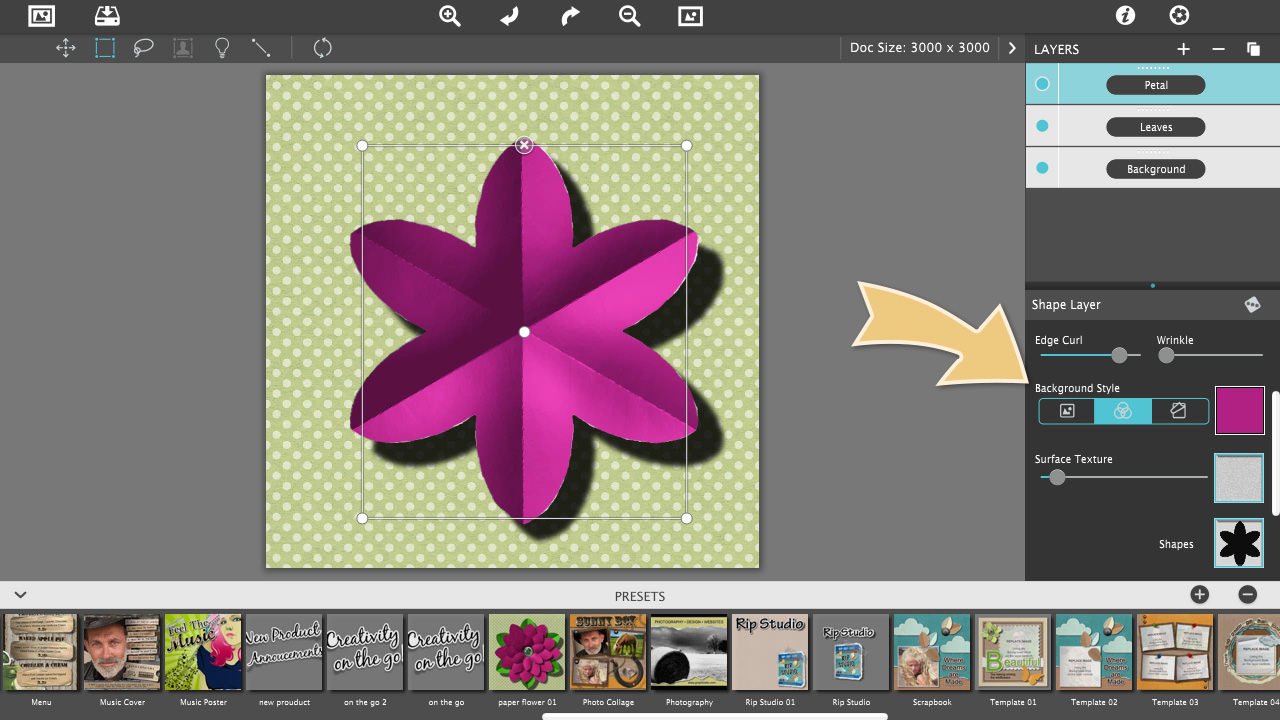
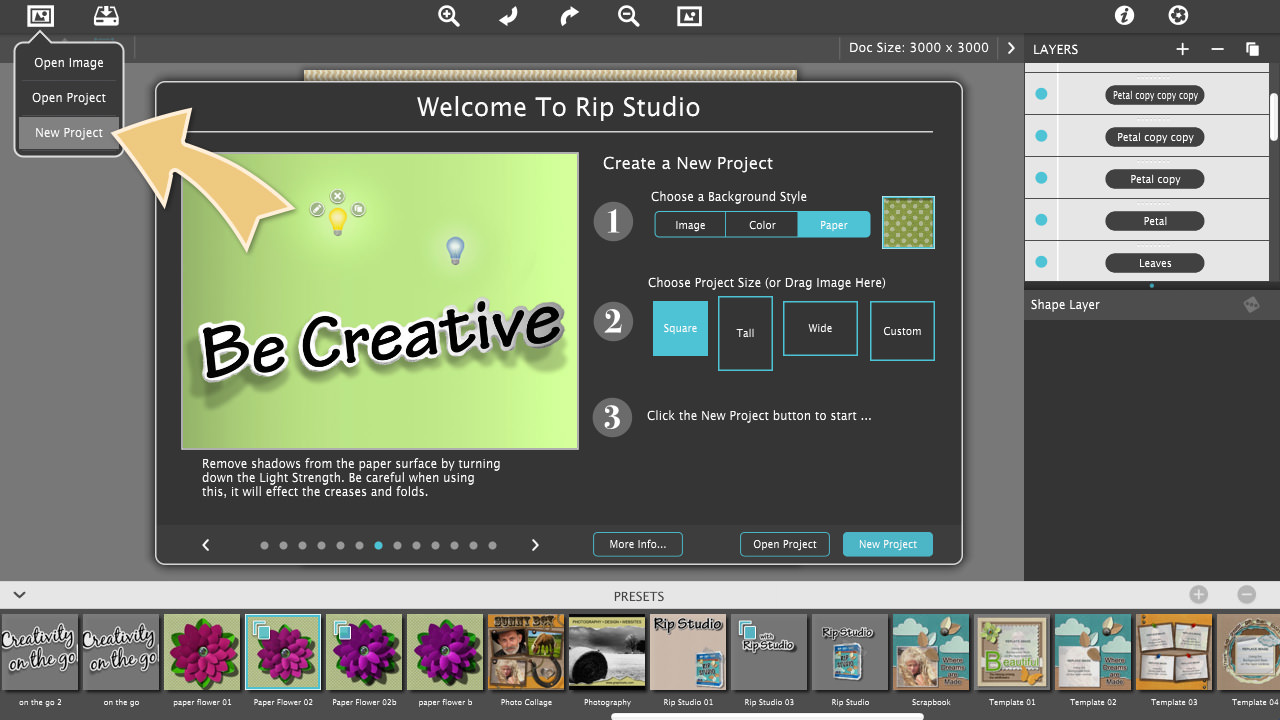
Now that you understand how layer presets work you can return back to the flower by making a New Project located on the upper left corner. When the new project dialog comes up choose these settings: 1. Background Style choose Paper then click box on right to choose green dot paper, 2. Project Size choose Square, 3. Click the blue New Project button. When the new project opens add the flower by going to the preset browser to find your paper flower saved as a Layer Preset.

Video Tutorial

Watch this video tutorial to get a better look on how we use Rip Studio

Keyboard Shortcuts

In this tutorial we use a lot of keyboard shortcuts, here is a list of the keyboard shortcuts included in Rip Studio:

  • SPACEBAR - Hold down to move the canvas
  • T - Resize and move an image
  • L - Select the Rip Lasso
  • P - Resize and move an image
  • S - Select the Light Tool
  • \ - Select the Crease and Fold Tool
  • SHIFT - Hold down while moving an object to constrains movements to strictly vertically or horizontally
  • ARROW UP / ARROW DOWN - nudge object, text or image
  • +A (Mac) / Ctrl+A (Windows) - Select All
  • +N (Mac) / Ctrl+N (Windows) - New Project
  • +O (Mac) / Ctrl+O (Windows) - Open
  • (Mac) / Ctrl (Windows) - Select multiple items
  • DELETE - deletes selected layers
  • TAB - Hide the sidebar and presets
  • ⌘= (Mac) / Ctrl = (Windows) - Zoom in on areas of the image
  • ⌘- (Mac)/ Ctrl - (Windows) - Zoom out to view a larger portions of the image
  • ⌘0 (Mac)/ Ctrl 0 (Windows) - Fill the window with the image
  • ⌘1 (Mac)/ Ctrl 1 (Windows) - Change the image's size to its original size