Here is a short video on how to use Alla Prima in Artista Impresso Pro. Detailed instructions below explain everything happening in this video.
Download a demo version of Impresso Pro: ![]() Mac |
Mac | ![]() Windows
Windows
Impresso Pro Tutorial - How to Use Alla Prima
Getting Started with Paint Layers and Settings
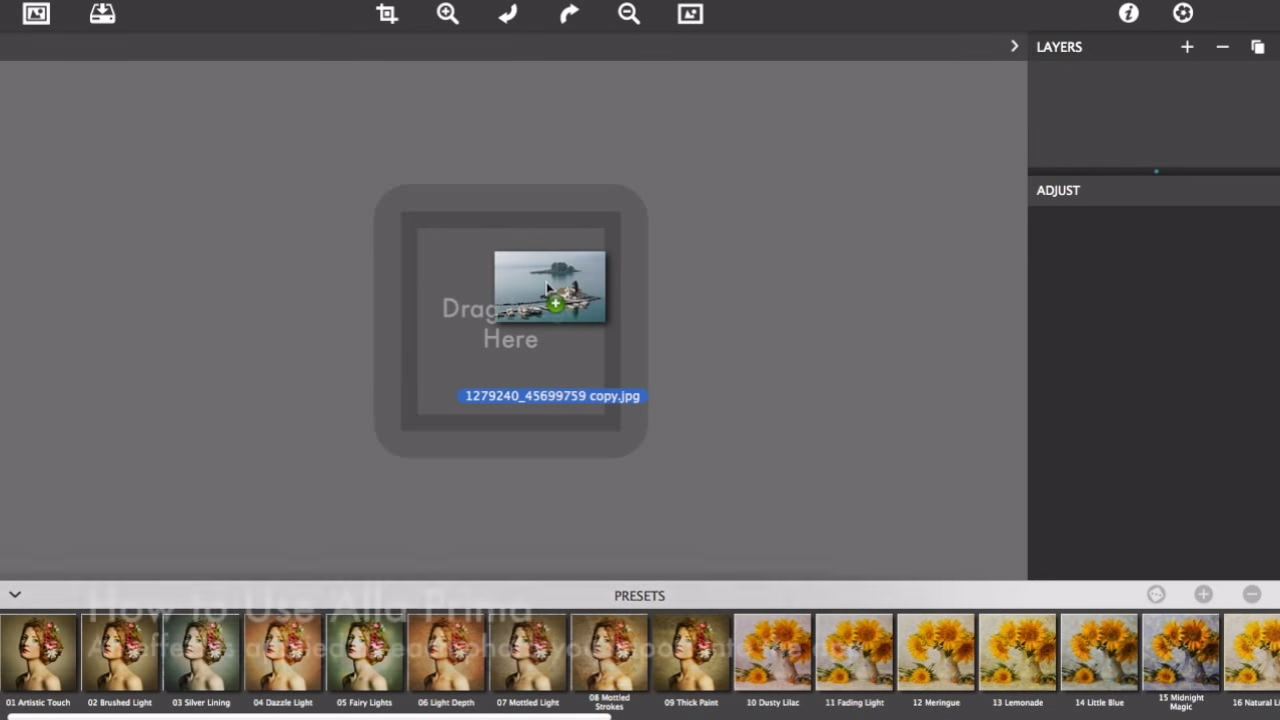
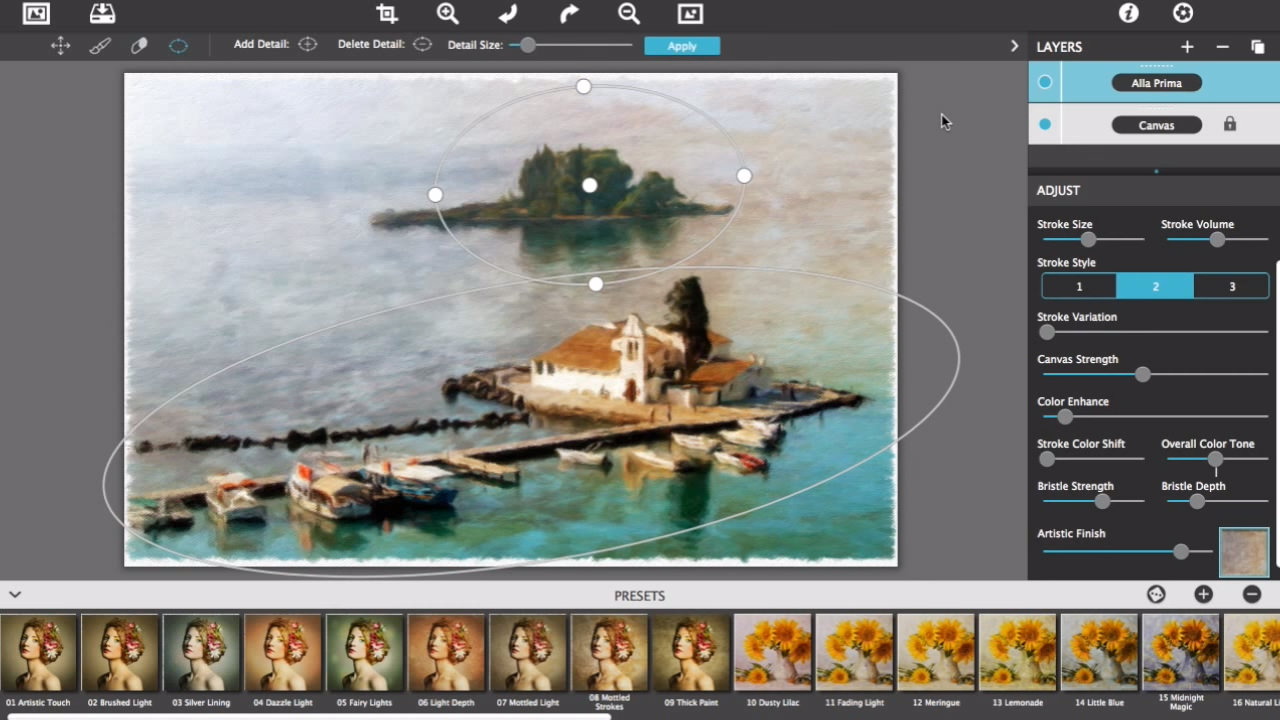
To start, drag and drop a photo on the open application of Impresso Pro. When a photo is placed, it will automatically render into a painting using the Alla Prima paint style. If you look on the Layers Palette to the right, you will see both the Alla Prima paint style and the Canvas on their own individual layers. To adjust the paint style, click on the layer named Alla Prima and watch as the settings load below on the adjust pane. There you can change stroke size and style along with other options specific to this effect.
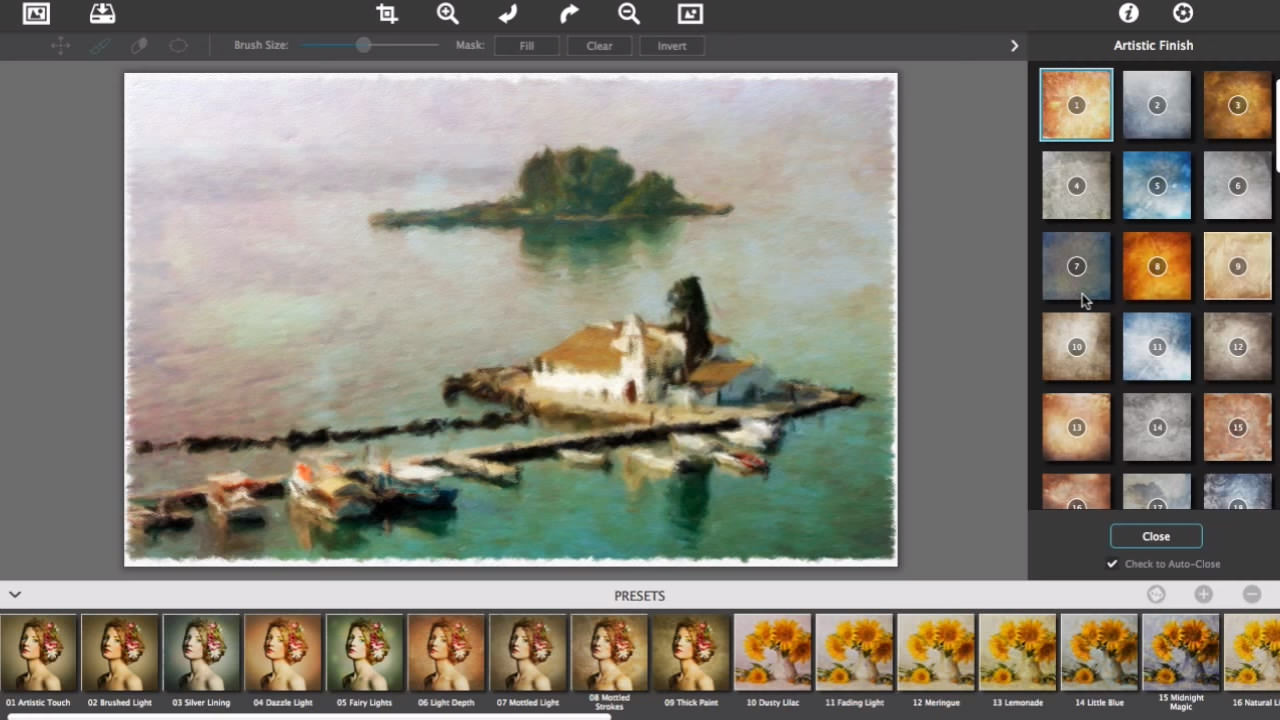
Artistic Finish
Adding an artistic finish is a great way to add mottled light and color to the brush strokes. You can do this by going to the Artistic Finish slider on the adjust panel, then add the finish in by moving the slider right. Now turn the Soft Paint layer on and off to see the changes.
Add Detail—Ellipses
Place one or multiple ellipses in areas where fine brush strokes are needed. To add an ellipse click the ellipse icon in the top left corner and then select Add Detail. Place the ellipse where detail is needed, click Apply, and watch as small brushstrokes render inside.
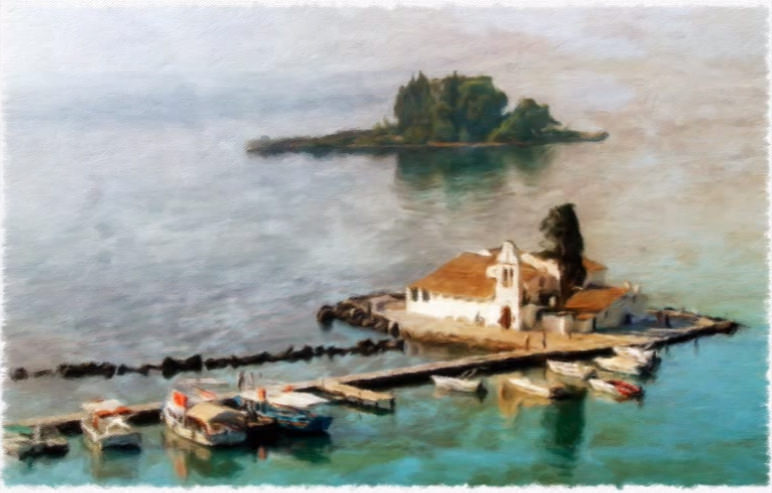
See the Before & After Results
Use the original button to compare the original with the painting

Feedback
We hope you enjoyed this tutorial. Have any tutorials that you would like to see in later posts? Feel free to tell us and show us your creations on our Facebook and other social networks.